Homemade Creamy Ice Cream Recipe
There is nothing quite like a scoop of homemade creamy ice cream on a warm afternoon. Unlike many store-bought varieties that rely on stabilizers and artificial flavors, a true homemade creamy ice cream recipe delivers pure, rich taste with a velvety texture that melts smoothly on the tongue. The challenge most home cooks face is avoiding ice crystals and achieving that professional, scoopable consistency. This recipe solves that problem by providing two reliable methods: a classic custard base for maximum richness and a no-churn option for simplicity. Both yield exceptional results.
Why This Homemade Creamy Ice Cream Recipe Works
Many homemade ice creams fail due to one common issue: large ice crystals. These form when water freezes slowly and unevenly. This recipe prevents that through three key techniques. First, the custard method uses egg yolks as natural emulsifiers, binding fat and water together. Second, chilling the base thoroughly before churning ensures a faster freeze. Third, the no-churn method leverages sweetened condensed milk to lower the freezing point, creating a soft, creamy texture without an ice cream maker. Whether you choose the stovetop custard or the five-minute no-churn version, you will achieve a dessert that scoops beautifully and tastes decadent.
Ingredients for Homemade Creamy Ice Cream
The ingredients differ slightly between the two methods. Choose the classic custard base for a traditional French-style ice cream or the no-churn method for a faster approach.
Classic Custard Base (Requires Ice Cream Maker)
-
2 cups heavy cream (48 percent milk fat recommended)
-
1 cup whole milk
-
3/4 cup granulated sugar
-
5 large egg yolks
-
2 teaspoons vanilla extract or one vanilla bean pod
-
1/8 teaspoon fine sea salt
No-Churn Method (No Ice Cream Maker Needed)
-
2 cups heavy cream, cold
-
14 ounces sweetened condensed milk (one standard can)
-
2 teaspoons vanilla extract
-
1/8 teaspoon fine sea salt
Optional Mix-Ins for Either Method
-
1/2 cup chocolate shavings
-
1/2 cup crushed cookies
-
1/2 cup caramel swirl
-
1/2 cup fresh fruit puree
Step-by-Step Instructions for Classic Custard Method
This method produces the richest, smoothest homemade creamy ice cream. Plan for approximately four hours of chilling and churning time.
Step 1: Heat the Dairy Base
In a medium saucepan over medium heat, combine the heavy cream, whole milk, and half of the sugar (6 tablespoons). Stir gently until the mixture is warm and steam rises from the surface. Do not let it boil. Small bubbles forming around the edge of the pan indicate the correct temperature.
Step 2: Temper the Egg Yolks
While the dairy heats, whisk the remaining sugar (6 tablespoons) together with the egg yolks in a separate bowl until the mixture becomes pale yellow and slightly thickened. Slowly pour one cup of the warm dairy mixture into the egg mixture while whisking constantly. This tempers the yolks and prevents them from scrambling.
Step 3: Cook the Custard
Pour the tempered egg mixture back into the saucepan with the remaining dairy. Reduce heat to low. Stir continuously with a wooden spoon or silicone spatula for five to seven minutes. The custard is ready when it coats the back of the spoon and a finger dragged across the coating leaves a clean line.
Step 4: Cool and Chill
Strain the custard through a fine-mesh sieve into a clean bowl to remove any accidental cooked egg bits. Stir in the vanilla extract and salt. Allow the mixture to cool to room temperature for thirty minutes. Cover with plastic wrap, pressing the wrap directly onto the surface of the custard to prevent a skin from forming. Refrigerate for at least four hours or up to twenty-four hours.
Step 5: Churn and Freeze
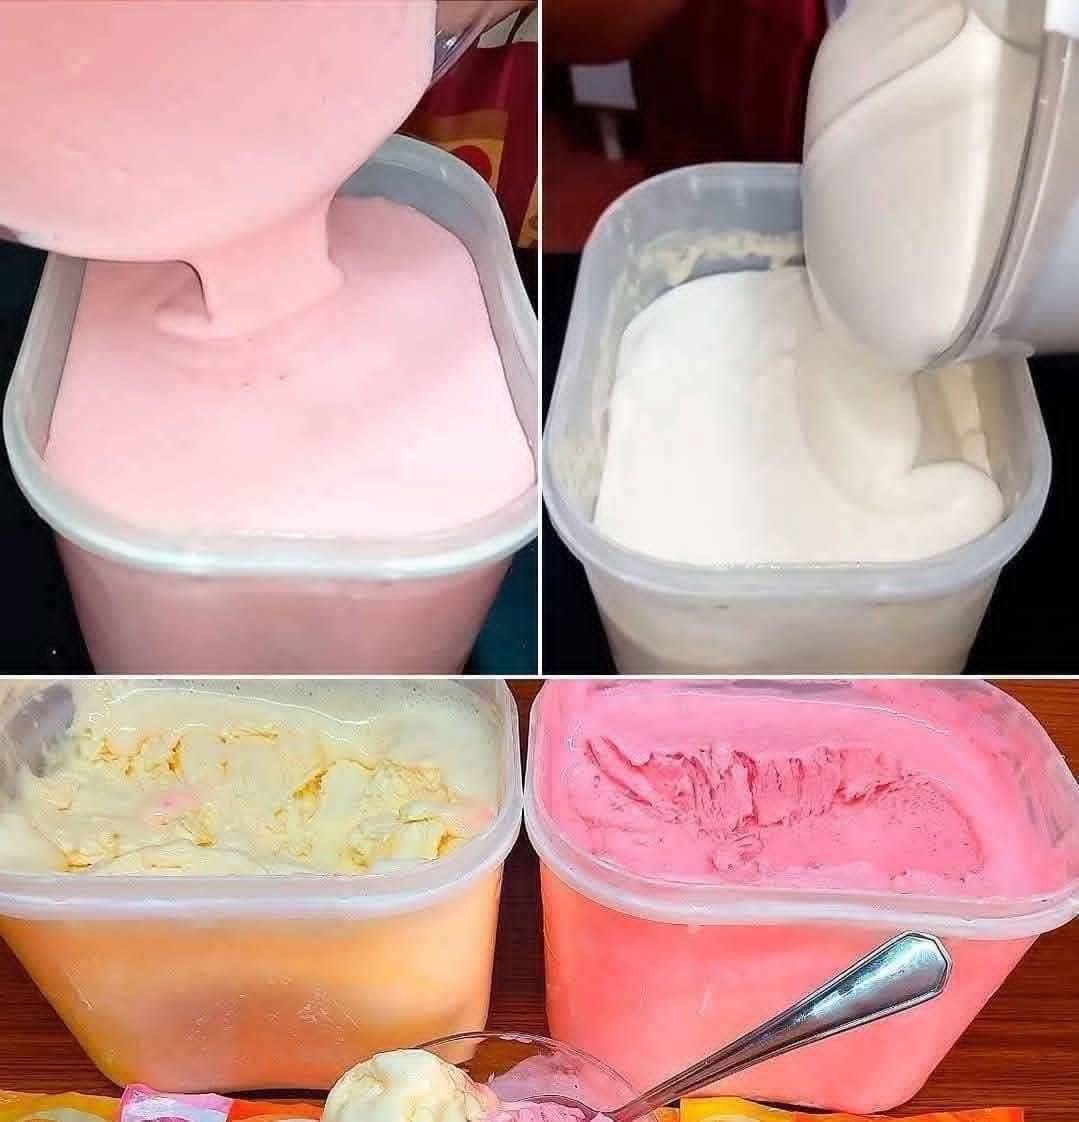
Pour the chilled custard into your ice cream maker. Churn according to the manufacturer’s instructions, typically twenty to twenty-five minutes. The ice cream will have a soft-serve consistency at this stage. Transfer it to an airtight container. Press a piece of parchment paper directly onto the surface to prevent ice crystals. Freeze for a minimum of four hours or until firm enough to scoop.
Step-by-Step Instructions for No-Churn Method
This method requires no special equipment and takes only ten minutes of active preparation.
Step 1: Whip the Cream
In a large chilled bowl, pour the cold heavy cream. Using a hand mixer or stand mixer fitted with the whisk attachment, whip the cream on medium-high speed until stiff peaks form. The cream should hold its shape when the whisk is lifted.
Step 2: Combine the Sweetened Condensed Milk
In a separate large bowl, whisk together the sweetened condensed milk, vanilla extract, and salt until smooth. Gently fold one-third of the whipped cream into the condensed milk mixture to lighten it. Then fold in the remaining whipped cream using a rubber spatula. Work slowly to maintain as much air as possible.
Step 3: Add Mix-Ins and Freeze
If adding chocolate shavings, crushed cookies, or fruit puree, fold them in gently at this stage. Pour the mixture into a loaf pan or a nine-by-five-inch metal baking pan. Smooth the top with a spatula. Cover tightly with plastic wrap and then aluminum foil. Freeze for at least six hours or overnight.
How to Achieve the Creamiest Texture
Several professional techniques elevate this homemade creamy ice cream recipe from good to exceptional.
Use Full-Fat Dairy
Low-fat milk and cream contain more water, which leads to iciness. Heavy cream with at least thirty-six percent milk fat and whole milk create the smoothest mouthfeel.
Chill Everything
The ice cream maker bowl should be frozen solid, ideally for twenty-four hours. The custard base must be thoroughly chilled before churning. Even the storage container benefits from being pre-chilled in the freezer for fifteen minutes.
Do Not Over-Churn
Once the ice cream reaches a soft-serve consistency similar to thick whipped cream, stop the machine. Over-churning can cause the fat to separate and create a grainy, buttery texture.
Store Properly
An airtight container is essential. Pressing plastic wrap or parchment directly onto the surface of the ice cream prevents freezer burn and crystal formation. Store the container in the coldest part of your freezer, typically the back, away from the door.
Flavor Variations for Homemade Creamy Ice Cream
Once you master the base recipe, customize it with these popular variations.
Chocolate
Add one-third cup of unsweetened cocoa powder to the dairy mixture during the heating stage for the custard method. For the no-churn method, sift the cocoa powder into the sweetened condensed milk before folding in the whipped cream.
Strawberry
Puree two cups of fresh strawberries with three tablespoons of sugar. After churning the custard base or folding the no-churn mixture, swirl in the strawberry puree with a knife to create ribbons.
Coffee
Steep one-quarter cup of coarsely ground coffee beans in the warm dairy mixture for thirty minutes. Strain out the beans before tempering the egg yolks. The result is a sophisticated coffee-flavored ice cream.
Mint Chocolate Chip
Infuse one cup of fresh mint leaves in the warm dairy mixture for thirty minutes. Strain out the leaves. Add one-half teaspoon of peppermint extract along with the vanilla. Fold in one-half cup of mini chocolate chips during the final mixing stage.
Common Mistakes to Avoid
Even with a reliable homemade creamy ice cream recipe, small errors can affect the final texture.
Skipping the Resting Time
Churning a warm or room-temperature base guarantees an icy, coarse texture. Patience during the chilling phase is non-negotiable.
Using a Shallow Container
Wide, shallow containers freeze ice cream faster than deep bowls. A faster freeze means smaller ice crystals. A loaf pan or a nine-inch square metal pan works better than a tall plastic container.
Adding Fresh Fruit Without Cooking
Raw fruit contains enzymes that break down dairy fats and create a watery texture. Cook fresh fruit with sugar into a syrup or use freeze-dried fruit powder for the best results.
How to Serve and Store
Scoop homemade creamy ice cream best when it has softened at room temperature for five to ten minutes. Dip your ice cream scoop in warm water before each scoop for clean, rounded portions. Store leftovers in the same airtight container with parchment pressed directly onto the surface. Properly stored homemade ice cream maintains optimal texture for up to two weeks. After that, it remains safe to eat but may develop minor ice crystals.
Frequently Asked Questions
Can I make this homemade creamy ice cream recipe without an ice cream maker?
Yes. The no-churn method provided above requires no ice cream maker. Simply whip the cream, fold in sweetened condensed milk, and freeze.
Why is my homemade ice cream icy?
Icy texture usually results from excess water content, insufficient fat, or a slow freeze. Use full-fat dairy, chill your base thoroughly, and freeze in a shallow metal container.
How long does homemade ice cream last in the freezer?
Homemade ice cream is best consumed within two weeks. It remains safe to eat for up to two months but may lose creaminess over time.
Can I reduce the sugar in this recipe?
Sugar does more than sweeten. It lowers the freezing point and contributes to a soft, scoopable texture. Reducing sugar significantly will result in a harder, icier ice cream. For a less sweet result, use the custard method and reduce sugar by no more than two tablespoons.
Is it safe to use raw eggs in ice cream?
The custard method cooks the egg yolks to a temperature sufficient to kill harmful bacteria. For the no-churn method, no eggs are used. If you are concerned about raw eggs, choose the no-churn method instead