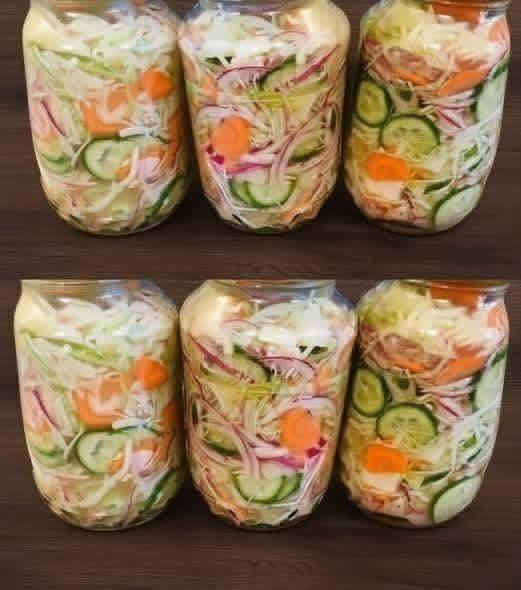
Homemade Pickled Vegetable Jars
Homemade pickled vegetable jars are the easiest way to preserve garden vegetables while creating bright, tangy, crunchy additions to sandwiches, salads, cheese boards, and tacos. This refrigerator pickling method requires no canning equipment, no special skills, and delivers ready-to-eat pickles in as little as twenty-four hours. You can pickle almost any vegetable, from classic cucumbers to carrots, cauliflower, radishes, red onions, and green beans. Each jar becomes a colorful, flavorful project that keeps in the refrigerator for weeks.
Why This Homemade Pickled Vegetable Recipe Works
The beauty of homemade pickled vegetable jars is the simplicity of the brine. A basic solution of equal parts vinegar and water, plus salt and sugar, creates the acidic environment that preserves vegetables and gives them that signature tangy flavor. You control every ingredient. No artificial preservatives, no yellow dye, no high-fructose corn syrup. The vegetables stay crisp because you do not heat-process the jars. Refrigerator pickling keeps the natural crunch intact. Customizing the brine with garlic, dill, peppercorns, mustard seeds, or red pepper flakes allows you to create unique flavor combinations that suit your taste.
Ingredients
For the Vegetables:
-
2 cups fresh vegetables, cut into desired shapes (cucumbers, carrots, cauliflower, red onion, radishes, green beans, or bell peppers)
For the Brine (per pint jar):
-
1/2 cup white distilled vinegar or apple cider vinegar
-
1/2 cup water
-
1 tablespoon granulated sugar
-
1 teaspoon kosher salt or pickling salt
For Flavorings (per jar):
-
1 clove garlic, smashed
-
1/2 teaspoon black peppercorns
-
1/2 teaspoon mustard seeds
-
1/4 teaspoon red pepper flakes (optional)
-
Fresh dill sprigs or other fresh herbs
Step-by-Step Instructions
Step 1: Prepare the Vegetables
Wash all vegetables thoroughly. Trim ends, peel if desired, and cut into uniform shapes. Cucumbers can become spears or rounds. Carrots and green beans fit whole or cut into sticks. Cauliflower breaks into small florets. Red onions slice into thin half-moons. Pack the vegetables tightly into clean, sterilized pint jars, leaving one inch of headspace at the top.
Step 2: Add Flavorings
Distribute the garlic, peppercorns, mustard seeds, red pepper flakes, and fresh dill among the jars. Place them against the sides or between vegetable pieces so the brine can circulate around them.
Step 3: Make the Brine
In a small saucepan, combine the vinegar, water, sugar, and salt. Bring to a boil over medium-high heat, stirring until the sugar and salt completely dissolve. Remove from heat.
Step 4: Fill the Jars
Pour the hot brine over the vegetables in each jar, covering them completely. Leave one-half inch of headspace. Use a chopstick or butter knife to gently poke around the inside of the jar, releasing any trapped air bubbles. Wipe the rims clean with a damp paper towel. Seal tightly with lids.
Step 5: Cool and Refrigerate
Allow the jars to cool to room temperature on the counter, approximately one hour. Do not place hot jars directly into the refrigerator. Once cooled, transfer the jars to the refrigerator.
Step 6: Wait and Enjoy
Refrigerate for at least twenty-four hours before eating. For best flavor, wait forty-eight to seventy-two hours. The vegetables will continue to pickle and develop flavor over time. Homemade pickled vegetable jars keep in the refrigerator for up to two months.
Popular Vegetable Combinations
Classic dill pickles use cucumber spears, fresh dill, garlic, and peppercorns. Spicy pickled carrots include carrot sticks, red pepper flakes, garlic, and black peppercorns. Pickled red onions feature thin onion slices, apple cider vinegar, and a pinch of oregano. Garden mix combines cauliflower florets, green beans, bell pepper strips, and mustard seeds.
Tips for Success
Use pickling salt or kosher salt, not table salt, which contains anti-caking agents that cloud the brine. Cut vegetables into uniform sizes so they pickle at the same rate. Do not reuse brine for a second batch, as it loses acidity. For extra crunch, add one grape leaf or a pinch of calcium chloride (Pickle Crisp) to each jar. Always use clean, non-reactive jars. Glass is ideal. Metal lids are fine, but the brine should not touch them during storage.