Servings: 1 large loaf (about 12 thick slices)
Pan Size: 9×5-inch loaf pan (or shape into a round on a baking sheet)
Oven Temperature: 375°F (190°C)
Total Time: About 2½ hours (mostly rising)
Active Time: 20 minutes
Dry Ingredients
| Ingredient | Quantity |
|---|---|
| All-purpose flour | 4 cups |
| Sugar | 1 tablespoon |
| Salt | 2 teaspoons |
| Active dry yeast | 1 packet (2¼ teaspoons) |
Wet Ingredients
| Ingredient | Quantity |
|---|---|
| Warm water (110°F) | 1½ cups |
| Unsalted butter (melted) | ¼ cup |
Cheese and Toppings
| Ingredient | Quantity |
|---|---|
| Shredded cheddar cheese | 2 cups |
| Grated Parmesan cheese | ½ cup |
| Fresh parsley (chopped) | 2 tablespoons |
| Garlic powder | 1 teaspoon |
Equipment You’ll Need
-
Large mixing bowl
-
Measuring cups and spoons
-
Instant-read or candy thermometer (for the water temperature)
-
Wooden spoon or dough whisk
-
Clean work surface for kneading
-
Loaf pan (9×5-inch) or baking sheet
-
Parchment paper (optional, for easy cleanup)
-
Pastry brush (for buttering the top)
Step-by-Step Instructions
Step 1: Activate the Yeast
In a large mixing bowl, combine:
-
4 cups all-purpose flour
-
1 tablespoon sugar
-
2 teaspoons salt
-
1 packet (2¼ teaspoons) active dry yeast
Whisk the dry ingredients together so the yeast and salt are evenly distributed. (Salt and yeast don’t like touching each other directly – mixing them into the flour first prevents any issues.)
Measure your water temperature carefully.Heat 1½ cups of water to exactly 110°F (43°C). Use a thermometer – this is important.
-
Above 120°F (49°C): You’ll kill the yeast. The bread won’t rise.
-
Below 95°F (35°C): The yeast won’t activate properly. The rise will be slow and weak.
-
At 110°F (43°C): The yeast wakes up happy and ready to work.
Gradually add the warm water and ¼ cup melted butter to the dry ingredients. Stir with a wooden spoon or dough whisk until a shaggy dough forms.
Step 2: Develop the Gluten
Turn the dough out onto a lightly floured surface. Knead for 8 to 10 minutes until the dough is smooth and elastic.
How to knead: Push the dough away from you with the heel of your hand, fold it back over itself, give it a quarter turn, and repeat. Keep a steady rhythm.
The Windowpane Test (this is how you know you’re done):
-
Pinch off a small piece of dough.
-
Gently stretch it between your fingers.
-
If you can stretch it thin enough to see light through it without the dough tearing – like a windowpane – your gluten is sufficiently developed.
If it tears, keep kneading for another 2–3 minutes and test again.
This gluten network is what will hold all that heavy cheese later. Don’t skip it.
Step 3: The First Rise (Primary Fermentation)
Lightly grease a large bowl with oil or butter. Place the dough in the bowl, turning it once to coat all sides.
Cover the bowl with a clean kitchen towel or plastic wrap. Let it rise in a warm, draft-free place for 1 hour, or until the dough has doubled in size.
Where to put it: The top of the refrigerator, inside an oven that’s turned off with the light on, or near a sunny window are all good spots.
What’s happening: The yeast is eating the sugar and starches, releasing carbon dioxide (which inflates the dough) and ethanol (which creates that wonderful yeasty flavor). This also lowers the pH of the dough, which balances the sharpness of the cheddar.
Step 4: Add the Cheese and Flavorings (The Inclusion Matrix)
Punch down the dough to release excess gas. Turn it out onto a lightly floured surface.
Add:
-
2 cups shredded cheddar cheese
-
½ cup grated Parmesan cheese
-
1 teaspoon garlic powder
-
2 tablespoons chopped fresh parsley
Knead the dough gently until the cheese and seasonings are evenly distributed throughout. Don’t over-knead – you just want everything incorporated.
Why add cheese now? If you added the cheese at the beginning, the fats would coat the flour particles and prevent gluten from forming. Your bread would be dense, crumbly, and sad. Adding it after the first rise means the gluten is already strong enough to hold all that cheesy goodness.
Step 5: Shape and Second Rise
For a loaf pan: Shape the dough into a log that fits your greased 9×5-inch loaf pan. Place it in the pan seam-side down.
For a round loaf (boule): Shape the dough into a smooth round and place it on a parchment-lined baking sheet.
Cover the shaped dough loosely with a kitchen towel. Let it rise for 30 minutes.
During this second rise, the yeast recovers from being redistributed and starts producing gas again. The dough will puff up, filling the pockets around the cheese.
Step 6: Bake
Preheat your oven to 375°F (190°C) while the dough is doing its second rise.
If using a loaf pan, place it on the center rack. If using a baking sheet, place it on the center rack.
Bake for 30 to 35 minutes, until:
-
The top is deep golden brown
-
The cheese on the surface is bubbly and crispy in spots
-
The loaf sounds hollow when tapped on the bottom (carefully turn it out of the pan to test)
-
An instant-read thermometer inserted into the center reads 190–200°F (88–93°C)
If the top is browning too quickly, loosely tent it with aluminum foil for the last 10 minutes of baking.
Step 7: Cool (The Hardest Part)
Remove the bread from the oven. Let it cool in the pan for 5 to 10 minutes, then turn it out onto a wire rack.
Let it cool for at least 20–30 minutes before slicing. I know this is torture. The smell is incredible. But if you cut into it while it’s piping hot, the interior will be gummy and the cheese will ooze out instead of staying in beautiful pockets.
Trust the process. Let it cool.
Step 8: Serve
Slice into thick pieces. Serve warm or at room temperature.
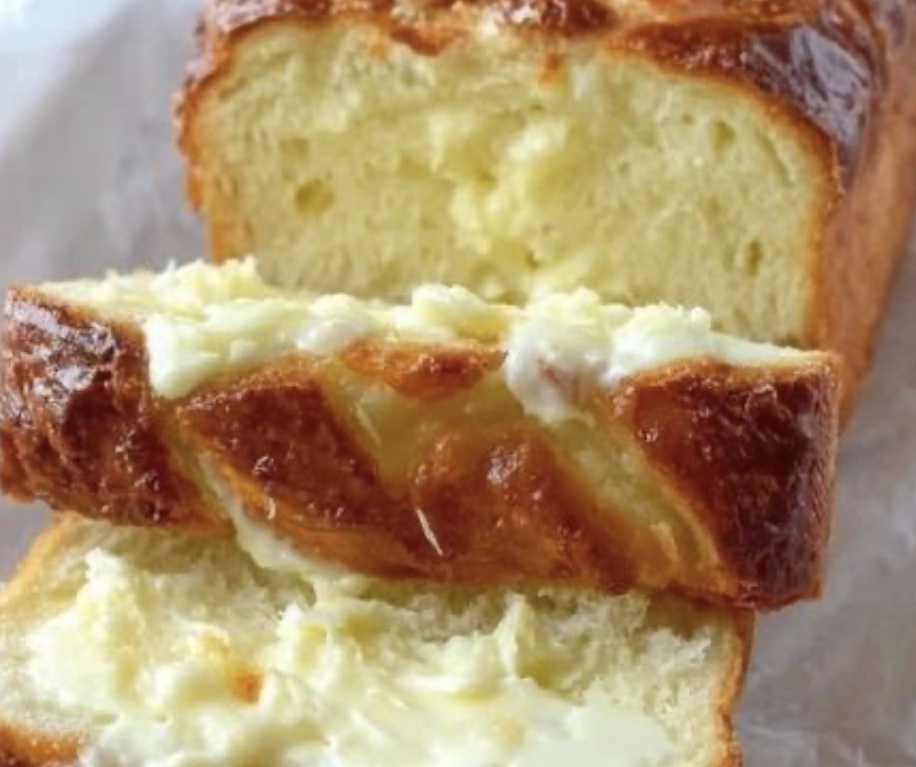
The crust should be crisp and golden. The inside should be soft, pillowy, and filled with melted cheese that stretches when you pull a piece apart.
Serve it alongside soup, pasta, or salad. Eat it plain as a snack. Toast a slice and top it with butter. However you eat it, one thing is certain: you’ll be making this again.
What to Serve With Cheese Bread
This bread is a star all on its own, but here are some perfect pairings:
| Main Dish | Why It Works |
|---|---|
| Tomato soup | The classic combination. Dip, dunk, repeat. |
| Chili | Hearty, spicy chili + cheesy bread = heaven. |
| Pasta with red sauce | Use the bread to soak up every drop of sauce. |
| Salad | A simple green salad with vinaigrette balances the richness. |
| Breakfast eggs | Toasted cheese bread with scrambled eggs is a revelation. |
| Just butter | Sometimes the simplest things are the best. |
For a showstopping appetizer, slice the bread, toast the slices, and top with a little more shredded cheese and a quick broil.
Storage and Reheating
Room temperature: Store in a paper bag or wrapped in a kitchen towel for up to 2 days. (Plastic wrap will make the crust soft.)
Refrigerator: Store in an airtight container for up to 5 days. The crust will soften, but the bread will still be delicious.
Freezer: Wrap tightly in plastic wrap, then in foil, and freeze for up to 3 months. Thaw at room temperature.
Reheating:
-
Oven (best method): Wrap in foil and warm at 350°F for 10–15 minutes. Unwrap for the last 5 minutes to re-crisp the crust.
-
Toaster oven: Perfect for slices. Toast until warm and crispy.
-
Microwave: 20–30 seconds per slice. The crust will be soft, but it’s fine in a pinch.
-
Skillet: Toast slices in a dry skillet over medium heat for a crispy, buttery texture.
Common Questions (FAQ)
Can I use bread flour instead of all-purpose?
Yes. Bread flour has a higher protein content, which means more gluten and a chewier, more structured loaf. If using bread flour, you may need an extra 1–2 tablespoons of water – add slowly until the dough comes together.
Can I use a different cheese?
Absolutely. Here are some great options:
| Cheese | Result |
|---|---|
| Sharp cheddar (recommended) | Bold, tangy, melts beautifully |
| Mild cheddar | Creamier, less sharp |
| Monterey Jack | Mild, creamy, melts like a dream |
| Gouda | Smoky, nutty, rich |
| Mozzarella | Stretchy, mild, great for pull-apart shots |
| Gruyère | Nutty, complex, melts beautifully |
| Pepper Jack | Spicy, creamy, adds a kick |
For best results, use a combination of a good melting cheese (cheddar, Monterey Jack, mozzarella) and a flavor cheese (Parmesan, Gruyère, Gouda).
Can I use dried parsley instead of fresh?
You can, but fresh parsley is much better here. Dried parsley has little flavor. If you only have dried, use 2 teaspoons and add it with the garlic powder. But seriously, buy fresh parsley – it’s cheap and makes a big difference.
Can I add other mix-ins?
Yes! Try:
-
Cooked, crumbled bacon – Add ½ cup with the cheese
-
Diced jalapeños – Add ¼ cup (fresh or pickled)
-
Sun-dried tomatoes – Add ¼ cup, chopped
-
Fresh rosemary – Add 1 tablespoon, finely chopped
-
Red pepper flakes – Add ½ teaspoon for heat
My bread didn’t rise. What went wrong?
Almost always a yeast issue:
-
Your water was too hot – You killed the yeast. Next time, use a thermometer.
-
Your water was too cold – The yeast never woke up. Next time, use 110°F water.
-
Your yeast was expired – Check the expiration date on the packet.
-
Your kitchen was too cold – Yeast likes warmth (75–80°F). Find a warmer spot for rising.
My bread is dense and heavy. What went wrong?
A few possibilities:
-
You didn’t knead enough – Underdeveloped gluten can’t hold the gas. Next time, do the windowpane test.
-
You added the cheese too early – The fats coated the flour and prevented gluten formation.
-
You over-proofed – The dough rose too long and collapsed. Next time, watch the clock.
-
You cut it while it was hot – The interior was still setting. Next time, be patient.
Can I make this into rolls instead of a loaf?
Yes! After adding the cheese, divide the dough into 12–16 equal pieces. Shape each into a ball and place them in a greased 9×13-inch baking dish. Let them rise for 30 minutes, then bake at 375°F for 20–25 minutes. Pull-apart cheese rolls!
Can I make this in a bread machine?
You can use the bread machine to knead and do the first rise. Add the cheese after the first rise (remove the dough, knead in the cheese by hand, shape, and do the second rise in a pan). Do not add the cheese to the bread machine – it will interfere with gluten development.
Pro Tips From My Kitchen to Yours
After making this cheese bread more times than I can count (it’s my go-to for soup season), here’s what I’ve learned:
-
Use a thermometer for the water.Seriously. Guessing the temperature is the #1 reason homemade bread fails. Spend $10 on an instant-read thermometer. Your bread will thank you.
-
Don’t skip the windowpane test. It takes 10 seconds and tells you exactly when your gluten is ready. If you skip it, you’re guessing.
-
Shred your own cheese. Pre-shredded cheese has anti-caking agents that can affect melting and texture. A block of cheddar and a box grater take 60 seconds.
-
Use fresh parsley. Dried parsley is basically green dust. Fresh parsley adds color, flavor, and a bright, herbal note that balances the rich cheese.
-
Let it cool completely before slicing. I know it’s hard. Set a timer. Walk away. The bread will still be warm when you come back – but it will slice cleanly instead of turning into a gummy mess.
-
Double the recipe. This bread disappears fast. Make two loaves – one to eat now, one to freeze for later.
-
Save the heels for breadcrumbs. The end pieces are perfect for homemade breadcrumbs. Dry them out in a low oven, then blitz in a food processor.
-
Toast leftovers. Day-old cheese bread is incredible toasted. The cheese gets crispy and the crust becomes shatteringly crisp.
The Joy of Homemade Bread
There’s something deeply satisfying about making bread from scratch.
It’s not the quickest thing you’ll ever make. It’s not the easiest. You have to wait. You have to trust the process. You have to resist the urge to peek, to poke, to cut into it while it’s still hot.
But when you pull that golden, fragrant loaf out of the oven? When you see the cheese bubbling through the cracks and smell the garlic and parsley? When you slice into it and watch the steam rise and the cheese stretch?
There’s nothing like it.
Store-bought bread is fine. It’s convenient. It’s predictable.
But homemade bread is an event. It’s love made tangible. It’s the kind of thing that makes people gather in the kitchen, waiting for the first slice.
This cheese bread is that bread.
Make it for soup night. Make it for a holiday table. Make it just because it’s Tuesday and you want your house to smell amazing.
And when someone asks for the recipe? Send it to them.
Good bread is meant to be shared.
Final Thoughts
This Homemade Cheese Bread is proof that you don’t need fancy equipment, expensive ingredients, or a culinary degree to bake something extraordinary.
Flour. Yeast. Water. Butter. Cheese. Garlic. Parsley.
That’s it.
And what you get in return is a golden, crusty, pull-apart loaf that’s soft and chewy on the inside, crispy and cheesy on the outside, and absolutely packed with flavor.
The kind of bread that makes a meal into a memory. The kind of bread that disappears before the soup is even finished. The kind of bread you’ll make again and again.
So preheat your oven. Measure your water to exactly 110°F. Knead until it passes the windowpane test.
And get ready to pull the best loaf of cheese bread you’ve ever eaten out of your oven.
Enjoy.