
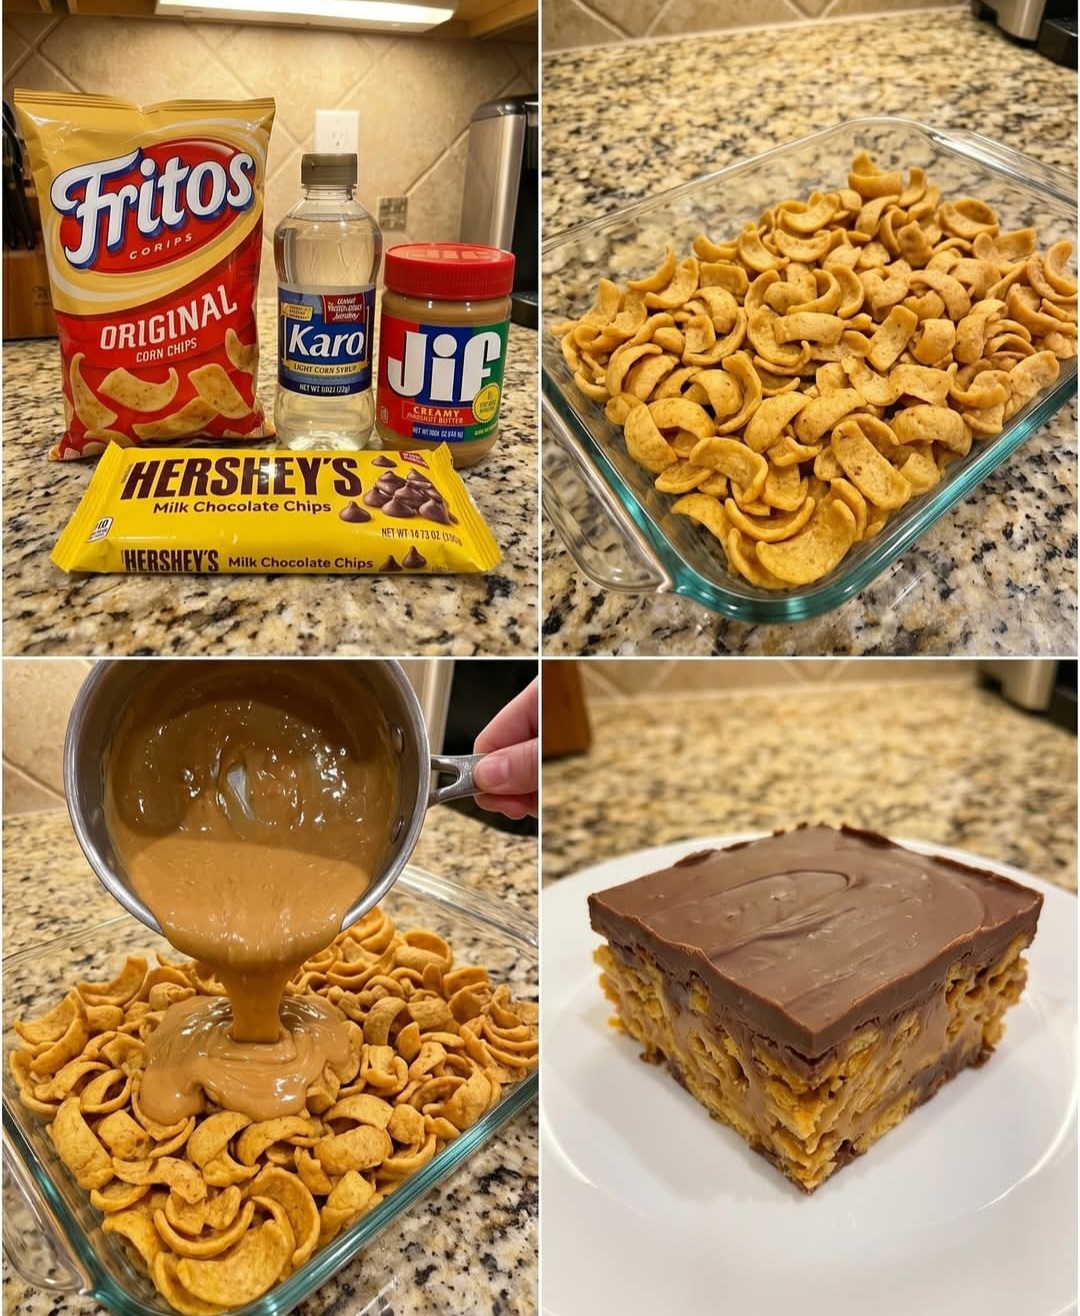
Sweet & Salty Frito Candy Bars: The Ultimate No-Bake Peanut Butter Chocolate Treat
If you’re searching for the perfect combination of sweet, salty, crunchy, and chocolatey, these Sweet & Salty Frito Candy Bars are about to become your new favorite dessert. This irresistible no-bake treat transforms simple pantry staples into a decadent candy bar that’s packed with texture and flavor. The crunchy corn chips provide a surprisingly delicious salty base, while the rich peanut butter layer and smooth milk chocolate topping create the ultimate dessert experience.
Whether you’re making them for a family gathering, holiday dessert table, potluck, game day snack, or simply to satisfy a sweet craving, these bars disappear fast. Best of all, they require minimal effort and deliver maximum flavor, making them one of the easiest homemade candy recipes you’ll ever make.
Why You’ll Love These Sweet & Salty Frito Candy Bars
No baking required
Ready with just a handful of ingredients
Perfect balance of sweet and salty flavors
Crunchy, creamy, and chocolatey in every bite
Great for parties, holidays, and gifting
Easy enough for beginner cooks
Ingredients
1 Bag (9.25 oz) Fritos Original Corn Chips
The foundation of this recipe. The salty crunch of the Fritos creates an unexpected but incredibly satisfying contrast to the sweet peanut butter and chocolate layers. Their sturdy texture also helps support the candy bars without becoming soggy.
1 Cup Granulated Sugar
Sugar provides sweetness and helps create the chewy candy-like texture of the peanut butter layer. When heated with the corn syrup, it forms the perfect binding mixture.
1 Cup Karo Light Corn Syrup
Corn syrup helps create a smooth, glossy consistency while preventing the sugar from crystallizing. It also gives the bars their signature chewy texture.
1 Cup Creamy Peanut Butter
Creamy peanut butter adds richness, nutty flavor, and a velvety texture. It blends beautifully with the sugar mixture to create the decadent center layer.
1 Bag (12 oz) Milk Chocolate Chips
Milk chocolate delivers the perfect sweet finish. Once melted and spread over the bars, it hardens into a smooth chocolate topping that complements the salty Fritos and creamy peanut butter perfectly.
How to Make Sweet & Salty Frito Candy Bars
Step 1: Prepare the Pan
Lightly spray a 9×13-inch baking dish with nonstick cooking spray. Spread the Fritos evenly across the bottom of the pan, creating a uniform layer.
Step 2: Make the Peanut Butter Mixture
In a medium saucepan, combine the granulated sugar and light corn syrup. Place over medium heat and stir occasionally until the mixture reaches a rolling boil.
Once boiling, immediately remove the pan from the heat. Avoid overcooking, as this can make the bars too hard once cooled.
Step 3: Add the Peanut Butter
Stir the creamy peanut butter into the hot sugar mixture. Continue mixing until completely smooth and fully incorporated. The mixture should be thick, glossy, and easy to pour.
Step 4: Cover the Fritos
Carefully pour the peanut butter mixture over the Fritos. Use a spatula to spread it evenly, ensuring all the chips are coated.
Allow the mixture to cool for several minutes before adding the chocolate layer.
Step 5: Melt the Chocolate
Place the chocolate chips in a microwave-safe bowl. Heat in 30-second intervals, stirring after each interval until the chocolate is smooth and melted.
Step 6: Add the Chocolate Topping
Spread the melted chocolate evenly over the peanut butter layer. Use an offset spatula or the back of a spoon to create a smooth finish.
Step 7: Let the Bars Set
Allow the bars to cool at room temperature or refrigerate until the chocolate is completely firm.
Step 8: Slice and Serve
Once fully set, cut into squares or bars and serve.
Pro Tips for Perfect Frito Candy Bars
Don’t Overboil the Sugar Mixture
Remove the saucepan from the heat as soon as a rolling boil is reached. Overheating can make the bars overly hard and difficult to bite into.
Use Fresh Fritos
Fresh corn chips provide the best crunch and ensure the bars maintain their signature texture.
Line the Pan for Easy Removal
For easier slicing and cleanup, line the pan with parchment paper before adding the ingredients.
Chill Before Cutting
Refrigerating the bars for 20–30 minutes makes them easier to slice cleanly.
Customize the Topping
Add chopped peanuts, crushed pretzels, sea salt flakes, or mini chocolate candies before the chocolate sets for extra flavor and texture.
Variations to Try
Chocolate Peanut Butter Lover’s Version
Use peanut butter chips along with the chocolate chips for an even richer topping.
Salted Caramel Version
Drizzle caramel sauce over the peanut butter layer before adding the chocolate.
Dark Chocolate Upgrade
Swap milk chocolate chips for dark chocolate for a less sweet, more sophisticated flavor profile.
Holiday Candy Bars
Top with festive sprinkles for Christmas, Halloween, Valentine’s Day, or birthday celebrations.
Serving Suggestions
These bars are delicious on their own, but they pair wonderfully with:
A cold glass of milk
Freshly brewed coffee
Hot chocolate
Vanilla ice cream
Peanut butter milkshakes
Dessert charcuterie boards
They also make an excellent addition to holiday cookie trays, bake sales, potlucks, and family gatherings.
Storage Instructions
Store the bars in an airtight container at room temperature for up to 5 days.
For longer storage, refrigerate for up to 2 weeks. You can also freeze them for up to 3 months. Simply thaw before serving.
Final Thoughts
These Sweet & Salty Frito Candy Bars prove that some of the most unforgettable desserts come from the simplest ingredients. The combination of crunchy Fritos, creamy peanut butter, and silky milk chocolate creates a flavor explosion that’s impossible to resist. With no baking required and only a few easy steps, this recipe is perfect for busy families, beginner bakers, and anyone craving a unique homemade treat.
Make a batch today and discover why these addictive peanut butter chocolate candy bars are guaranteed to become a favorite dessert for every occasion.