
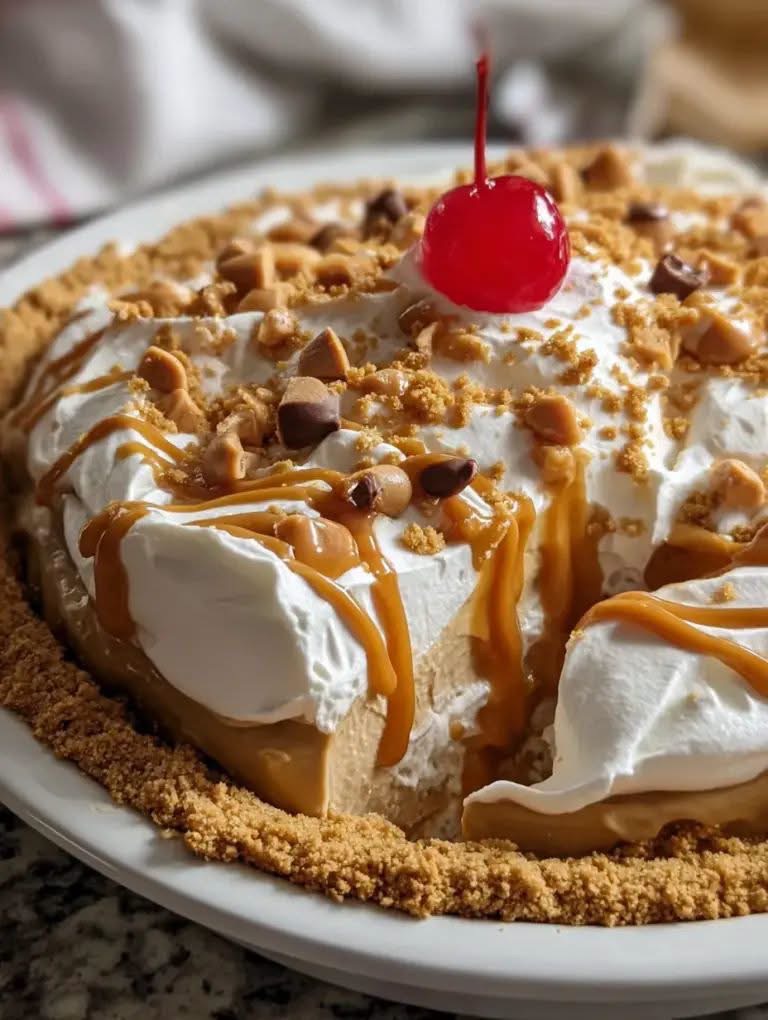
Butterscotch Heaven Pie
There are desserts that are delicious, and then there are desserts that are truly heavenly. This Butterscotch Heaven Pie falls firmly into the second category. It’s a vintage, no-bake pie that’s absolutely packed with rich, buttery, caramelized butterscotch flavor, all nestled in a creamy, fluffy filling and topped with a cloud of whipped cream. Every single bite is pure bliss.
I first encountered this pie at a church potluck years ago, and it was the first dessert to disappear. When I asked for the recipe, I was told it was a family heirloom—a classic from the 1970s that had been passed down through generations . The combination of a buttery graham cracker crust, a silky butterscotch pudding layer, a cream cheese layer, and a mountain of whipped topping is pure comfort food nostalgia. It’s the kind of dessert that feels like a warm hug and makes any occasion feel a little more special.
Ingredients
For the Crust:
-
1 ½ cups graham cracker crumbs
-
⅓ cup granulated sugar
-
½ cup (1 stick) unsalted butter, melted
For the Butterscotch Layer:
-
1 box (3.4 oz) instant butterscotch pudding mix
-
1 cup cold milk
For the Cream Cheese Layer:
-
8 oz cream cheese, softened
-
1 cup powdered sugar
-
1 cup frozen whipped topping (like Cool Whip), thawed
For the Topping:
-
1 ½ cups frozen whipped topping (like Cool Whip), thawed
-
Butterscotch chips, toffee bits, or chocolate shavings for garnish
Directions
-
Make the crust: In a medium bowl, combine the graham cracker crumbs, sugar, and melted butter until the mixture resembles wet sand. Press the mixture firmly into the bottom and up the sides of a 9-inch pie dish. Refrigerate while you prepare the filling.
-
Make the butterscotch layer: In a medium bowl, whisk together the instant butterscotch pudding mix and cold milk for about 2 minutes, until thickened. Set aside.
-
Make the cream cheese layer: In a large bowl, beat the softened cream cheese and powdered sugar together until smooth and fluffy. Gently fold in 1 cup of thawed whipped topping until well combined.
-
Assemble the pie: Spread the cream cheese mixture evenly over the prepared crust. Top with the butterscotch pudding layer, spreading it into an even layer.
-
Add the topping: Spread the remaining 1 ½ cups of whipped topping over the butterscotch layer, creating a beautiful, fluffy finish.
-
Chill and garnish: Refrigerate the pie for at least 4 hours, or overnight, to allow the layers to set completely. Just before serving, garnish with butterscotch chips, toffee bits, or chocolate shavings.
-
Slice and serve: Slice the pie with a sharp knife, wiping it clean between cuts. Serve chilled.
Variations
-
Chocolate Butterscotch Heaven:Use chocolate pudding instead of butterscotch for a rich, chocolaty twist.
-
Banana Butterscotch: Add a layer of sliced bananas over the cream cheese layer before adding the butterscotch pudding.
-
Nutty Heaven: Fold ½ cup of toasted chopped pecans or walnuts into the butterscotch layer for added crunch.
-
Caramel Drizzle: Drizzle warm caramel sauce over the top before serving for extra indulgence.
-
Flavor Swaps: Try vanilla, chocolate, or banana pudding instead of butterscotch for a completely different flavor profile.
-
Gluten-Free: Use a gluten-free graham cracker crust for a celiac-friendly version.
Expert Tips
-
Room temperature cream cheese:For a smooth, lump-free cream cheese layer, make sure your cream cheese is at room temperature before you begin mixing.
-
Chill the crust: Refrigerate the crust for at least 15-20 minutes before adding the filling to prevent it from becoming soggy.
-
Don’t overmix the pudding: Whisk the instant pudding and milk just until it thickens. Overmixing can make it grainy.
-
Make it ahead: This pie is the ultimate make-ahead dessert. It actually gets better as the flavors meld together in the fridge, so feel free to make it a day before you plan to serve it.
-
Garnish just before serving: Add any garnishes just before serving to keep them looking fresh and beautiful.
Storage
Store this pie, covered, in the refrigerator for up to 4 days. This dessert is meant to be served cold, so no reheating is necessary. It does not freeze well, as the texture of the pudding and cream cheese layers can become watery upon thawing.
Frequently Asked Questions
-
Can I use homemade butterscotch pudding instead of instant? Instant pudding is essential for this recipe because it sets up firmly in the refrigerator. Cook-and-serve pudding will not give you the same texture.
-
Can I use real whipped cream instead of Cool Whip? Yes, you absolutely can. Substitute the frozen whipped topping with an equal amount of sweetened, freshly whipped cream. For the best texture, add it just before serving.
-
Why is my pie runny? This usually happens if the pudding wasn’t set properly, the pie wasn’t chilled long enough, or the cream cheese wasn’t firm enough. Make sure to use instant pudding, chill for at least 4 hours, and use full-fat cream cheese for the best results.
-
Can I use a different crust?Absolutely. A vanilla wafer, shortbread cookie, or Oreo crust would all be delicious alternatives to graham cracker.
-
Can I make this dairy-free? Yes. Use dairy-free cream cheese, a dairy-free whipped topping, and a dairy-free pudding mix (some brands are dairy-free). The texture will be slightly different but still delicious.
What to Serve With This Dish
-
A hot cup of coffee or tea to balance the sweetness.
-
Fresh berries on the side for a pop of color and tartness.
-
A drizzle of extra caramel or butterscotch sauce.
-
It’s also beautiful on its own as the centerpiece of a dessert table.
Final Thoughts
This Butterscotch Heaven Pie is pure vintage comfort. It’s creamy, sweet, and absolutely irresistible. Whether you’re making it for a holiday gathering, a potluck, or simply because you need a little sweetness in your life, this pie delivers every single time. I hope it becomes a beloved tradition in your home as it has in mine.