
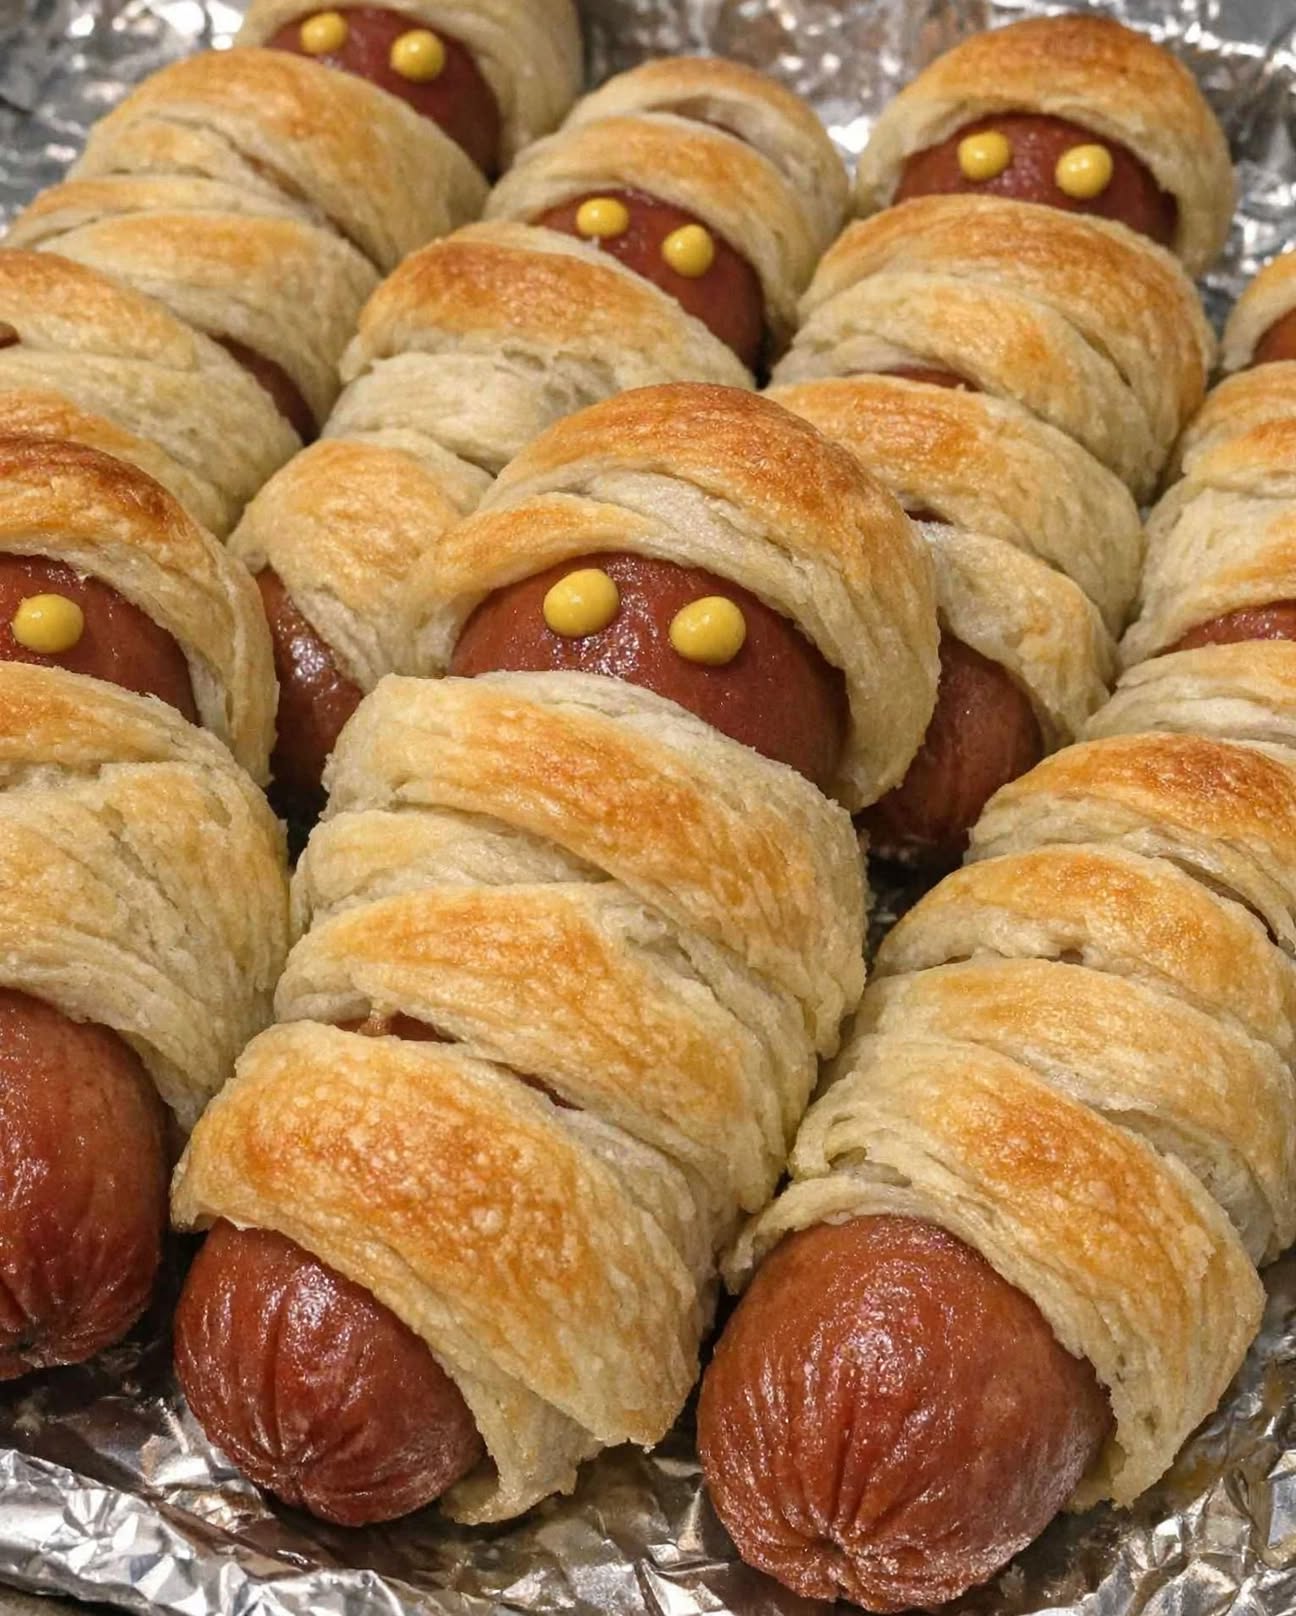
3-Ingredient Mummy Dogs
My nephew begs me to make these 3-ingredient mummy dogs every October. They’re the absolute perfect way to fuel up before a long night in the neighborhood!
When Halloween rolls around, there’s nothing better than a recipe that is easy, festive, kid-friendly, and delicious. These 3-Ingredient Mummy Dogs check every box. Refrigerated dough wraps around juicy hot dogs to create adorable little mummies that bake until the dough is puffed, golden, and lightly crisp. A couple of tiny mustard eyes bring the whole spooky snack to life.
The best part is how little effort they require. With just three simple ingredients, you can have a fun Halloween appetizer or pre-trick-or-treat dinner ready without spending the evening in the kitchen. They’re perfect for Halloween parties, October family dinners, school-friendly celebrations, game nights, and trick-or-treating snacks.
Serve them warm with your favorite dipping sauces, and watch them disappear almost as quickly as you can put them on the table.
Ingredients
1 Can Refrigerated Crescent Roll Dough
The dough creates the mummy’s wrappings. Once cut into thin strips and wrapped around the hot dogs, it bakes into a golden, tender, flaky coating. Crescent roll dough is especially convenient because it requires almost no preparation. If you use perforated crescent dough, simply press the seams together before cutting.
8 Hot Dogs
Hot dogs provide the savory, hearty center of each mummy. Since they’re already fully cooked, the oven time is primarily used to bake and brown the dough while warming the hot dogs.
Yellow Mustard
A tiny dab of yellow mustard creates the mummy’s eyes after baking. It adds a bright pop of color and a little tangy flavor while making these Halloween treats instantly recognizable.
How to Make 3-Ingredient Mummy Dogs
1. Prepare the Oven
Preheat your oven to 375°F. Line a baking sheet with parchment paper or foil to make cleanup quick and easy.
2. Cut the Dough Into Strips
Unroll the refrigerated dough. If you’re working with crescent roll dough, gently press the perforated seams together.
Using a knife or pizza cutter, cut the dough into thin strips. They don’t need to be perfectly uniform—the slightly uneven strips actually make the finished mummy dogs look more fun and homemade.
3. Wrap the Hot Dogs
Take one strip of dough and loosely wrap it around a hot dog, creating the appearance of mummy bandages.
Leave a small section uncovered near the top for the face. Don’t wrap the dough too tightly because it will expand as it bakes.
Repeat with the remaining hot dogs and dough.
4. Arrange on the Baking Sheet
Place each wrapped hot dog on the prepared baking sheet, leaving a little room between them so the dough can puff and brown evenly.
5. Bake Until Golden
Bake for approximately 12 to 15 minutes, or until the dough is puffed and golden brown.
Keep an eye on them toward the end of the baking time. Since hot dogs are already cooked, you mainly want the dough to become fully baked and beautifully golden.
6. Add the Mummy Eyes
Remove the mummy dogs from the oven and let them cool for a minute or two.
Using yellow mustard, add two small dots for eyes to each mummy. A toothpick can help you create small, neat dots if you want more control.
Serve warm with your favorite dipping sauces.
Why Everyone Loves These Mummy Dogs
There’s a reason these easy Halloween mummy dogs become a yearly tradition.
– Only 3 ingredients: You don’t need a long grocery list.
– Quick preparation: They’re easy enough for a busy October evening.
– Festive and fun: The mummy design makes an ordinary hot dog feel special.
– Kid-friendly: Children love helping wrap the dough and add the mustard eyes.
– Party-ready: They work beautifully on Halloween appetizer trays.
– Customizable: Use different sausages, doughs, and dipping sauces to make them your own.
– Perfect for trick-or-treating: They provide a warm, satisfying bite before heading outside for the evening.
Pro Tips for Perfect Mummy Dogs
Keep the Dough Strips Thin
Thin strips create a more recognizable mummy appearance and allow some of the hot dog to peek through. Thick strips can cover too much of the hot dog and make the mummy effect less noticeable.
Don’t Overwrap
You want the dough to look like loose mummy bandages rather than a completely covered hot dog. Leaving little gaps gives each one plenty of character.
Leave Room for the Face
Before wrapping, decide which end will be the head. Keep a small area of the hot dog uncovered so you have space for the mustard eyes.
Add the Mustard After Baking
Adding mustard before baking can cause the eyes to spread or lose their bright appearance. For the clearest Halloween mummy face, add them once the mummy dogs have come out of the oven.
Watch the Dough, Not Just the Clock
Oven temperatures can vary, so use the suggested 12 to 15 minutes as a guideline. The best indicator is golden, fully baked dough.
Make Mini Mummy Dogs
For a Halloween party, use cocktail sausages or mini hot dogs and shorter strips of dough. They make adorable bite-sized appetizers and are easy for guests to grab from a serving platter.
Fun Variations
Puff Pastry Mummy Dogs
Swap the crescent dough for puff pastry for an especially flaky and buttery finish. Keep the strips narrow so the mummy design remains visible.
Cheesy Mummy Dogs
For an extra indulgent version, place a thin strip of cheese alongside the hot dog before wrapping it in dough. Cheddar or American cheese melts beautifully inside.
Spicy Mummy Dogs
Use spicy sausages or your favorite pepper-flavored hot dogs for an adult-friendly Halloween appetizer.
Mini Party Mummies
Use cocktail sausages for a bite-sized Halloween appetizer that’s perfect for buffet tables and gatherings.
What to Serve With Mummy Dogs
These Halloween treats are delicious on their own, but a few simple sides can turn them into a complete meal.
For a kid-friendly Halloween dinner, serve them with carrot sticks, apple slices, kettle chips, or a simple green salad.
For dipping, set out small bowls of ketchup, yellow mustard, honey mustard, barbecue sauce, or cheese sauce.
If you’re creating a larger Halloween party spread, pair the mummy dogs with chili, baked beans, tomato soup, potato wedges, or a Halloween-themed vegetable platter.
And don’t forget the drinks. Apple cider, lemonade, iced tea, or a fun Halloween punch makes the meal feel even more festive.
Frequently Asked Questions
Can I make mummy dogs ahead of time?
Yes. You can assemble them ahead of time and refrigerate them until you’re ready to bake. For the best texture, bake them shortly before serving.
Can I use puff pastry instead of crescent dough?
Absolutely. Puff pastry works well and produces a crispier, flakier mummy dog.
Why are my mummy dogs pale?
The dough may simply need another minute or two in the oven. Continue baking until the dough is fully puffed and golden brown, watching carefully so it doesn’t overbake.
Can I use mini hot dogs?
Yes. Mini sausages or cocktail franks are excellent for parties. Just remember that smaller mummy dogs may require slightly less baking time.
When should I add the mustard eyes?
Add them after baking. This keeps the eyes bright, defined, and easy to see.
The Perfect Easy Halloween Treat
These 3-Ingredient Mummy Dogs prove that a memorable Halloween recipe doesn’t have to involve complicated ingredients or hours of preparation. With refrigerated dough, hot dogs, and a little mustard, you can transform everyday ingredients into an adorable seasonal treat that everyone will want to grab.
They’re crispy on the outside, savory in the center, wonderfully simple, and irresistibly festive. Whether you’re feeding hungry kids before trick-or-treating, putting together a Halloween party platter, or simply looking for an easy October dinner, these little mummies are guaranteed to bring some fun to the table.
Sometimes the simplest recipes become the traditions everyone looks forward to—and these easy 3-ingredient mummy dogs are exactly that kind of Halloween favorite.