
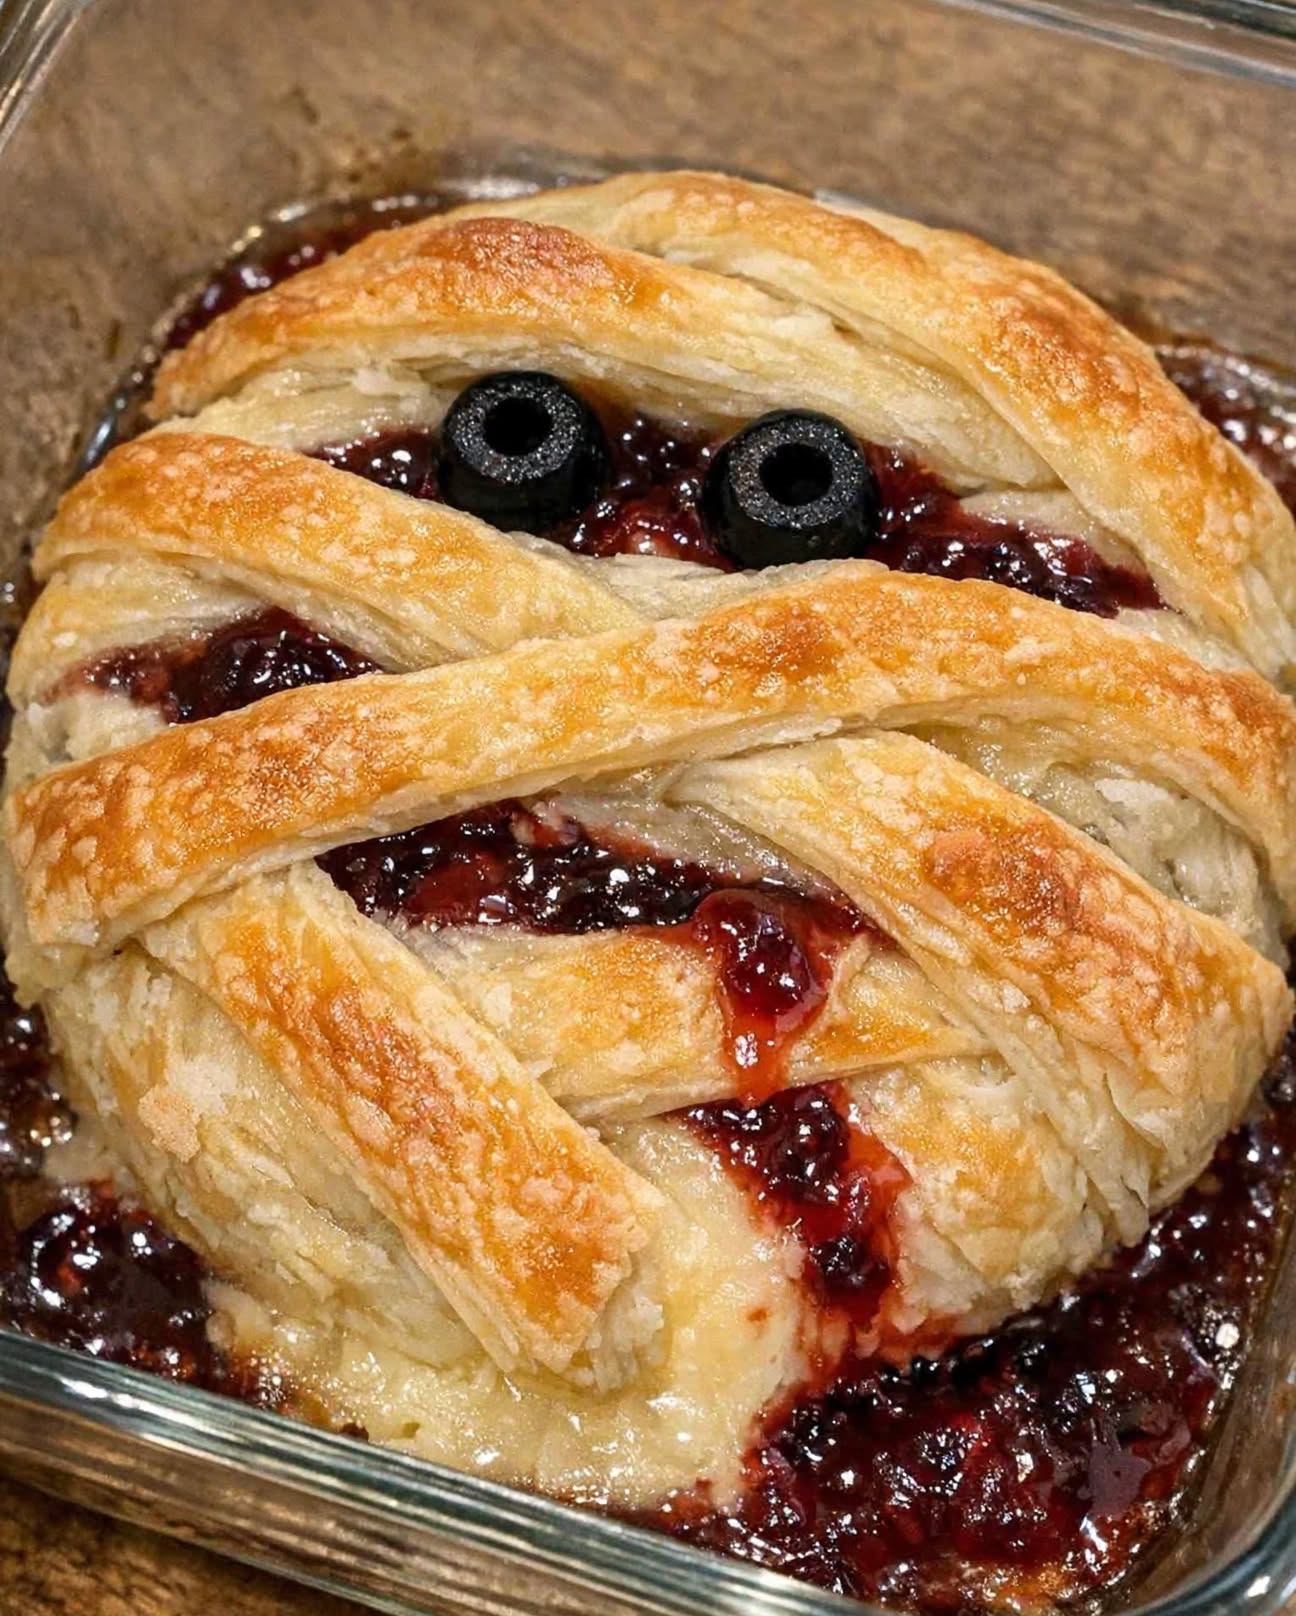
My sister makes this 4-ingredient Mummy Baked Brie every October, and somehow it disappears before anything else on the party table. It looks impressive, feels perfectly festive, and takes surprisingly little effort to prepare. The best part? You only need four simple ingredients to turn an ordinary wheel of brie into a spooky, golden, melty Halloween appetizer.
Imagine cutting through crisp, buttery puff pastry bandages to reveal warm, creamy brie underneath, with a layer of rich red berry jam peeking through the pastry. The sweet-tart jam balances the buttery cheese beautifully, while the candy eyes give this easy appetizer its unmistakable mummy personality.
Whether you’re hosting a Halloween party, preparing a fall snack board, or simply planning a fun family movie night, this easy baked brie recipe delivers maximum presentation with minimal work. It is warm, gooey, flaky, sweet, savory, and completely irresistible.
Why You’ll Love This Mummy Baked Brie
– Only 4 ingredients make this an incredibly simple Halloween appetizer.
– Festive presentation makes it look much more complicated than it really is.
– The combination of creamy brie, flaky puff pastry, and berry jam is wonderfully balanced.
– It can be assembled ahead of time and baked when you’re ready.
– It is perfect for Halloween parties, fall gatherings, potlucks, and holiday appetizer tables.
– Guests can simply tear off a pastry strip and scoop up the warm, melted cheese.
Ingredients
1. Wheel of Brie — about 8 ounces
The brie cheese is the creamy centerpiece of the recipe. As it bakes, the inside becomes soft, warm, and wonderfully spreadable while the rind helps the cheese maintain its shape. A small 8-ounce wheel is ideal for an appetizer because it is easy to wrap and provides plenty for sharing.
2. Puff Pastry — 1 sheet, thawed
Puff pastry creates the mummy’s flaky bandages. Once baked, the thin strips puff up and become beautifully golden and crisp, creating a delicious contrast with the soft brie underneath.
3. Dark Red Jam — 3 tablespoons
Raspberry or blackberry jam adds sweetness, acidity, and gorgeous color. The deep red shade also creates a spooky Halloween effect as little streaks of jam peek between the pastry strips.
Cherry or strawberry jam can also work if that’s what you have on hand.
4. Candy Eyes — 2
The candy eyes are the finishing touch that transforms ordinary baked brie into an adorable Halloween mummy. Add them after baking so they don’t melt or lose their shape.
How to Make Mummy Baked Brie
Step 1: Prepare the Puff Pastry
Preheat your oven to 375°F.
Place the thawed puff pastry on a lightly floured work surface. Gently unfold it and use a sharp knife or pizza cutter to slice it into thin strips.
Don’t worry about making every strip perfectly identical. Slightly uneven pastry strips actually make the mummy look more rustic and fun.
Step 2: Add the Brie
Place the wheel of brie in the center of a clear glass baking dish.
Using a baking dish allows you to take the entire festive appetizer straight from the oven to the table. It also helps contain any melted cheese that escapes as the brie warms.
Step 3: Add the Jam
Spoon approximately 3 tablespoons of dark red jam over the top of the brie.
Spread it gently, allowing a little jam to remain visible around the edges. The red color will peek through the pastry and create a wonderfully spooky effect.
Step 4: Create the Mummy Bandages
Arrange the puff pastry strips across the top of the brie in a crisscross pattern.
Leave a small area uncovered near the upper portion of the cheese. This is where you’ll place the candy eyes after baking.
There is no need to make the strips perfectly straight. In fact, overlapping them at slightly different angles gives your mummy more character.
Step 5: Bake Until Golden and Gooey
Place the dish in the preheated oven and bake for approximately 20 to 25 minutes.
The pastry should be puffed and golden brown, while the brie underneath should be warm and soft.
Keep an eye on the pastry during the final few minutes because oven temperatures can vary.
Step 6: Rest and Add the Eyes
Remove the baked brie from the oven and let it rest for about 5 minutes.
This short resting period gives the melted cheese a chance to settle while keeping it wonderfully creamy.
Carefully place the two candy eyes near the top of the mummy.
Then serve immediately while the brie is warm and gooey.
Pro Tips for Perfect Mummy Baked Brie
Don’t overfill with jam
Three tablespoons is enough to add flavor and color without overwhelming the cheese. Too much jam can make the pastry messy and difficult to arrange.
Keep the pastry cold
Work fairly quickly once you begin cutting the puff pastry. Cold puff pastry is easier to handle and tends to puff beautifully in the oven.
Don’t cover every inch of the brie
Leave small gaps between some of the pastry strips. The exposed areas allow the red jam and creamy cheese to show through, making the mummy design much more recognizable.
Don’t add the candy eyes before baking
Candy eyes can melt or become distorted in the oven. Add them after baking for the cleanest and cutest presentation.
Let it rest before serving
That five-minute rest is worth it. The cheese will still be beautifully melted, but it won’t immediately flood out of the brie the moment someone cuts into it.
Assemble ahead
For an easier party schedule, assemble the brie several hours before your guests arrive. Cover it and refrigerate until you’re ready to bake. Add the candy eyes only after it comes out of the oven.
Easy Variations
Raspberry Mummy Brie: Use raspberry jam for a bright berry flavor and dramatic red color.
Blackberry Mummy Brie: Blackberry preserves provide a deeper, richer fruit flavor that pairs beautifully with creamy brie.
Cherry Mummy Brie: Cherry jam gives the appetizer a slightly sweeter, classic fruit-and-cheese combination.
Extra Savory: If you prefer less sweetness, reduce the jam to a thin layer and let the buttery brie and pastry take center stage.
What to Serve With Mummy Baked Brie
This Halloween baked brie appetizer is perfect with plenty of things for dipping, scooping, and spreading.
Serve it with:
– Crisp crackers
– Toasted baguette slices
– Apple wedges
– Fresh pear slices
– Pretzels
– Grapes
– Mixed nuts
– Fresh vegetables
– Crostini
For a complete Halloween snack table, arrange the mummy brie in the center of a large board surrounded by crackers, fruit, nuts, pretzels, and other finger foods.
For drinks, sparkling apple cider, apple punch, or warm spiced cider all complement the cozy fall flavors beautifully.
Frequently Asked Questions
Can I make Mummy Baked Brie ahead of time?
Yes. You can assemble the brie and puff pastry several hours ahead, cover it, and refrigerate it until you’re ready to bake. Bake directly from the refrigerator, allowing a little additional time if needed.
Can I use a different type of jam?
Absolutely. Raspberry, blackberry, cherry, and strawberry jam all work well. For the strongest mummy effect, choose a dark red or deep berry-colored jam.
Do I need to remove the rind from the brie?
No. The rind can remain on the brie while it bakes. It helps the wheel hold its shape and becomes part of the creamy baked cheese experience.
How should I store leftovers?
If you happen to have leftovers, refrigerate them in an airtight container and enjoy them within a few days. Reheat gently in the oven so the pastry can crisp up again.
The Easiest Halloween Appetizer You’ll Make
This 4-Ingredient Mummy Baked Brie proves that a memorable Halloween appetizer doesn’t need a long ingredient list or complicated decorating skills. With just brie, puff pastry, berry jam, and candy eyes, you can create a warm, golden, gooey centerpiece that looks adorable on the table and tastes even better.
The contrast of flaky pastry, creamy melted brie, and sweet-tart jam makes every bite satisfying, while the simple mummy design gives it that extra bit of Halloween magic. Make it for a party, set it beside your favorite crackers and fruit, and watch everyone gather around for one more bite.
It is easy, festive, delicious, and practically foolproof—exactly the kind of Halloween recipe you’ll want to make every October.