
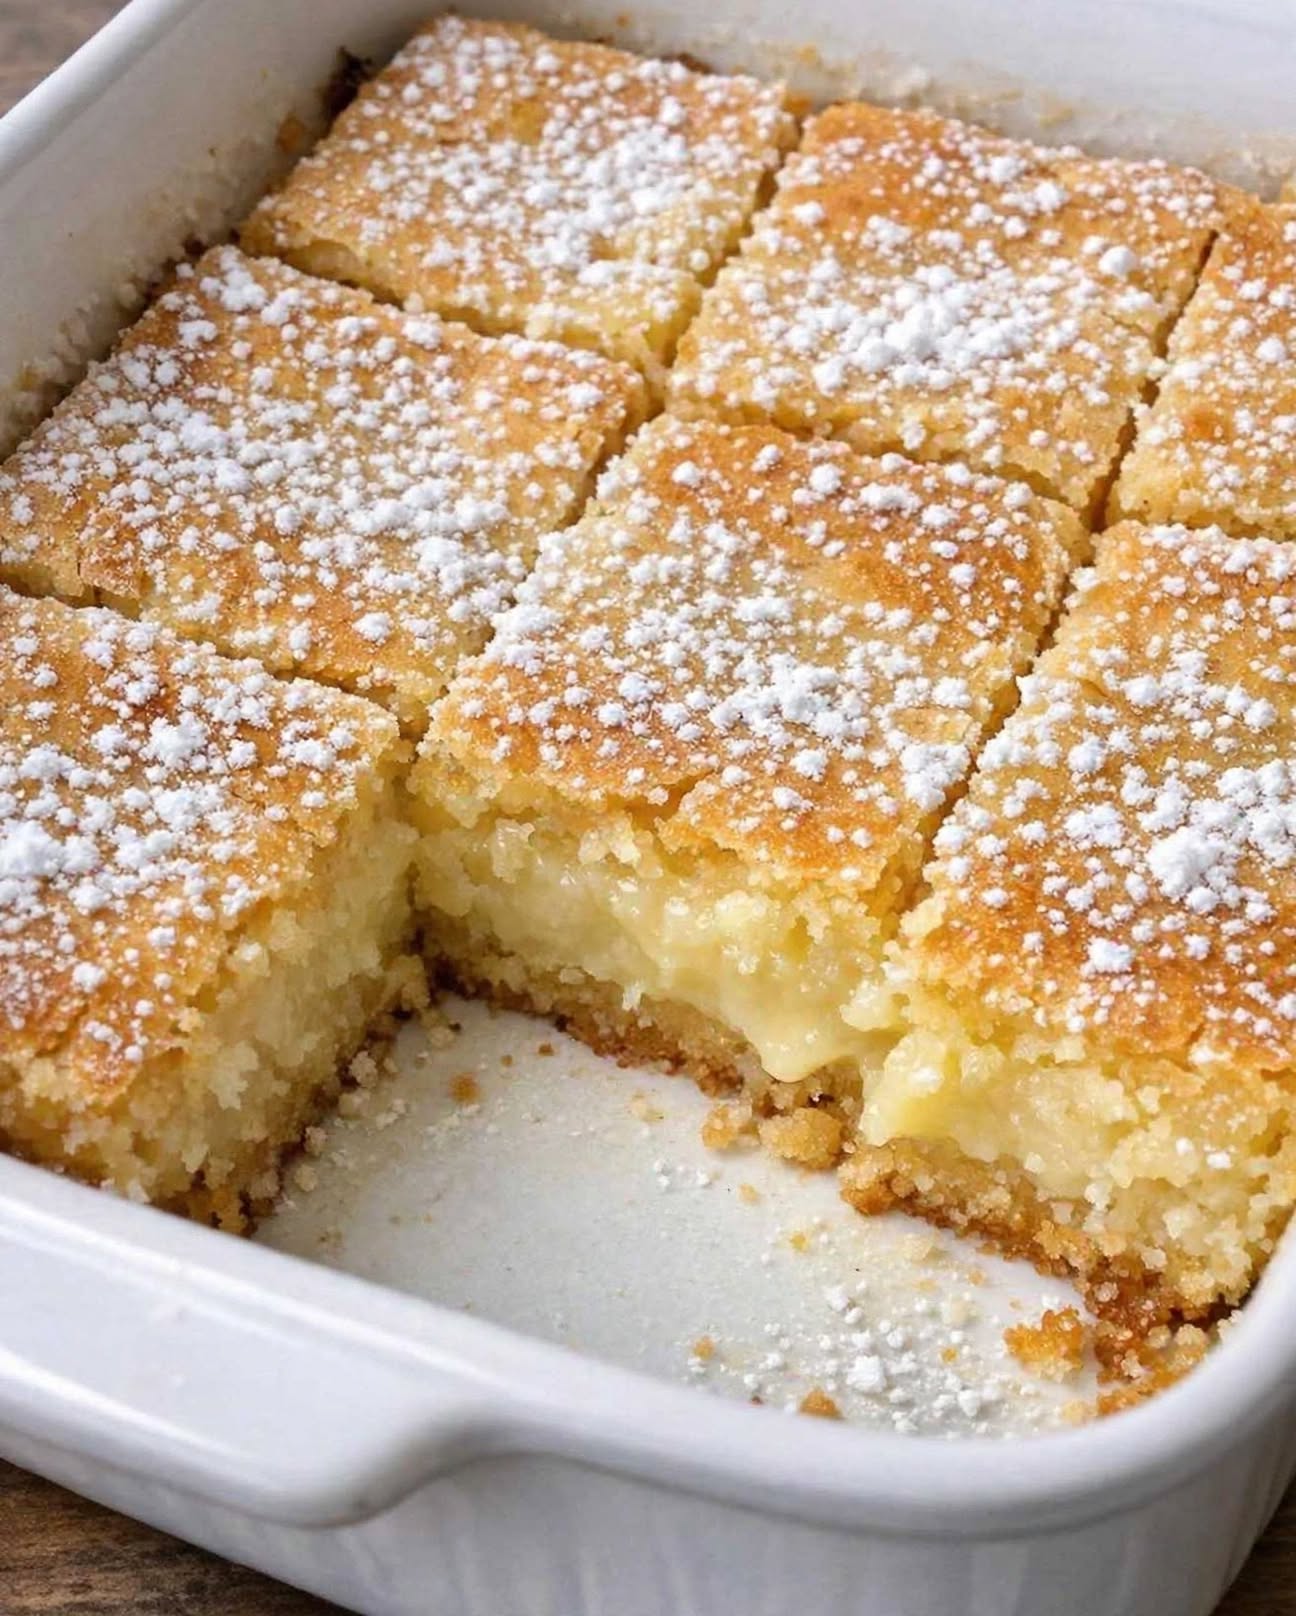
My husband and I couldn’t stop going back for just one more square. That’s the trouble with these St. Louis-style gooey butter cake bars—they’re ridiculously easy to make, but once you take that first bite, walking away is another story.
Made with just 5 simple ingredients, these old-fashioned dessert bars have everything you want in a homemade treat: a buttery yellow cake crust, a rich and creamy cream cheese topping, and a delicate crackly surface that gives way to a soft, gooey center.
They’re the kind of dessert that feels right at almost any gathering. Bring them to a potluck, holiday party, church supper, family movie night, brunch, or cookie exchange, and don’t be surprised when the pan comes home nearly empty.
The best part? You don’t need complicated techniques, special equipment, or a long ingredient list. Mix, press, pour, and bake. That’s it.
Why You’ll Love These Gooey Butter Cake Bars
There’s a reason gooey butter cake has remained such a beloved Midwestern-style dessert. It delivers an irresistible combination of textures in every bite.
The bottom layer is buttery and tender, while the cream cheese topping becomes rich, sweet, and slightly crisp around the edges as it bakes. The center stays wonderfully soft and gooey without requiring a complicated pastry crust.
These 5-ingredient dessert bars are especially appealing when you want something homemade without spending the entire afternoon in the kitchen.
They are:
– Easy to make with basic grocery-store ingredients
– Perfect for beginners
– Rich and buttery
– Soft and gooey in the center
– Ideal for potlucks and parties
– Easy to cut into individual squares
– Make-ahead friendly
– Delicious with coffee, milk, or ice cream
Ingredients for 5-Ingredient Gooey Butter Cake Bars
1. Yellow Cake Mix
A box of yellow cake mix forms the foundation of the bottom layer. It provides the cake-like structure, sweetness, and classic buttery vanilla flavor while eliminating the need to measure flour, sugar, baking powder, and other dry ingredients separately.
2. Butter
Melted butter adds richness and helps turn the cake mix into a thick, pressable crust. It also gives the finished bars that unmistakable buttery flavor that makes gooey butter cake so irresistible.
3. Large Eggs
You’ll use 3 large eggs, divided between the two layers. One egg goes into the cake crust to help bind everything together, while the remaining two eggs create structure and richness in the creamy topping.
4. Cream Cheese
Softened cream cheese is responsible for the luxurious texture of the top layer. Its slight tang balances the sweetness of the powdered sugar and gives these bars their signature creamy, rich flavor.
For the smoothest filling, allow the cream cheese to soften at room temperature before mixing.
5. Powdered Sugar
Powdered sugar sweetens the cream cheese layer while dissolving smoothly into the mixture. It helps create the soft, creamy filling and contributes to the lightly crackled surface that develops during baking.
How to Make St. Louis Gooey Butter Cake Bars
Step 1: Prepare the Oven and Pan
Preheat your oven to 350°F.
Lightly grease a 9×13-inch baking dish. For especially easy removal and cleaner slices, you can also line the pan with parchment paper, leaving a little overhang on the sides.
Step 2: Make the Buttery Cake Base
In a medium mixing bowl, combine the yellow cake mix, melted butter, and 1 large egg.
Stir until everything comes together into a thick dough.
Press the mixture evenly into the bottom of your prepared baking dish. Take your time here and spread it all the way into the corners so the crust is relatively even.
Step 3: Make the Creamy Topping
In a large bowl, beat the softened cream cheese, remaining 2 eggs, and powdered sugar until smooth and creamy.
The mixture should be thick but spreadable, with no large lumps of cream cheese remaining.
Step 4: Add the Gooey Layer
Pour the cream cheese mixture over the prepared cake crust.
Use a spatula to gently spread it into an even layer, being careful not to disturb the crust underneath.
Step 5: Bake
Place the pan in the preheated oven and bake for approximately 40–50 minutes.
Look for golden edges and a center that still has a slight jiggle.
The center should not look completely firm when you remove the pan. Remember that the bars will continue to set as they cool.
Step 6: Cool Completely
Allow the bars to cool completely in the pan before slicing.
This step is important. Cutting them while they are still hot can make the gooey center difficult to handle and result in messy squares.
Once cooled, cut into squares and serve.
Pro Tips for Perfect Gooey Butter Cake Bars
Don’t overbake. This is the most important tip. The center should retain a slight jiggle when the bars come out of the oven. Overbaking can turn the creamy middle into a firmer cake-like layer.
Soften the cream cheese first. Room-temperature cream cheese blends much more smoothly with the eggs and powdered sugar.
Use parchment for clean cuts. Lining the pan allows you to lift the cooled dessert out before slicing, making it much easier to create neat squares.
Let the bars cool completely. The filling continues to set as it cools, so patience pays off.
For extra-clean slices, chill the cooled bars briefly before cutting. Use a sharp knife and wipe the blade between cuts.
Don’t worry if the top cracks. That lightly crackled surface is part of the charm of classic gooey butter cake.
Easy Variations
Although the original 5-ingredient version is hard to beat, you can make small changes when you want to put your own spin on it.
For a holiday presentation, dust the cooled bars lightly with powdered sugar before serving.
For a little freshness, serve them with fresh strawberries, raspberries, or blueberries.
For an extra-indulgent dessert, add a scoop of vanilla ice cream beside a slightly warmed square.
If you love citrus desserts, a small amount of lemon zest can add a bright contrast to the rich filling.
How to Serve Gooey Butter Cake Bars
These bars are sweet and rich enough to stand on their own, but they pair beautifully with simple drinks and toppings.
Serve them with a steaming cup of coffee for an afternoon treat or with a cold glass of milk for a nostalgic dessert.
For holidays and dinner parties, place the squares on a dessert platter alongside fresh berries and other bite-sized treats.
You can also serve a square slightly warm with vanilla ice cream. The combination of warm gooey cake and cold creamy ice cream makes an especially indulgent dessert.
For brunch, arrange smaller squares on a serving tray with fresh fruit and coffee.
How to Store
Once completely cooled, cover the bars tightly and refrigerate for up to 4 days.
Because of the cream cheese filling, refrigeration is the best way to keep them fresh.
For the softest texture, allow individual squares to sit at room temperature for a few minutes before serving.
Frequently Asked Questions
Can I make these bars ahead of time?
Yes. Gooey butter cake bars are excellent for making ahead. Prepare them the day before, allow them to cool completely, cover, and refrigerate until you’re ready to serve.
Why is my center still jiggly?
A slight jiggle is exactly what you want when these bars first come out of the oven. The filling continues to firm as it cools.
Should I refrigerate gooey butter cake?
Yes. Since the topping contains cream cheese, store the cooled bars covered in the refrigerator.
Can I cut the bars while they’re warm?
You can, but the center will be much softer and harder to cut cleanly. For neat squares, let the bars cool completely first.
The Bottom Line
These 5-Ingredient St. Louis Gooey Butter Cake Bars prove that an unforgettable dessert doesn’t need a complicated recipe. With a box of yellow cake mix, butter, eggs, cream cheese, and powdered sugar, you can create a pan of rich, buttery, creamy dessert bars that look impressive and taste even better.
They’re easy enough for a weeknight, special enough for holidays, and dependable enough to bring to the next potluck. And if my husband and I couldn’t stop going back for another square, don’t say you weren’t warned.
Make one pan, cut it into squares, and watch how quickly they disappear. Simple ingredients, minimal effort, and seriously irresistible results—that’s exactly what a great old-fashioned dessert should be.