
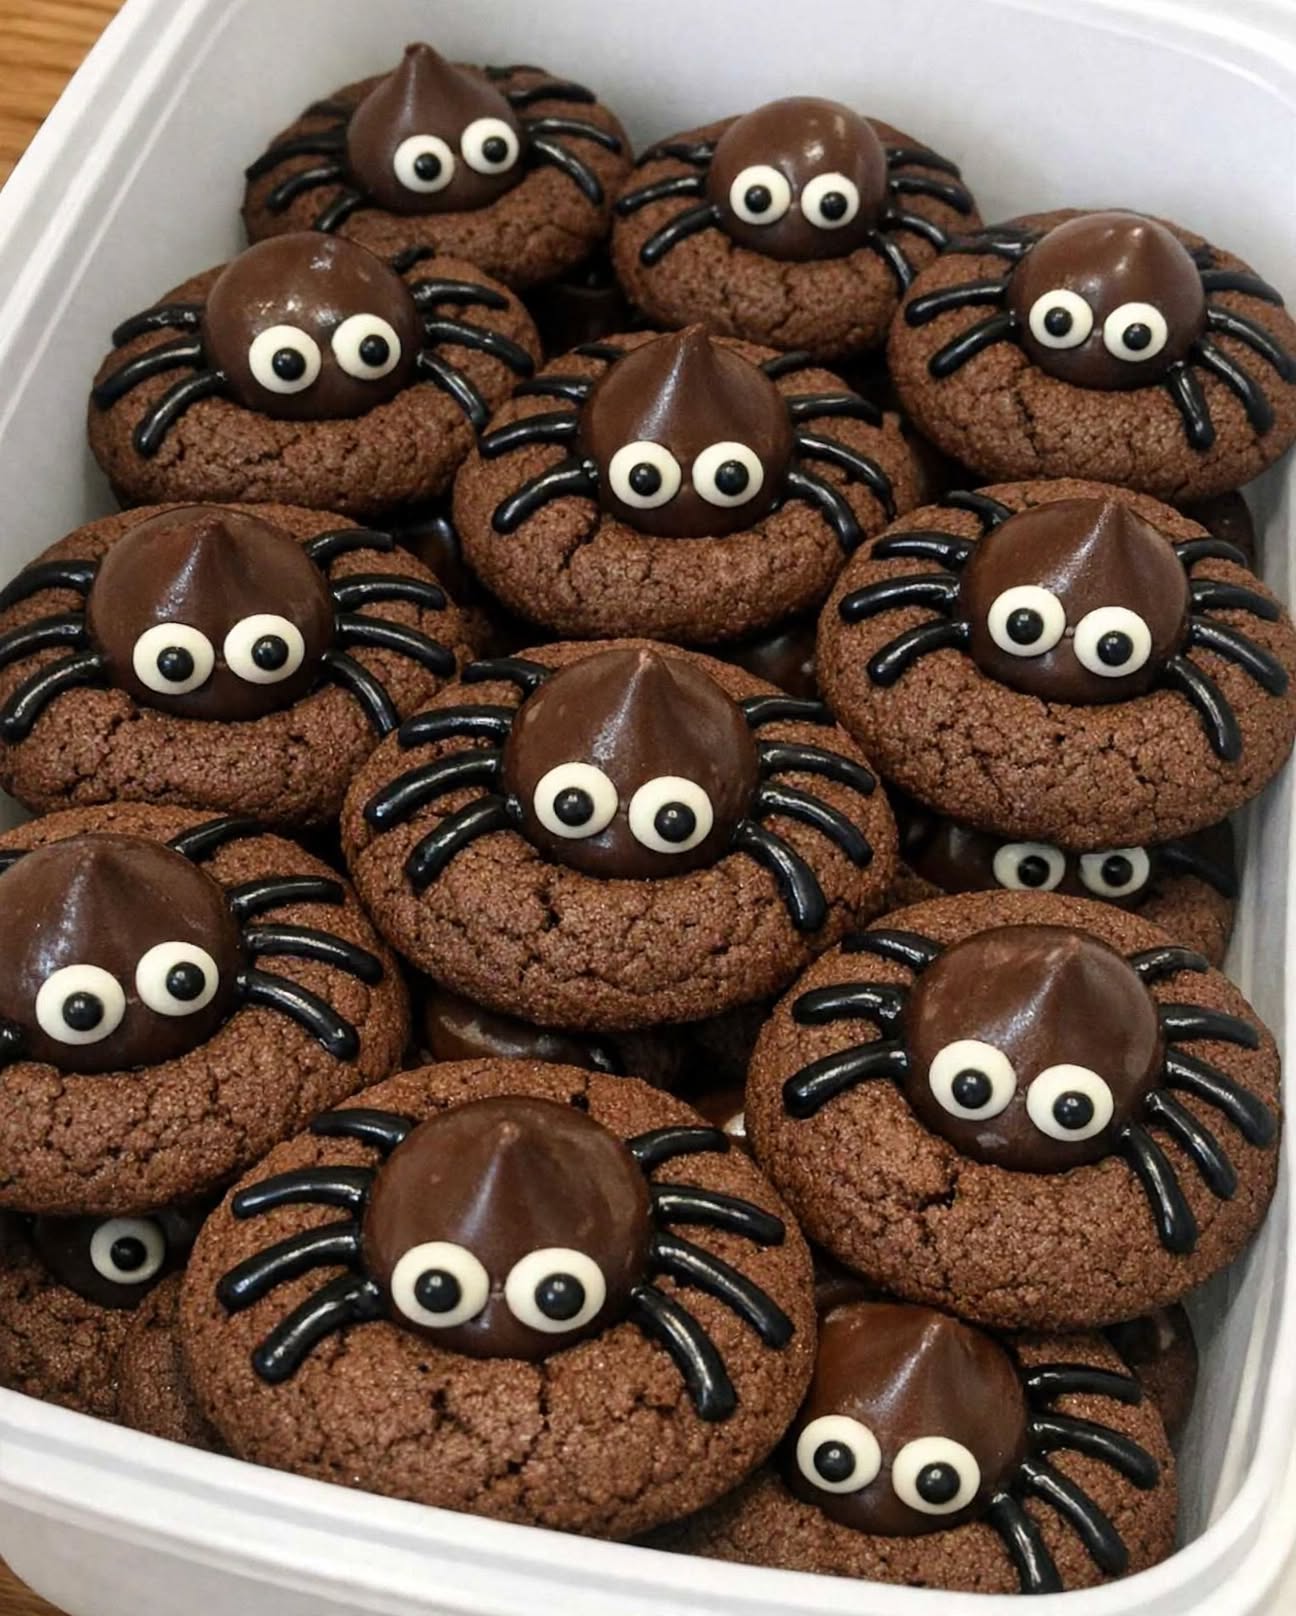
My sister brings these 4-ingredient spooky spider cookies to every October party, and the moment she sets the platter down, they practically disappear. They’re cute, chocolatey, incredibly easy to assemble, and festive enough to make any Halloween gathering feel special without spending hours in the kitchen.
These Halloween spider cookies are the perfect example of how a few simple ingredients can turn into something that looks far more impressive than the effort involved. Chocolate sandwich cookies become the base, a chocolate candy kiss creates the adorable spider body, and a little black decorating gel brings the whole spooky design to life.
Best of all, there’s no baking required. That makes these easy Halloween treats especially handy when you’re preparing several dishes for a party, school event, church gathering, hayride, or neighborhood get-together.
Serve them alongside caramel corn, popcorn balls, apple slices, brownies, or Halloween candy. Add mugs of hot cocoa or coffee for the adults and cold milk for the kids, and you have an easy seasonal dessert platter everyone will want to sample.
4-Ingredient Spooky Spider Cookies
Ingredients
– 24 chocolate sandwich cookies – These form the spider’s edible base and provide a rich chocolate flavor that pairs perfectly with the candy center. Their dark color also makes the black spider legs especially eye-catching.
– 24 chocolate candy kisses, unwrapped – Each chocolate kiss becomes the spider’s body. Its familiar shape makes it perfect for this simple Halloween transformation.
– 1/2 cup chocolate frosting – The frosting acts as edible glue, holding each candy kiss securely in the middle of the cookie while adding another layer of chocolate flavor.
– 1 tube black decorating gel – This creates the spider’s eight thin legs and gives the cookies their unmistakable spooky appearance.
How to Make Spooky Spider Cookies
1. Prepare the cookies
Line a large tray or platter with parchment paper. Arrange the chocolate sandwich cookies in a single layer, leaving enough room around each one to pipe the spider legs.
2. Add the edible glue
Place a small dollop of chocolate frosting in the center of each cookie. You only need enough to hold the candy kiss in place; too much frosting can make the candy slide.
3. Create the spider bodies
Place one unwrapped chocolate candy kiss directly onto the frosting in the center of each cookie. Press gently so it sticks without squeezing frosting over the sides.
4. Pipe the spider legs
Using the black decorating gel, carefully pipe eight thin legs extending from each candy kiss—four legs on each side.
For the most recognizable spider shape, keep the lines relatively thin and slightly curved rather than making them perfectly straight.
5. Let them set
Allow the cookies to sit for about 10 to 15 minutes, giving the frosting time to firm up. Once set, arrange them on a Halloween platter or transfer them to a covered container.
Why Everyone Loves These Halloween Spider Cookies
There’s a lot to love about these easy Halloween cookies:
– Only 4 ingredients
– No baking required
– Ready in just a few simple steps
– Fun enough for kids to help decorate
– Easy to transport to parties and gatherings
– Chocolate lovers get plenty of rich flavor
– Perfect for Halloween dessert trays
– Can be prepared ahead of time
– They look festive without requiring complicated decorating skills
The combination of a crisp chocolate cookie, creamy frosting, and a smooth chocolate candy center gives every bite plenty of satisfying chocolate flavor. The spooky spider design is what makes them especially fun.
Pro Tips for Perfect Spider Cookies
Use just a little frosting. The chocolate frosting is meant to act as glue. A small amount is enough to secure the candy kiss and will keep the spider body from sliding.
Pipe slowly. When making the eight legs, gentle pressure on the decorating gel will give you thinner, cleaner lines.
Warm the decorating gel slightly. Hold the tube in your hands for a minute before decorating. This can make the gel easier to squeeze and control.
Practice on one cookie first. If you’re unsure about the leg size or shape, decorate one cookie before doing the entire batch.
Keep the cookies cool. If your kitchen is particularly warm, refrigerate the finished cookies briefly so the frosting stays firm.
Let the kids decorate. Perfectly straight legs aren’t necessary. Wiggly, uneven spider legs actually make these treats look more playful and homemade.
Easy Variations
Want to put your own spin on these spooky spider treats?
Try peanut butter. Replace the chocolate frosting with a little peanut butter for a delicious chocolate-and-peanut-butter combination.
Use chocolate-hazelnut spread. A small spoonful adds a creamy, nutty flavor while still providing enough stickiness for the candy kiss.
Change the cookie base. Chocolate wafers, fudge cookies, or even vanilla sandwich cookies can work when you want a different look or flavor.
Make tiny spiders. Use smaller cookies and smaller chocolate candies for bite-sized Halloween party treats.
Add edible eyes. If desired, tiny candy eyes can be placed on the chocolate kiss before the frosting sets, giving the spiders an extra playful appearance.
Make-Ahead Instructions
These no-bake Halloween cookies are convenient for busy party days because they can be assembled several hours in advance.
Once decorated, keep them in a covered container in a cool area. If your kitchen is warm, refrigerate them briefly to help the frosting remain firm.
For the neatest presentation, arrange them on the serving platter shortly before your guests arrive.
What to Serve With Spider Cookies
Build a fun Halloween dessert table by surrounding the cookies with:
– Caramel corn
– Popcorn balls
– Apple slices
– Brownie bites
– Chocolate-covered pretzels
– Halloween candy
– Pumpkin muffins
– Rice cereal treats
For drinks, serve them with hot cocoa, coffee, apple cider, or cold milk. A big bowl of seasonal fruit can also add something fresh alongside all the chocolate.
Frequently Asked Questions
Do spider cookies need to be baked?
No. These are no-bake spider cookies. The ingredients are simply assembled and decorated, making them especially easy for last-minute Halloween parties.
How far ahead can I make them?
You can prepare them several hours ahead and keep them covered. For the best appearance, store them somewhere cool so the frosting and decorating gel remain firm.
Can children make these cookies?
Absolutely. Children can help place the candy kisses and decorate the spider legs. Just expect every spider to have its own wonderfully unique personality!
Can I use a different frosting?
Yes. Chocolate frosting, peanut butter, or chocolate-hazelnut spread can all work as the edible adhesive.
The Easiest Spooky Treat for Your Halloween Table
These 4-ingredient spooky spider cookies prove that a memorable Halloween dessert doesn’t have to involve complicated recipes, special equipment, or hours in the kitchen. With chocolate sandwich cookies, candy kisses, frosting, and black decorating gel, you can create an entire platter of adorable little spiders in minutes.
They’re simple, inexpensive, kid-friendly, and irresistibly chocolatey—exactly the kind of seasonal treat that gets everyone reaching for one more. Whether you’re taking them to an October party, adding them to a school treat table, or making them at home with the kids, these easy spider cookies are almost guaranteed to be one of the first things to disappear.