
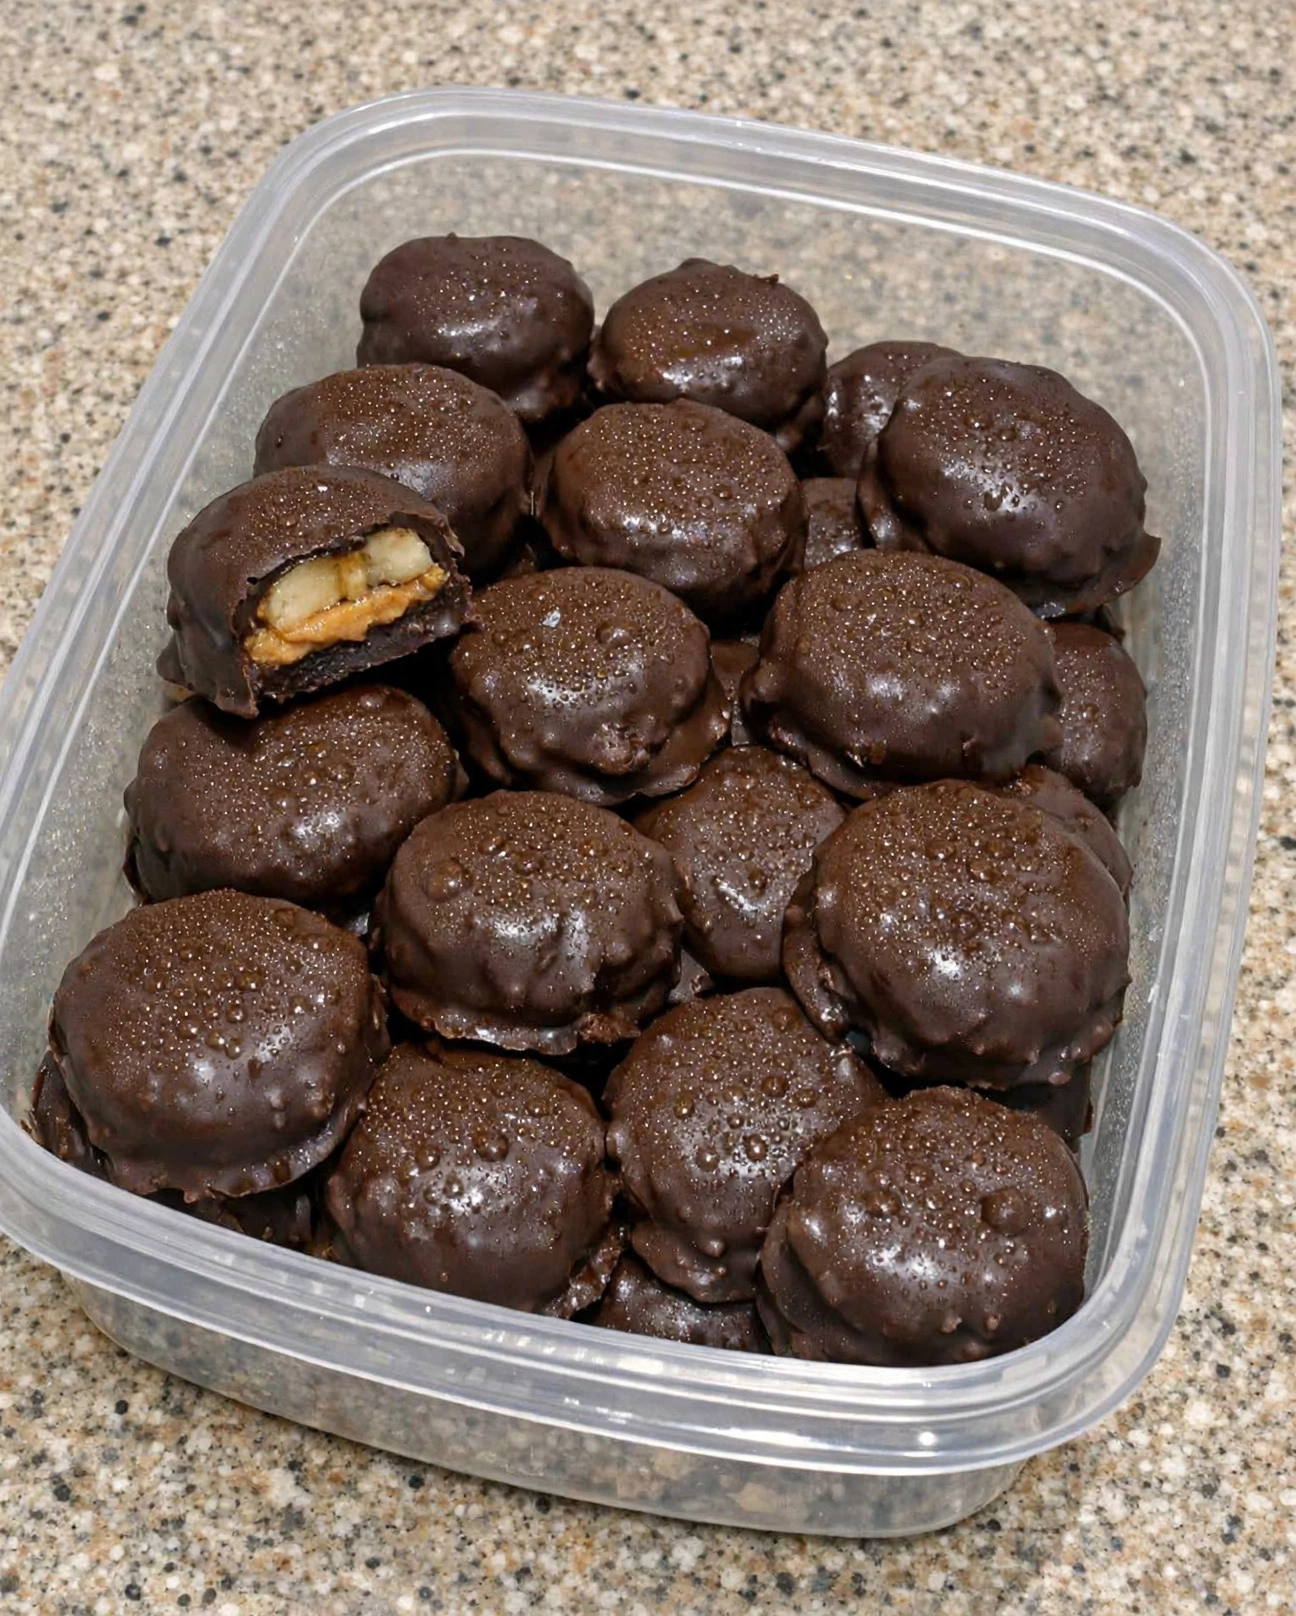
3-Ingredient Chocolate Covered Banana Bites – An Easy Frozen Treat Everyone Loves
Aunt Mary swears by this 3-ingredient chocolate covered banana bites recipe, and after watching an entire tray disappear at a summer pool party, I finally understood why! These little frozen treats combine sweet, creamy bananas, rich peanut butter, and a smooth dark chocolate coating to create an irresistible dessert that tastes like a chocolate-covered candy bar with a fresh, fruity twist.
The best part? You don’t need an oven, complicated equipment, or a long list of ingredients. With just three simple ingredients, you can make a delicious homemade frozen dessert that looks beautiful on a serving tray and tastes like something you’d find in a specialty chocolate shop.
These chocolate peanut butter banana bites are perfect for hot summer afternoons, birthday parties, backyard barbecues, poolside gatherings, after-school snacks, and late-night sweet cravings. Each bite has a creamy banana center, a satisfying peanut butter layer, and a rich chocolate shell that makes every mouthful feel special.
Whether you’re preparing a quick family treat or looking for an easy dessert to share with friends, this old-fashioned favorite proves that the simplest recipes are often the most memorable.
Why You’ll Love These 3-Ingredient Chocolate Banana Bites
– Only 3 ingredients: Bananas, peanut butter, and dark chocolate are all you need to make this simple homemade treat.
– No baking required: Skip the oven and let your freezer do most of the work.
– Sweet, creamy, and chocolatey: The natural sweetness of bananas balances the nutty peanut butter and rich chocolate coating.
– Perfect for making ahead: Prepare a batch in advance and keep it frozen until dessert time.
– Easy to customize: Try different types of chocolate or your favorite creamy or crunchy peanut butter.
– Great for sharing: These bite-sized treats are easy to arrange on a platter for parties, family gatherings, and summer celebrations.
Ingredients for Chocolate Covered Banana Bites
You only need three everyday ingredients to make these delicious frozen chocolate banana bites.
1. Bananas – 2 medium
Bananas provide the naturally sweet, soft center that makes these bites so satisfying. When frozen, they develop a firm, creamy texture that pairs beautifully with peanut butter and chocolate.
Choose ripe but firm bananas. They should have a lovely yellow peel and be sweet without becoming overly soft or mushy. Firm bananas are easier to slice, stack, and dip into melted chocolate.
Cutting them into even 1/2-inch rounds helps the sandwiches hold together and makes each bite easier to eat.
2. Peanut Butter – 1/3 cup
Peanut butter adds a rich, nutty flavor and a creamy middle layer between the banana slices. It also gives the dessert its classic chocolate-and-peanut-butter taste, making these little bites feel wonderfully indulgent.
Creamy peanut butter is ideal if you want a smooth filling that spreads easily. However, crunchy peanut butter works beautifully when you prefer a little extra texture.
Use a small amount between each pair of banana slices. Too much filling can cause the sandwiches to slide apart during dipping.
3. Dark Chocolate – 6 ounces
Dark chocolate creates the delicious outer shell that makes these frozen treats so irresistible. Its slightly bitter, deep cocoa flavor balances the sweetness of the bananas and the richness of the peanut butter.
Chopped dark chocolate or broken chocolate-bar pieces melt smoothly when heated gently. Choose a chocolate you enjoy eating on its own, because its flavor will shine through in every bite.
For a sweeter dessert, use semisweet chocolate. For a richer, more intense cocoa flavor, choose a higher-cacao dark chocolate.
How to Make 3-Ingredient Chocolate Covered Banana Bites
Follow these simple steps to create perfectly layered banana sandwiches covered in a delicious chocolate shell.
Step 1: Prepare the Bananas
Line a freezer-safe tray or plate with parchment paper. Peel the bananas and slice them into even rounds about 1/2 inch thick.
Try to keep the slices similar in size so the finished bites look neat and freeze evenly.
Step 2: Make the Peanut Butter Banana Sandwiches
Arrange half of the banana slices on the prepared tray. Spread a small amount of peanut butter over each slice, keeping the filling away from the edges.
Place another banana slice on top and gently press to create a little sandwich.
Repeat until you’ve used the banana slices. Avoid pressing too firmly, because the banana can become slippery and the peanut butter may squeeze out.
Step 3: Freeze Until Firm
Place the tray in the freezer for 20–30 minutes.
This step is important because firm banana sandwiches are much easier to dip into melted chocolate. Chilling also helps the bites hold their shape while you work.
Step 4: Melt the Dark Chocolate
Place the chopped dark chocolate in a microwave-safe bowl. Microwave in short intervals of approximately 15–20 seconds, stirring after each interval until the chocolate is smooth.
Alternatively, melt the chocolate in a heatproof bowl set over a saucepan of gently simmering water. Make sure the bottom of the bowl does not touch the water, and keep moisture away from the chocolate.
Stir gently until no lumps remain. Let the chocolate cool slightly if it feels excessively hot, while keeping it fluid enough for dipping.
Step 5: Dip the Banana Bites in Chocolate
Remove the chilled banana sandwiches from the freezer.
Using a fork, carefully dip each sandwich into the melted chocolate, turning it to coat the outside. Lift it out and allow the excess chocolate to drip back into the bowl.
Return each coated bite to the parchment-lined tray.
Work in small batches if necessary so the remaining banana sandwiches stay cold. If you prefer a lighter chocolate coating, dip each bite only partially or drizzle chocolate over the top instead.
Step 6: Freeze Until the Chocolate Sets
Return the tray to the freezer for another 15–20 minutes, or until the chocolate coating is firm.
Once set, transfer the banana bites to an airtight, freezer-safe container. If stacking them, place parchment paper between the layers to prevent sticking.
Keep the bites frozen until you’re ready to serve them.
Step 7: Serve and Enjoy
Arrange the frozen chocolate banana bites on a chilled plate or serving tray. Let them stand at room temperature for approximately 1–2 minutes before serving if you’d like the banana centers to soften slightly.
Enjoy them straight from the freezer for a firmer texture, or allow them to soften just a little for a creamier middle.
Either way, these easy frozen chocolate peanut butter banana bites are a simple treat that can disappear from the plate surprisingly quickly!
Pro Tips for Perfect Chocolate Covered Banana Bites
Choose the right bananas. Ripe but firm bananas are easier to slice and handle. Overripe bananas can become too soft, making the sandwiches difficult to dip.
Keep the banana sandwiches cold. Freezing them before dipping helps the chocolate set quickly and prevents the peanut butter filling from slipping out.
Melt the chocolate slowly. Chocolate can scorch if overheated. Short microwave intervals and frequent stirring help create a smooth, glossy coating.
Use a fork for dipping. A fork allows excess chocolate to drain away, creating a thinner, neater shell without using extra chocolate.
Avoid water in the melted chocolate. Even a small amount of water can cause melted chocolate to seize and become thick or grainy.
Work quickly but carefully. Keep the tray in the freezer between batches if your kitchen is warm. This helps the banana sandwiches remain firm throughout the dipping process.
Store them properly. Keep finished bites in an airtight container in the freezer. For the best flavor and texture, enjoy them within about two weeks.
Delicious Variations to Try
Although the original recipe uses only three ingredients, you can change the flavors to suit your family’s preferences.
– Crunchy peanut butter bites: Replace creamy peanut butter with crunchy peanut butter for extra texture.
– Milk chocolate banana bites: Use milk chocolate for a sweeter, milder coating.
– Extra-dark chocolate bites: Choose a higher-cacao dark chocolate for a more intense cocoa flavor.
– Chocolate-drizzled bites: Dip each sandwich halfway into chocolate or drizzle chocolate over the top for a decorative finish.
– Mini dessert bites: Use smaller banana slices and a thin layer of peanut butter to create smaller portions.
– Nut-free alternative: Replace peanut butter with a suitable sunflower seed butter and check all ingredient labels for allergy safety.
Keep in mind that substitutions may slightly change the texture, sweetness, or setting time.
What to Serve with Chocolate Covered Banana Bites
These little frozen desserts are delicious on their own, but they’re also easy to include in a larger dessert spread.
For summer parties: Serve them alongside fresh strawberries, grapes, watermelon cubes, and pineapple pieces for a colorful fruit platter.
For an afternoon snack: Pair a few bites with a cold glass of milk or an iced coffee.
For a family dessert night: Arrange them with homemade cookies, brownies, or small pieces of pound cake for a simple dessert board.
For pool parties and backyard barbecues: Place them on a chilled tray lined with parchment paper, using mini cupcake liners to keep individual bites easy to pick up.
For a refreshing after-dinner treat: Serve one or two bites straight from the freezer when you want something sweet without making a full dessert.
Because the chocolate can soften in warm weather, keep the serving tray chilled and replenish it in small batches rather than leaving the entire supply outside for an extended period.
How to Store Frozen Chocolate Banana Bites
In the freezer: Store the finished bites in an airtight, freezer-safe container with parchment paper between layers. They are best enjoyed within approximately two weeks for good flavor and texture.
Before serving: Remove only the number of bites you plan to eat. Let them soften for a minute or two if desired, then serve promptly.
Avoid repeated thawing and refreezing: The bananas can become softer and release moisture, which may affect the chocolate coating and overall texture.
These treats are designed to be served frozen, so refrigeration alone is not the best long-term storage option.
Frequently Asked Questions
Can I make chocolate covered banana bites ahead of time?
Absolutely! These treats are ideal for preparing ahead. Make them the day before a party, freeze them in an airtight container, and serve them straight from the freezer when needed.
Why are my banana bites falling apart when I dip them?
The banana sandwiches may not be cold enough, or the peanut butter layer may be too thick. Freeze the sandwiches until firm and use only a thin layer of peanut butter to help them stay together.
How do I make the chocolate coating smooth?
Melt the chocolate gently, stir frequently, and keep water away from the bowl. Use a fork to dip the frozen sandwiches and allow excess chocolate to drip off before placing them back on the tray.
Can I use milk chocolate instead of dark chocolate?
Yes! Milk chocolate makes a sweeter coating, while dark chocolate offers a deeper cocoa flavor. Choose whichever you prefer.
Do these banana bites need to stay frozen?
Yes. For the best texture, keep them in the freezer until serving. They soften as they warm up, especially in hot weather.
Are these chocolate banana bites healthy?
They contain fruit, peanut butter, and chocolate, but they are still a dessert. Their nutritional value depends on the ingredients and portion sizes. If you have a peanut allergy, use an appropriate alternative and check product labels carefully.
Final Thoughts: A Simple Three-Ingredient Treat Worth Sharing
These 3-ingredient chocolate covered banana bites prove that an unforgettable homemade dessert doesn’t need a complicated recipe or expensive ingredients. Sweet banana slices, creamy peanut butter, and rich dark chocolate come together to create a frozen treat that’s easy to prepare, simple to customize, and perfect for sharing.
From busy afternoons and family movie nights to summer pool parties and backyard gatherings, this no-bake dessert brings plenty of chocolatey goodness with very little effort.
Make a batch, keep it in the freezer, and you’ll always have a sweet little treat ready when a craving strikes. Just remember Aunt Mary’s rule: make more than you think you’ll need, because one tray may not be enough!