
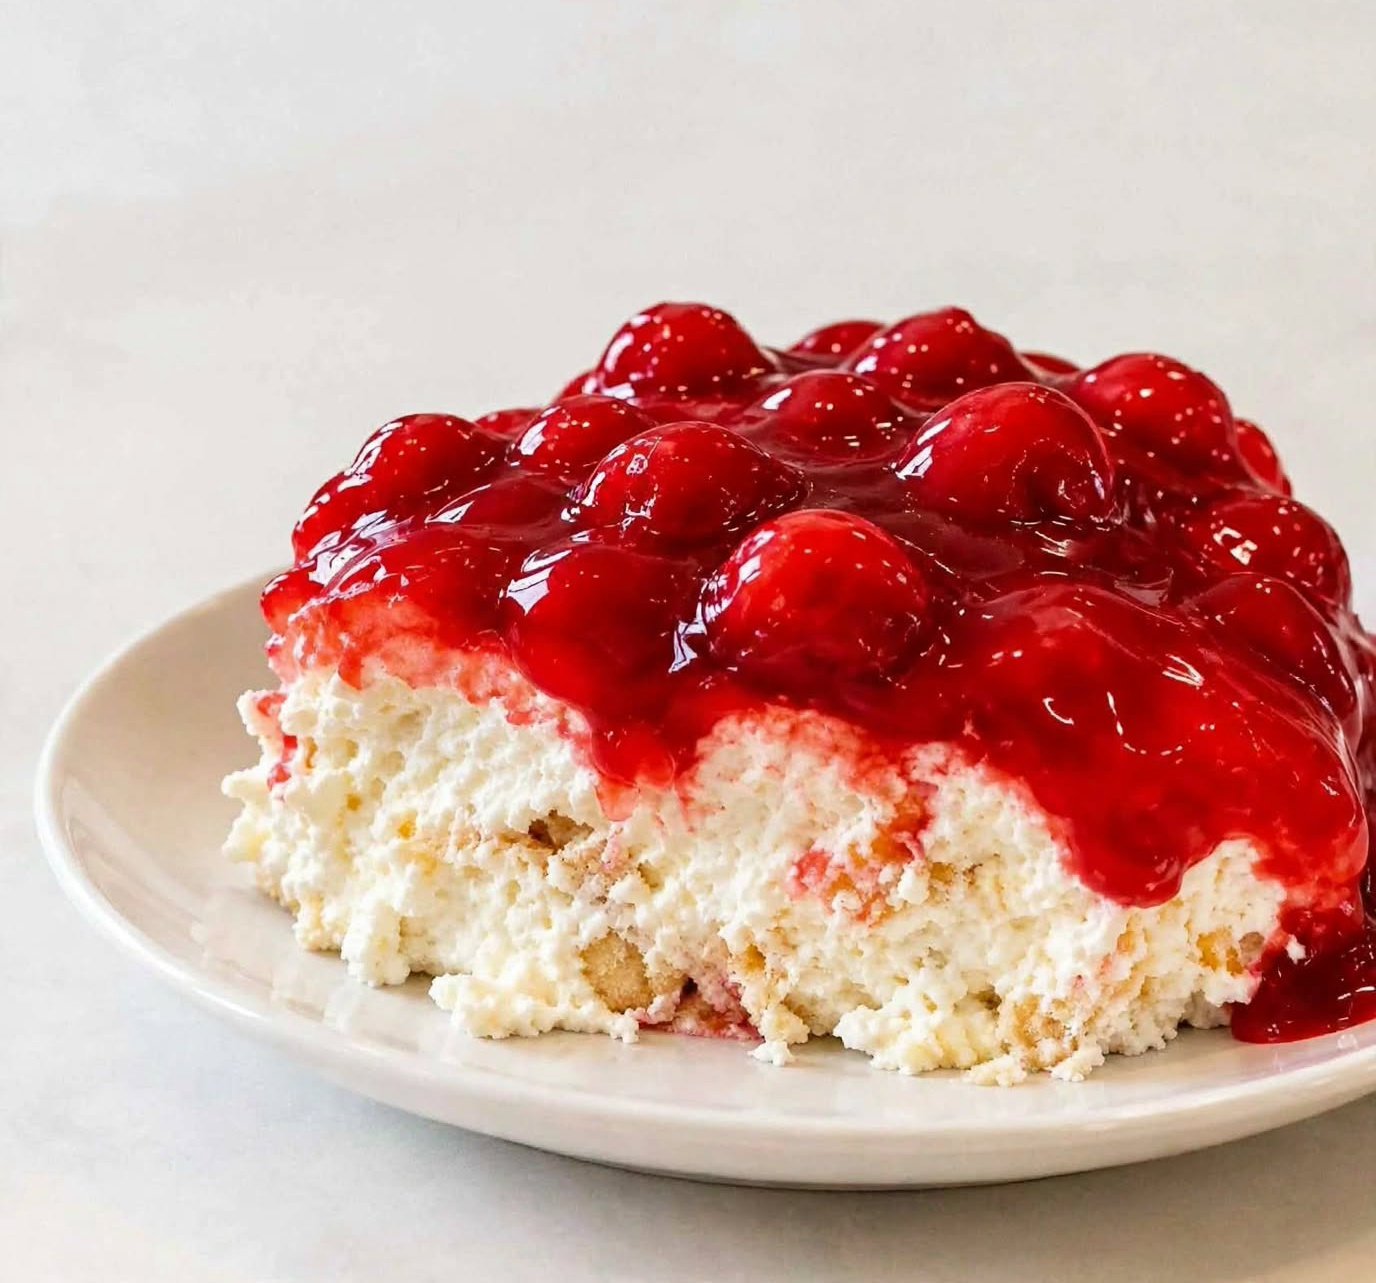
Cherries in the Snow – Easy No-Bake Cherry Cheesecake Angel Food Cake Dessert
Some desserts are simply unforgettable, and Cherries in the Snow is one of those old-fashioned treats that brings back the sweetest memories! With fluffy cubes of angel food cake, a rich and creamy cheesecake filling, and a beautiful layer of sweet cherry pie topping, this dessert is as delightful to look at as it is to eat.
This easy no-bake Cherries in the Snow dessert combines everything we love about classic family desserts. It’s light, fluffy, creamy, fruity, and wonderfully refreshing. Best of all, there’s no oven required and only a handful of simple ingredients stand between you and a dessert everyone will want seconds of.
Whether you’re preparing a holiday dessert, bringing something special to a church potluck, or looking for an easy summer treat, this cherry angel food cake dessert is guaranteed to make an impression.
Why You’ll Love This Cherries in the Snow Recipe
– No baking required: A convenient dessert that comes together without turning on the oven.
– Simple ingredients: Made with everyday grocery-store staples.
– Light and creamy texture: Angel food cake and fluffy cheesecake filling create a wonderful combination.
– Beautiful presentation: The bright red cherry topping looks stunning against the snowy white cream layer.
– Perfect for gatherings: Makes 12 generous servings, making it ideal for holidays, potlucks, and family dinners.
– Make-ahead friendly: Prepare it the night before and let the refrigerator do the rest.
Ingredients for Cherries in the Snow
For the Creamy Cheesecake Layer
8 oz cream cheese, softened
The foundation of the creamy filling. Cream cheese provides a rich, slightly tangy cheesecake flavor that balances the sweetness of the cherries and powdered sugar. Allow it to soften at room temperature for easier mixing and a smoother consistency.
1 cup powdered sugar
Powdered sugar sweetens the cream cheese while helping create a smooth, velvety filling. Its fine texture blends much more easily than regular granulated sugar.
1 teaspoon vanilla extract
Vanilla adds warmth and enhances the classic cheesecake flavor. It gives the creamy layer a delicious homemade taste.
1 container (8 oz) whipped topping, thawed
Whipped topping makes the cheesecake mixture light, airy, and fluffy. It creates the signature snowy texture that makes this dessert so special.
For the Cake Layer
1 prepared angel food cake (about 10 oz), cut into bite-sized cubes
Angel food cake provides a soft, delicate foundation that absorbs some of the creamy filling while maintaining its fluffy texture. Its mild sweetness allows the cheesecake and cherry flavors to shine.
For the Cherry Topping
2 cans (21 oz each) cherry pie filling
The star of the topping! Cherry pie filling adds beautiful color, fruity sweetness, and juicy cherries to every serving. It creates the gorgeous red layer that contrasts perfectly with the white cheesecake filling.
How to Make Cherries in the Snow
Step 1: Prepare the Cream Cheese
Place the softened cream cheese in a large mixing bowl. Using an electric hand mixer, beat until completely smooth and creamy.
Make sure there are no lumps before adding the remaining ingredients. This helps create a silky cheesecake filling.
Step 2: Add the Sugar and Vanilla
Add the powdered sugar and vanilla extract to the cream cheese.
Beat on medium speed until everything is thoroughly combined. Scrape down the sides of the bowl as needed to make sure all the ingredients are incorporated.
Step 3: Fold in the Whipped Topping
Gently fold the thawed whipped topping into the cream cheese mixture using a spatula.
Continue folding until the filling is evenly blended, light, and fluffy. Avoid overmixing because you want to preserve as much air as possible.
Step 4: Prepare the Angel Food Cake
Cut the prepared angel food cake into small, bite-sized cubes.
Arrange half of the cake cubes evenly across the bottom of a 9×13-inch baking dish. Spread them into a single layer so every serving gets plenty of fluffy cake.
Step 5: Add the First Cream Layer
Spoon half of the cheesecake mixture over the angel food cake cubes.
Gently spread it with a spatula, making sure the cream reaches the edges and fills the spaces between the cake pieces.
Step 6: Repeat the Layers
Add the remaining angel food cake cubes over the first cream layer.
Spread the remaining cheesecake mixture evenly over the cake, creating another soft, creamy layer.
Step 7: Add the Cherry Pie Filling
Open both cans of cherry pie filling and spoon the filling evenly over the top of the dessert.
Spread the cherries carefully to cover the entire surface. The bright red cherry topping creates the beautiful signature look of Cherries in the Snow.
Step 8: Refrigerate Until Set
Cover the baking dish with plastic wrap or a lid.
Refrigerate for at least 4 hours, preferably overnight. This chilling time allows the cake to absorb some of the creamy flavors while the layers become wonderfully cold and delicious.
Step 9: Slice and Serve
Once chilled, remove the dessert from the refrigerator.
Cut into squares and serve cold. Enjoy the combination of fluffy cake, creamy cheesecake filling, and sweet cherry topping in every bite!
Expert Tips for the Best Cherries in the Snow
1. Soften the cream cheese properly
Room-temperature cream cheese is much easier to beat smoothly. Cold cream cheese can leave unwanted lumps in your filling.
2. Use fully thawed whipped topping
Make sure the whipped topping has thawed in the refrigerator before folding it into the cream cheese mixture.
3. Fold gently
Use a spatula rather than aggressively mixing the whipped topping. Gentle folding helps maintain the light and airy texture.
4. Cut the cake into evenly sized cubes
Bite-sized pieces make layering easier and help distribute the angel food cake throughout the dessert.
5. Give it enough chilling time
Although four hours is the minimum, chilling overnight produces an even better texture and allows the flavors to blend beautifully.
6. Keep it refrigerated
Because this dessert contains cream cheese and whipped topping, store it covered in the refrigerator until ready to serve.
Delicious Variations to Try
– Strawberries in the Snow: Replace the cherry pie filling with strawberry pie filling for a sweet strawberry version.
– Blueberry Delight: Use blueberry pie filling for a beautiful fruity twist.
– Mixed Berry Version: Try mixed berry pie filling for a combination of fruity flavors.
– Chocolate Cherry: Sprinkle mini chocolate chips over the cherry topping for a chocolate-cherry combination.
– Almond Cherry: Add a small amount of almond extract to the cheesecake filling for a delicious cherry-almond flavor.
What to Serve with Cherries in the Snow
This easy cherry cheesecake dessert is delicious on its own, but it also pairs beautifully with other favorites.
– Holiday meals: Serve after roasted turkey, glazed ham, or a traditional family dinner.
– Potluck gatherings: Add it to a dessert table alongside brownies, cookies, and fruit salads.
– Summer cookouts: Enjoy a chilled square after grilled chicken, burgers, or barbecue.
– Afternoon treats: Pair a slice with freshly brewed coffee, hot tea, or iced tea.
– Special occasions: Serve it for Thanksgiving, Christmas, Easter, birthdays, or Sunday family dinners.
How to Store Cherries in the Snow
Refrigerator: Cover leftovers tightly and refrigerate for up to 3 days for the best texture and freshness.
Freezing: Freezing is not recommended because the whipped topping and cream cheese mixture may change texture after thawing, and the angel food cake can become soggy.
Make ahead: This dessert is perfect for preparing a day in advance. Simply assemble, cover, and refrigerate overnight. Add the cherry topping before chilling, as directed, for the easiest preparation.
Frequently Asked Questions
Can I make Cherries in the Snow the night before?
Absolutely! In fact, making it the night before is highly recommended. The overnight chilling time allows the cake to absorb some of the creamy filling and makes serving the next day incredibly convenient.
Can I use homemade angel food cake?
Yes! Homemade angel food cake works beautifully. Just make sure it has completely cooled before cutting it into cubes.
Can I use fresh cherries instead of canned cherry pie filling?
You can, but fresh cherries will need to be cooked with sugar and a thickener to create a topping similar to cherry pie filling.
Why is my cheesecake layer lumpy?
The most common reason is cream cheese that hasn’t softened enough. Allow it to reach room temperature before beating, and mix it until smooth before adding the other ingredients.
How long does Cherries in the Snow need to chill?
Allow at least 4 hours in the refrigerator. Overnight chilling is even better for developing the flavors and texture.
Cherries in the Snow Recipe
Prep Time: 15 minutes
Chill Time: 4 hours
Total Time: 4 hours 15 minutes
Servings: 12
Category: Dessert
Method: No-Bake
Cuisine: American
Final Thoughts
This Cherries in the Snow recipe is proof that you don’t need complicated ingredients or hours in the kitchen to make an unforgettable dessert. With fluffy angel food cake, a dreamy cheesecake filling, and a generous layer of sweet cherry pie topping, every bite delivers the perfect balance of creamy, fruity, and fluffy goodness.
It’s easy enough for an ordinary weeknight but pretty enough for Thanksgiving, Christmas, church suppers, and special family celebrations.
Make it ahead, keep it chilled, and watch everyone come back for another slice. One taste of this nostalgic no-bake cherry dessert, and you’ll understand why it’s a family favorite worth making again and again!