There is something undeniably comforting and deeply satisfying about a perfectly cooked piece of crispy chicken. It is a dish that evokes childhood memories, simplifies weeknight dinners, and always delivers on flavor. But achieving that coveted golden-brown, shatteringly crisp skin while keeping the meat juicy and tender can often feel like a culinary challenge reserved for professional chefs. Fear not, home cooks! This Crispy Skillet Chicken recipe is here to demystify the process and bring restaurant-quality results right into your kitchen with minimal fuss and maximum flavor.
Imagine sinking your teeth into chicken where the skin crackles with every bite, followed by succulent, moist meat that is bursting with savory goodness. That is precisely what this recipe promises. We are going back to basics, utilizing the magic of a hot skillet and a few simple techniques to transform everyday chicken pieces into a culinary masterpiece. It is a dish that is both elegant enough for a special occasion and straightforward enough for a busy Tuesday evening. Get ready to impress yourself and your family with this incredibly delicious and surprisingly easy Crispy Skillet Chicken.
The beauty of cooking chicken in a skillet lies in its efficiency and the incredible crust it develops. Unlike baking or deep-frying, pan-frying in a skillet allows for precise control over the browning process, ensuring an even, deep golden crisp without excessive oil. This method renders the fat from the chicken skin beautifully, turning it into a flavorful, delicate layer that protects the meat from drying out. This recipe focuses on bone-in, skin-on chicken thighs, which are inherently more flavorful and forgiving, guaranteeing a juicy outcome every time. Prepare to make this a staple in your dinner rotation.
Why You Will Love This Recipe
-
Shatteringly Crispy Skin: The combination of proper drying, seasoned flour, and the perfect sear creates a crust that crackles with every bite.
-
Juicy, Flavorful Meat: Bone-in, skin-on chicken thighs stay moist and tender, with rich flavor infused from garlic, rosemary, and butter.
-
Simple Technique: No deep frying or complicated equipment—just a skillet and a few basic steps.
-
One-Pan Wonder: Everything cooks in a single skillet, including the aromatic butter basting sauce.
-
Restaurant Quality at Home: Achieve results that rival your favorite restaurant with minimal fuss.
-
Versatile: Serve with any side dish for a complete, satisfying meal.
Crispy Skillet Chicken
Prep Time: 10 minutes | Cook Time: 25 to 30 minutes | Rest Time: 5 to 10 minutes | Total Time: 40 to 50 minutes
Servings: 4
This recipe delivers perfectly crispy, golden-brown chicken thighs with tender, juicy meat. A seasoned flour coating creates a flavorful crust, while butter, garlic, and rosemary infuse the chicken with aromatic richness as it cooks.
Ingredients
-
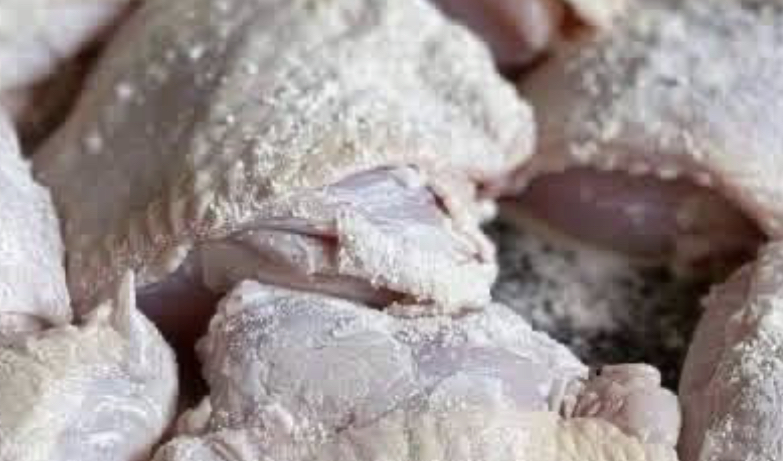
4 bone-in, skin-on chicken thighs (about 2 to 2½ pounds total)
-
½ cup all-purpose flour
-
1 tablespoon smoked paprika
-
1 teaspoon garlic powder
-
1 teaspoon onion powder
-
½ teaspoon black pepper
-
1 teaspoon salt (or to taste)
-
¼ teaspoon cayenne pepper (optional, for a kick)
-
2 tablespoons olive oil (or other high-smoke point oil like avocado or grapeseed)
-
2 tablespoons unsalted butter
-
2 sprigs fresh rosemary
-
3 cloves garlic, smashed
Instructions
Step 1: Prepare the Chicken
Remove chicken thighs from their packaging and pat them thoroughly dry with paper towels. This step is absolutely crucial for achieving crispy skin, as excess moisture prevents proper browning. Trim any excessive fat from the edges of the thighs, but leave the skin intact.
Step 2: Season the Chicken
In a shallow dish or a large plate, combine the all-purpose flour, smoked paprika, garlic powder, onion powder, black pepper, salt, and optional cayenne pepper. Mix well to ensure all spices are evenly distributed throughout the flour.
Step 3: Dredge the Chicken
One by one, dredge each chicken thigh in the seasoned flour mixture. Make sure to coat all sides evenly, gently pressing the flour onto the chicken to adhere. Shake off any excess flour. Place the coated chicken thighs on a clean plate or a wire rack set over a baking sheet, ensuring they are not touching, while you prepare the skillet.
Step 4: Heat the Skillet
Place a large, heavy-bottomed skillet (preferably cast iron or stainless steel) over medium-high heat. Allow the skillet to heat for 2 to 3 minutes until it is hot but not smoking.
Step 5: Add Oil and Sear First Side
Add the olive oil to the hot skillet. Swirl to coat the bottom. Carefully place the chicken thighs, skin-side down, into the hot oil. Ensure there is enough space between each piece; if your skillet is not large enough, cook in two batches to avoid overcrowding, which can lower the pan temperature and steam the chicken instead of searing it.
Step 6: Cook Skin-Side Down
Reduce the heat to medium. Let the chicken cook undisturbed for 8 to 12 minutes on the skin side. Do not move the chicken during this time. This extended cooking time on the skin side is essential for rendering the fat and developing that deep, golden-brown, crispy crust. You will know it is ready to flip when the skin is deeply golden and easily releases from the pan.
Step 7: Flip and Add Aromatics
Once the skin is beautifully crispy and golden, flip the chicken thighs over. Add the unsalted butter, fresh rosemary sprigs, and smashed garlic cloves to the skillet. The butter will melt and baste the chicken, and the aromatics will infuse wonderful flavor into the oil and chicken.
Step 8: Finish Cooking
Continue to cook the chicken on the second side for another 10 to 15 minutes, periodically spooning the melted butter, garlic, and rosemary over the chicken to baste it. Cook until the internal temperature of the thickest part of the chicken (without touching the bone) reaches 165°F (74°C) on an instant-read thermometer.
Step 9: Rest the Chicken
Once cooked through, remove the chicken thighs from the skillet and transfer them to a clean plate or cutting board. Tent loosely with aluminum foil and let them rest for 5 to 10 minutes before serving. This resting period allows the juices to redistribute throughout the meat, ensuring maximum tenderness and juiciness.
Step 10: Serve
Serve your Crispy Skillet Chicken immediately with your favorite side dishes.
Tips for Achieving Perfectly Crispy Skillet Chicken
-
Pat the Chicken Completely Dry:This is the most important step. Any surface moisture creates steam, preventing the skin from crisping. Use plenty of paper towels and ensure the chicken is as dry as possible before seasoning.
-
Do Not Overcrowd the Pan:Overcrowding lowers the pan temperature and causes steaming instead of searing. Cook in batches if necessary. The extra few minutes are well worth the results.
-
Use a Heavy-Bottomed Skillet: Cast iron or stainless steel skillets retain heat evenly and provide the consistent temperature needed for perfect browning.
-
Let the Chicken Cook Undisturbed:Resist the urge to move or flip the chicken early. Let it cook on the skin side for 8 to 12 minutes to allow the fat to render and the crust to develop fully. The chicken will release easily from the pan when it is ready to flip.
-
Baste for Extra Flavor: Spooning the butter, garlic, and rosemary over the chicken adds layers of flavor and helps keep the meat moist.
-
Use an Instant-Read Thermometer:For perfectly cooked chicken, rely on temperature rather than time. Chicken thighs are done when they reach 165°F (74°C) in the thickest part.
-
Rest Before Serving: Allowing the chicken to rest for 5 to 10 minutes after cooking lets the juices redistribute, ensuring tender, juicy meat.
Variations and Substitutions
-
Herb Variations: Substitute rosemary with fresh thyme, sage, or oregano for different flavor profiles.
-
Lemon Herb: Add the zest of one lemon to the flour mixture and add lemon slices to the skillet along with the butter for bright, citrusy flavor.
-
Spicy Version: Increase the cayenne pepper to ½ teaspoon or add a pinch of red pepper flakes to the butter.
-
Gluten-Free Option: Substitute the all-purpose flour with a gluten-free 1:1 baking flour blend or almond flour.
-
Chicken Breasts: Boneless, skin-on chicken breasts can be used. Adjust cooking time as they will cook more quickly. Cook skin-side down for 6 to 8 minutes, then flip and cook until internal temperature reaches 165°F.
-
Dairy-Free Option: Use ghee or a dairy-free butter alternative in place of unsalted butter.
What to Serve with Crispy Skillet Chicken
This versatile chicken pairs beautifully with:
-
Mashed Potatoes: Creamy mashed potatoes are the perfect companion for the rich, savory chicken.
-
Roasted Vegetables: Roasted Brussels sprouts, asparagus, or green beans add color and balance.
-
Simple Salad: A crisp green salad with a tangy vinaigrette cuts through the richness.
-
Rice or Risotto: Serve alongside buttery rice or creamy Parmesan risotto.
-
Crusty Bread: Perfect for sopping up the garlic-herb butter from the skillet.
Storage and Reheating
-
Refrigerator: Store leftovers in an airtight container in the refrigerator for up to 4 days.
-
Freezer: Cooked chicken can be frozen for up to 3 months. Wrap tightly in plastic wrap and then aluminum foil, or store in freezer-safe containers. Thaw overnight in the refrigerator before reheating.
-
Reheating: For best results, reheat in a 375°F oven or air fryer until the skin crisps up again. The microwave can be used but will soften the skin.
The Art of Perfectly Cooked Chicken
Achieving truly crispy skillet chicken is all about technique and attention to detail. The key principles are simple: start with dry chicken, use a hot pan, give the skin time to render and crisp, and resist the urge to move the meat before it is ready.
Bone-in, skin-on chicken thighs are the ideal cut for this method. The bone adds flavor and helps regulate cooking temperature, while the skin provides the fat needed for that crispy, golden crust. The thighs themselves are more forgiving than lean chicken breasts, staying moist and tender even with slightly longer cooking times.
This recipe honors the tradition of simple, well-executed cooking—where quality ingredients and proper technique combine to create something truly memorable.
Why This Recipe Works
The success of this Crispy Skillet Chicken lies in the combination of proper preparation and cooking technique. Patting the chicken dry removes excess moisture, allowing the skin to crisp rather than steam. The seasoned flour coating adds flavor and helps create a uniform, golden crust.
Cooking the chicken skin-side down for an extended period allows the fat to render slowly, transforming the skin into a thin, crackly layer. The hot skillet creates the Maillard reaction—the chemical process that browns food and develops deep, savory flavors.
Adding butter, garlic, and rosemary toward the end infuses the chicken with aromatic richness without burning the butter. Basting ensures even flavor distribution and adds moisture. Resting the chicken after cooking allows the juices to settle, ensuring every bite is tender and flavorful.
Nutritional Information
Please note that values are estimates and will vary based on specific ingredients and portion sizes.
Per serving (based on 4 servings):
| Nutrient | Amount |
|---|---|
| Calories | 450–500 |
| Protein | 38–42g |
| Carbohydrates | 10–12g |
| Fat | 28–32g |
| Saturated Fat | 9–11g |
| Fiber | 1–2g |
| Sugar | 1g |
| Sodium | 600–700mg |
Conclusion
Crispy Skillet Chicken is proof that you do not need complicated techniques or fancy equipment to create a truly memorable meal. With just a handful of ingredients and attention to a few key details, you can achieve chicken that is shatteringly crisp on the outside and perfectly juicy on the inside.
This is the kind of recipe that becomes a weeknight staple—the one you turn to when you want something comforting, satisfying, and reliably delicious. Whether you are cooking for family, entertaining guests, or simply treating yourself, this Crispy Skillet Chicken delivers every time.
I hope this recipe brings warmth and flavor to your table. If you give it a try, please leave a comment below. I wou