DIY Slow Sand Water Filter is a simple, low-cost way to improve water quality using natural filtration methods. This system mimics nature by passing water slowly through layers of sand and gravel, helping remove impurities, sediment, and some microorganisms. It’s a great project for learning, emergency preparedness, or off-grid living.
⚠️ Important Safety Note
While slow sand filters can improve water clarity and reduce contaminants, they do not guarantee safe drinking water. Always boil or disinfect filtered water before consuming to eliminate harmful bacteria, viruses, and parasites.
How a Slow Sand Filter Works
A slow sand filter uses multiple layers to clean water:
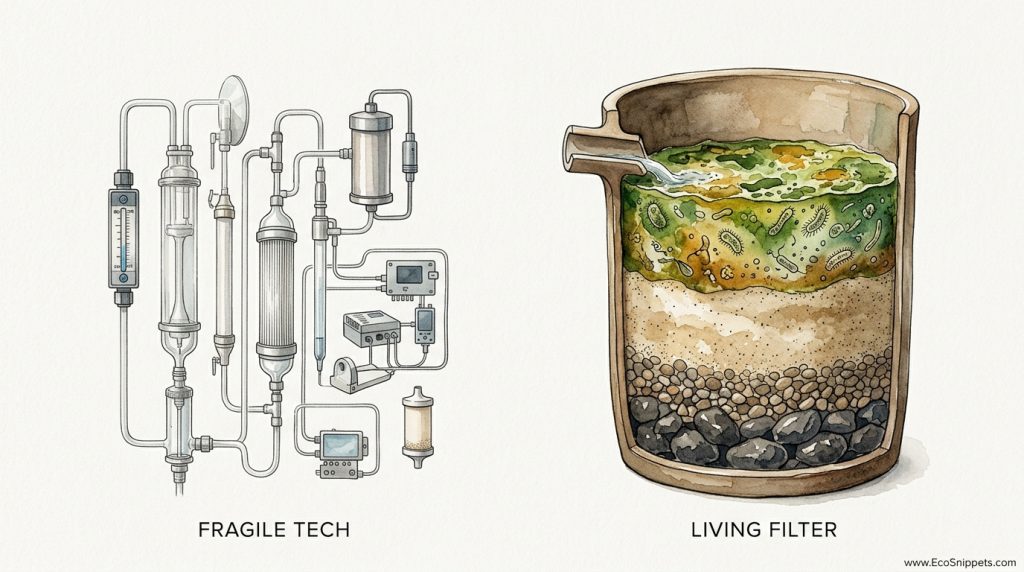
- Top layer: Traps larger debris
- Sand layer: Removes fine particles and some microbes
- Biological layer (biofilm): Naturally forms over time and helps break down contaminants
- Gravel layer: Supports drainage and prevents clogging
Water moves slowly through these layers, becoming clearer and cleaner as it passes through.
Materials You’ll Need
- A large food-grade bucket or container (with lid)
- Fine sand (clean and washed)
- Coarse sand
- Small gravel and larger stones
- Activated charcoal (optional, for odor and taste)
- Clean cloth or mesh
- Drill or tool to make a drainage hole
Step-by-Step Instructions
1. Prepare the Container
Drill a small hole near the bottom side of the bucket for water to flow out. Place a cloth or mesh inside to prevent materials from escaping.
2. Add the Bottom Layer (Drainage)
Start with a layer of large stones, followed by smaller gravel. This helps water drain properly.
3. Add Charcoal (Optional)
Add a thin layer of activated charcoal to help reduce odors and improve taste.
4. Add Sand Layers
Pour in coarse sand, then top with a thick layer of fine sand. This is the main filtration zone.
5. Add a Protective Top Layer
Place a cloth or thin layer of gravel on top to prevent disturbing the sand when pouring water.
6. Rinse the Filter
Run clean water through the filter several times until the output runs clear.
How to Use the Filter
Slowly pour untreated water into the top. Allow it to pass through the layers and collect the filtered water from the outlet.
For best results:
- Filter water slowly (don’t rush the process)
- Discard the first few batches
- Always boil or disinfect before drinking
Maintenance Tips
- Clean the top layer regularly: Remove debris buildup
- Replace sand if clogged: Over time, flow may slow down
- Keep covered: Prevent contamination from dust and insects
- Use regularly: Helps maintain the biological layer
Benefits of a Slow Sand Filter
- Low-cost and easy to build
- Uses natural materials
- Improves water clarity and taste
- Great for emergencies or outdoor use
Limitations
- Does not remove all pathogens
- Requires maintenance and time to work effectively
- Needs additional purification for safe drinking
Final Thoughts
A DIY Slow Sand Water Filter is a practical and educational way to understand natural water purification. While it’s not a complete solution for making water fully safe to drink, it’s a valuable first step in improving water quality.