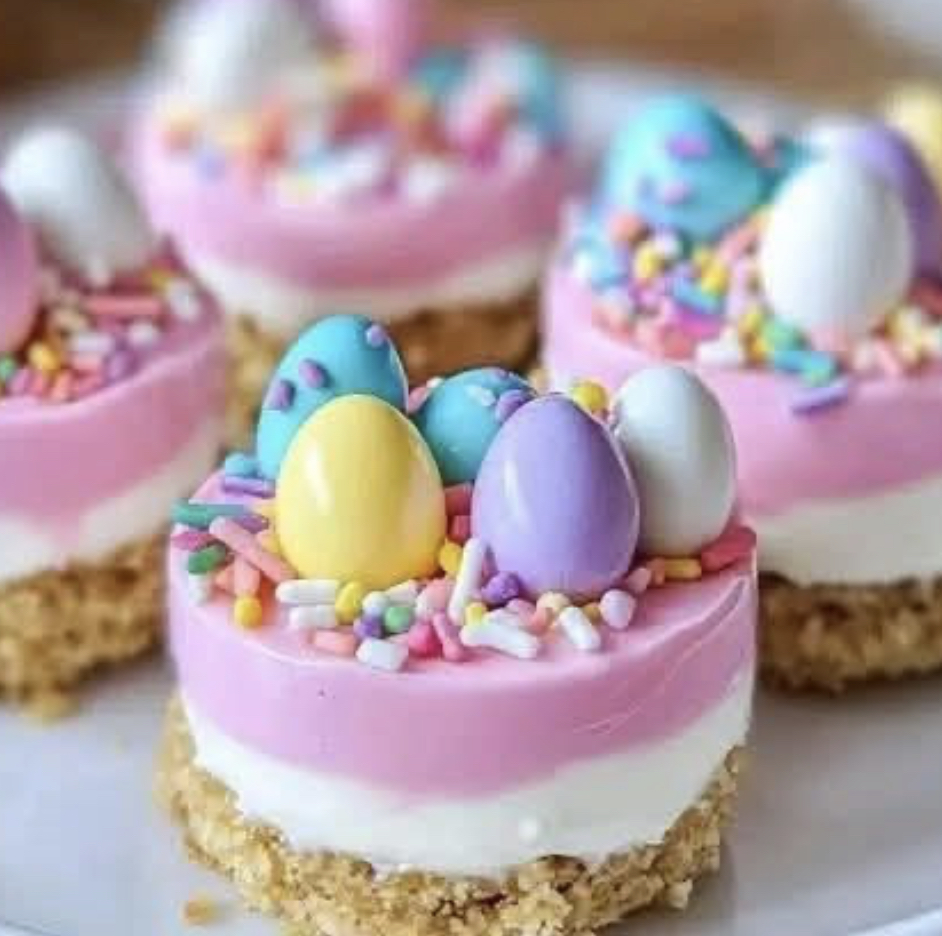
These Easter No-Bake Mini Cheesecakes are the perfect festive treat for your spring celebration. Adorable, individual-sized, and requiring absolutely no oven time, they’re ideal for holiday gatherings when you want something special without the stress. With their buttery graham cracker crust, creamy cheesecake filling, and endless possibilities for Easter-themed decorations, these little cheesecakes are guaranteed to bring smiles to faces of all ages.
The beauty of these mini cheesecakes lies in their simplicity and versatility. You can dress them up with pastel colors, top them with seasonal fruits, or add cute Easter-themed decorations. They’re light, creamy, and perfectly portioned—just right for a holiday treat.
Why This Recipe Works
This no-bake cheesecake filling achieves its perfect texture through a simple but brilliant combination. The cream cheeseprovides that signature tangy richness. The sweetened condensed milk adds sweetness and helps the filling set without baking. The whipped creamfolded in at the end creates a light, airy texture that’s utterly luxurious.
The Complete Recipe: Easter No-Bake Mini Cheesecakes
Prep Time: 20 minutes | Chill Time: 3-4 hours | Total Time: 3.5-4.5 hours | Yield:12 mini cheesecakes (standard muffin tin)
Ingredients
For the Crust:
-
1½ cups graham cracker crumbs
-
¼ cup unsalted butter, melted
-
2 tablespoons sugar
For the Cheesecake Filling:
-
8 oz cream cheese, softened
-
½ cup sweetened condensed milk
-
2 tablespoons lemon juice (freshly squeezed)
-
1 teaspoon vanilla extract
-
½ cup heavy whipping cream, cold
For Easter Decorations (Optional):
-
Pastel sprinkles
-
Mini chocolate eggs (like Cadbury Mini Eggs)
-
Fresh berries (strawberries, blueberries, raspberries)
-
Whipped cream
-
Pastel food coloring
-
Easter-themed candy decorations
Step-by-Step Instructions
1. Prepare the Crust
In a medium bowl, combine the graham cracker crumbs, melted butter, and sugar. Stir until the mixture is evenly moistened and resembles wet sand.
2. Press into Liners
Line a 12-cup standard muffin tin with paper liners. Divide the crust mixture evenly among the cups, about 1½ tablespoons per cup. Press down firmly with the back of a small glass or a spoon to create a compact, even layer. Place the muffin tin in the refrigerator to set while you prepare the filling.
3. Make the Cheesecake Filling
In a large bowl, beat the softened cream cheese with an electric mixer until smooth and creamy. Gradually beat in the sweetened condensed milk, lemon juice, and vanilla extract until well combined and smooth.
4. Whip the Cream
In a separate bowl, beat the cold heavy whipping cream until stiff peaks form.
5. Fold Together
Gently fold the whipped cream into the cream cheese mixture until no white streaks remain and the filling is light and airy. Be gentle—you want to maintain the volume from the whipped cream.
6. Fill the Cups
Remove the muffin tin from the refrigerator. Divide the cheesecake filling evenly among the cups, smoothing the tops with a small spatula or the back of a spoon.
7. Chill
Refrigerate the mini cheesecakes for at least 3 to 4 hours, or until firm and fully set. For best results, chill overnight.
8. Decorate and Serve
Just before serving, decorate your mini cheesecakes with your choice of Easter-themed toppings. Remove the paper liners and serve chilled.
Pro Tips for Perfect Mini Cheesecakes
-
Room Temperature Cream Cheese:Ensure your cream cheese is fully softened to room temperature for a smooth, lump-free filling.
-
Press Crust Firmly: Press the crust down very firmly—this prevents it from crumbling when you remove the liners.
-
Chill Thoroughly: Don’t rush the chilling time. These need at least 3 to 4 hours to set properly.
-
Easy Removal: If the cheesecakes are difficult to remove from the liners, let them sit at room temperature for 5 to 10 minutes.
-
Make Ahead: These can be made up to 2 days in advance and decorated just before serving.
Easter Decoration Ideas
-
Pastel Swirls: Divide the filling into portions and tint with pastel food coloring (pink, yellow, lavender, mint). Layer or swirl for a beautiful effect.
-
Mini Egg Topping: Press a few mini chocolate eggs into the top of each cheesecake before chilling.
-
Bird’s Nest: Top with shredded coconut tinted green and place a few mini eggs in the center.
-
Berry Beautiful: Top with fresh raspberries, blueberries, or sliced strawberries.
-
Whipped Cream Flowers: Pipe small rosettes of whipped cream and top with a single small candy.
-
Chocolate Drizzle: Drizzle with melted white or milk chocolate and sprinkle with pastel sprinkles.
Delicious Variations
-
Lemon Easter Cheesecakes: Add 1 tablespoon of lemon zest to the filling for extra brightness.
-
Chocolate Easter: Add 2 tablespoons of cocoa powder to the filling for chocolate cheesecakes.
-
Strawberry Swirl: Swirl in strawberry jam or puree before chilling.
-
Coconut Easter: Fold in ½ cup of toasted coconut flakes.
-
Oreo Crust: Substitute the graham crackers with crushed Oreos for a cookies-and-cream version.
Storage
-
Refrigerator: Store covered in the refrigerator for up to 4 days.
-
Freezer: These mini cheesecakes freeze beautifully for up to 2 months. Freeze in a single layer, then transfer to a freezer container. Thaw overnight in the refrigerator before serving and decorating.
Conclusion: Little Bites of Easter Joy
Easter No-Bake Mini Cheesecakes are the perfect way to celebrate spring. They’re adorable, delicious, and so easy to make that you can involve the whole family in decorating. The creamy, tangy cheesecake filling paired with the buttery crust is simply irresistible, and the festive decorations make them the star of any Easter dessert table.
Whether you’re hosting a big Easter brunch or simply want to create something special for your family, these mini cheesecakes deliver. They’re proof that the most memorable treats don’t have to be complicated—just made with love and a little bit of creativity.