Fried cornmeal mush is more than a recipe; it’s a direct line to the soul of hearty, frugal, and deeply satisfying home cooking. Originating as a practical way to preserve and repurpose leftover cooked cereal, this dish has earned its place as a beloved staple in Midwestern and Southern kitchens. By transforming a simple pot of cornmeal porridge into golden, crispy-edged slices through the magic of chilling and frying, it creates a textural masterpiece—creamy in the center, crackly on the outside. It is the ultimate culinary chameleon, effortlessly bridging the gap between sweet breakfast and savory dinner, proving that the humblest ingredients can yield the most extraordinary comfort.
The Alchemy of Texture: From Mush to Magic
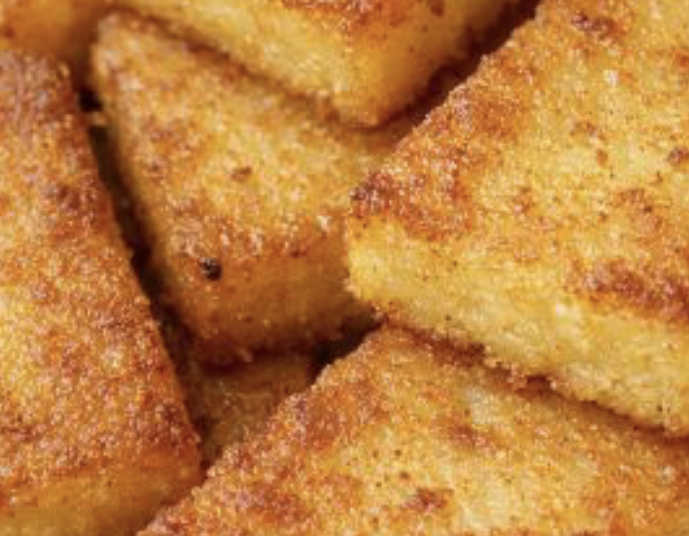
The genius of fried cornmeal mush lies in its two-stage process, each essential for achieving its signature contrast. The first stage involves cooking cornmeal with water and salt into a thick porridge, or “mush.” Pouring this into a loaf pan to chill is not merely for convenience; it’s a crucial step that allows the mixture to set into a firm, sliceable loaf as the cornmeal’s starches retrograde. This firm texture is what makes the second stage—pan-frying—so successful. When the cold slices hit the hot skillet, the exterior sears almost instantly, forming a delicious, golden crust that locks in the soft, creamy interior. This transformative process turns a modest grain into a versatile canvas, ready to be paired with everything from maple syrup to hot sauce.
The Complete Recipe: Fried Cornmeal Mush
Prep Time: 10 minutes (plus 4+ hours to chill) | Cook Time: 20 minutes | Total Time: 4.5+ hours (mostly hands-off) | Servings: 4-6
Ingredients
For the Mush:
-
3 cups water, divided
-
1 cup yellow cornmeal (medium or coarse grind preferred)
-
1 teaspoon kosher salt
-
1 tablespoon unsalted butter (optional, for richness)
For Frying & Serving:
-
2-3 tablespoons neutral oil (like canola or avocado), bacon fat, or butter for frying
-
Sweet Toppings: Maple syrup, honey, fruit compote, powdered sugar, fresh berries, whipped cream.
-
Savory Toppings: Fried eggs, crispy bacon or sausage, hot sauce, salsa, grated cheese, sautéed greens.
Step-by-Step Instructions
1. Prepare the Pan & Mix the Cornmeal:
-
Lightly grease a standard 9×5-inch loaf pan, 8×8-inch square baking dish, or a container with a lid.
-
In a medium bowl, whisk together 1 cup of cold water and the 1 cup of cornmeal until smooth. This “slurry” prevents lumps when added to boiling water.
2. Cook the Mush:
-
In a medium saucepan, bring the remaining 2 cups of water and the 1 teaspoon of salt to a gentle boil over medium-high heat.
-
Once boiling, reduce the heat to low. Slowly pour the cornmeal slurry into the boiling water in a thin stream, whisking constantly and vigorously.
-
Continue to cook, stirring frequently with a wooden spoon, for 5-8 minutes. The mixture will become very thick and pull away from the sides of the pan. Stir in the optional tablespoon of butter for extra flavor.
-
Immediately pour the hot cornmeal mush into the prepared loaf pan, smoothing the top with a spatula or the back of a spoon.
3. Chill Until Firm:
-
Let the mush cool at room temperature for about 30 minutes, then cover with plastic wrap or a lid.
-
Refrigerate for at least 4 hours, or preferably overnight, until it is completely firm and set. This step cannot be rushed.
4. Slice and Fry:
-
Turn the firm loaf of mush out onto a cutting board. Slice it into ½ to ¾-inch thick slices.
-
Heat 1-2 tablespoons of oil or fat in a large skillet (cast iron is ideal) over medium-high heat.
-
Once the oil is shimmering, carefully add the slices in a single layer, without crowding the pan. Fry for 4-6 minutes per side, until deeply golden brown and crispy on both edges.
-
Transfer to a paper towel-lined plate to drain briefly. Add more oil to the pan as needed for subsequent batches.
5. Serve Immediately:
-
Serve the slices hot and crispy, topped as desired for a sweet or savory meal.
Chef’s Notes for Perfect Results Every Time
-
Cornmeal Choice: Yellow cornmealoffers the classic flavor and color, but white cornmeal works too. A medium or coarse grind provides the best traditional texture. Avoid instant or “quick-cooking” varieties, as they don’t set as firmly.
-
The Key to No Lumps: Creating the cold water slurry is the single most important tip for smooth mush. Pouring dry cornmeal directly into boiling water is a guaranteed path to lumps.
-
Chill Time is Non-Negotiable: For clean slices that hold their shape in the skillet, the mush must be thoroughly chilled and firm. Overnight is best.
-
Frying for Optimal Crisp: Use a well-heated, heavy-bottomed skillet. Do not move the slices for the first few minutes of frying to allow a proper crust to form. For extra crispness, a combination of oil and butter works wonderfully.
-
Make-Ahead & Storage: The cooked, chilled loaf will keep tightly wrapped in the refrigerator for up to 5 days, making it perfect for meal prep. You can also wrap individual slices in plastic and freeze them for up to 3 months; fry directly from frozen, adding a few minutes to the cooking time.
-
Serving Inspiration: For the ultimate sweet-savory brunch, serve crispy slices with a fried egg on top, a side of bacon, and a drizzle of maple syrup. For dinner, use them as a base for hearty chili or a thick stew in place of cornbread.
Conclusion: A Lesson in Resourceful Cooking
Fried cornmeal mush stands as a beautiful testament to resourceful, no-waste cooking. It exemplifies how patience and simple technique can elevate a basic pantry staple into a dish with incredible textural complexity and versatility. It teaches us that some of the most comforting foods are not about exotic ingredients, but about the care and tradition embedded in their preparation. Each crispy, golden slice is a bite of history and heart, offering sustained nourishment and the profound comfort that comes from food made with intention. It’s a recipe that deserves to be passed down, enjoyed, and celebrated in any home where simple, honest cooking is valued.