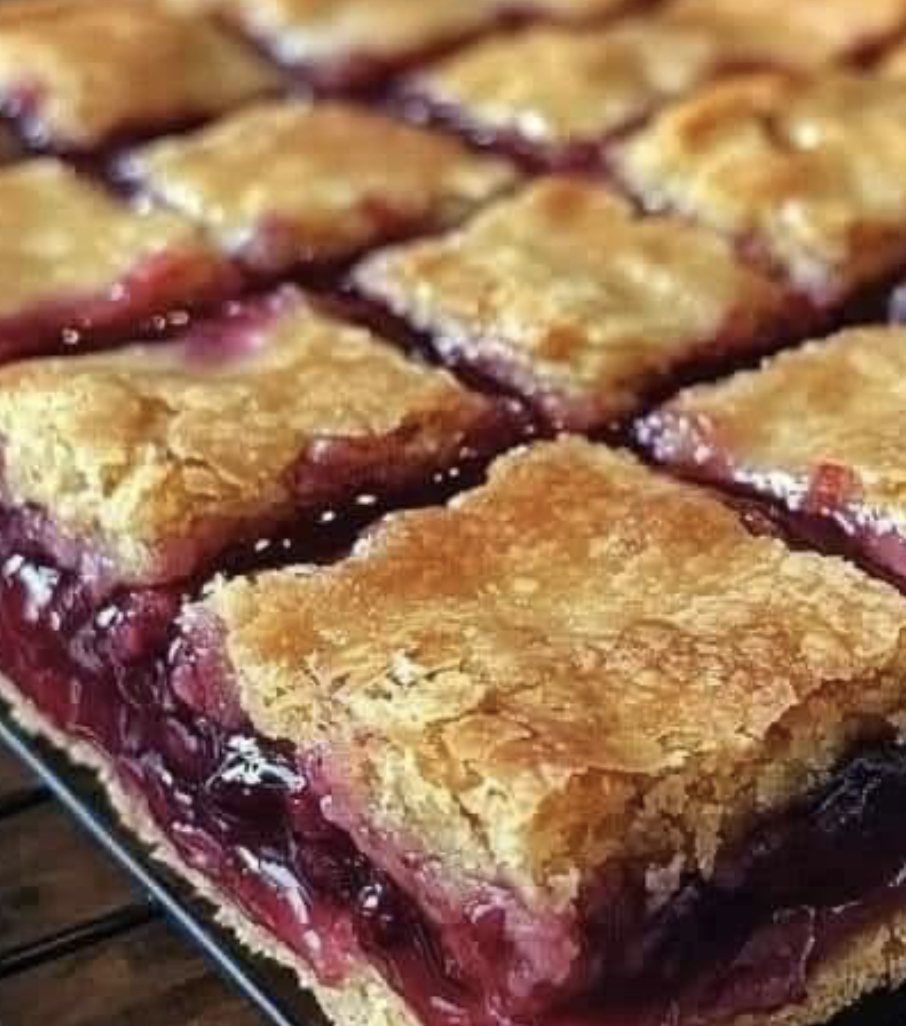
If you love the taste of homemade cherry pie but dread rolling out pie dough, these Homemade Cherry Pie Bars are your perfect solution. They offer all the flavor of a classic cherry pie in an easier, sliceable dessert bar form — no rolling pins required!
These bars feature a buttery crust and crumble topping made from the same dough, a vibrant homemade cherry filling, and a drizzle of almond glaze that ties everything together. They’re perfect for potlucks, holiday trays, or just a weekend baking project.
Why You’ll Love These Cherry Pie Bars
-
No-Pie-Crust Hassle – The same dough makes both the base and the crumbly topping.
-
Versatile Cherry Filling – Works with fresh or frozen sour cherries.
-
Easy Almond Glaze – A simple touch that adds big flavor.
-
Make-Ahead Friendly – Perfect once fully cooled and even better the next day.
Ingredients You’ll Need
For the Crust & Topping:
-
1 ½ cups all-purpose flour (188g), measured by spoon and leveled
-
1 cup old-fashioned rolled oats (85g), plus 2 extra tablespoons (11g) separated
-
½ cup packed brown sugar (100g), light or dark
-
1 teaspoon baking powder
-
1 teaspoon lemon zest
-
⅛ teaspoon salt
-
10 tablespoons unsalted butter (142g), melted
-
1 teaspoon pure vanilla extract
For the Cherry Filling:
-
1 ½ tablespoons cornstarch (11g)
-
3 ½ cups frozen sour cherries (525g), unthawed
-
½ cup granulated sugar (100g)
-
1 teaspoon fresh lemon juice
-
¼ teaspoon almond extract
For the Almond Icing (Optional):
-
1 cup powdered sugar (120g)
-
2 tablespoons milk
-
¼ teaspoon almond extract
How to Make Homemade Cherry Pie Bars
Step 1 — Make the Cherry Filling
In a medium saucepan, combine the cherries, sugar, lemon juice, and cornstarch.
Cook over medium heat, stirring frequently, until the mixture thickens and becomes glossy — about 5–8 minutes.
Remove from heat, stir in almond extract, and let cool.
Step 2 — Prepare the Crust and Topping
In a large bowl, whisk together the flour, oats, brown sugar, baking powder, lemon zest, and salt.
Pour in the melted butter and vanilla extract, and mix until crumbly.
Press two-thirds of this mixture into the bottom of a greased or parchment-lined 9×13-inch baking dish.
Set the remaining one-third aside for the topping.
Step 3 — Assemble the Bars
Spread the cooled cherry filling evenly over the pressed crust.
Sprinkle the reserved crumb topping over the cherries.
Step 4 — Bake
Bake at 350°F (175°C) for 40–45 minutes, or until the top is golden brown and the filling is bubbling slightly at the edges.
Let cool completely — about 2–3 hours — before adding icing and cutting into bars.
Step 5 — Make the Almond Icing (Optional)
Whisk together powdered sugar, milk, and almond extract until smooth.
Drizzle over the cooled bars before slicing.
Pro Tips
-
Do not skip cooling time — it helps the bars set for clean slicing.
-
Frozen cherries work perfectly — no need to thaw before cooking.
-
Almond glaze is optional but recommended — it complements the cherries beautifully.
Storage
Store the cherry pie bars in an airtight container at room temperature for up to 2 days or refrigerate for up to 5 days. They also freeze well for up to 2 months.
Final Thoughts
Homemade Cherry Pie Bars deliver classic pie flavor with none of the fuss. Whether you’re baking for a crowd, a special occasion, or just to enjoy with coffee, these bars are a guaranteed hit. The tart cherry filling, buttery crumb topping, and almond glaze make every bite memorable.