There is something truly special about an old fashioned chocolate pie. It is the kind of dessert that evokes memories of Sunday dinners, holiday gatherings, and recipes passed down through generations. With its silky, rich chocolate filling nestled in a flaky pie crust and topped with a cloud of whipped cream, this pie is the epitome of classic comfort.
This recipe stays true to tradition, using simple ingredients like sugar, cocoa powder, cornstarch, and egg yolks to create a smooth, velvety pudding-like filling that sets beautifully in a pre-baked pie crust. It is not overly sweet, deeply chocolatey, and utterly irresistible. Whether you are making it for a special occasion or simply because you are craving a taste of nostalgia, this old fashioned chocolate pie is sure to become a favorite.
Why You Will Love This Recipe
-
Classic Chocolate Flavor: Rich, smooth, and deeply satisfying.
-
Simple Ingredients: Made with pantry staples you likely already have.
-
Silky Smooth Texture: A stovetop pudding-style filling that sets to perfection.
-
No-Bake Filling: The filling comes together on the stovetop, then chills in the refrigerator.
-
Make-Ahead Friendly: Perfect for preparing a day in advance.
-
Crowd-Pleasing: A timeless dessert that everyone loves.
Old Fashioned Chocolate Pie
Prep Time: 15 minutes | Cook Time: 10 to 15 minutes | Chill Time: 4 hours or overnight | Total Time: 4½ to 5 hours
Servings: 8
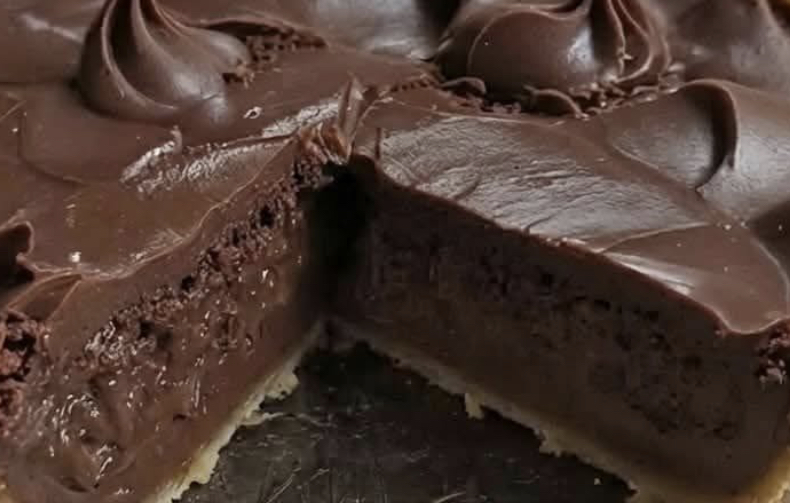
This classic chocolate pie features a silky, rich chocolate filling in a flaky pie crust. It is the perfect make-ahead dessert for any occasion.
Ingredients
For the Filling:
-
1 (9-inch) baked pie crust
-
1½ cups granulated sugar
-
⅓ cup unsweetened cocoa powder
-
⅓ cup cornstarch
-
¼ teaspoon salt
-
3 large egg yolks, lightly beaten
-
2½ cups whole milk
-
2 teaspoons vanilla extract
-
2 tablespoons unsalted butter
For Serving (Optional):
-
Whipped cream
-
Chocolate shavings
Instructions
Step 1: Prepare the Pie Crust
Pre-bake your 9-inch pie crust according to your recipe or package directions. Let it cool completely before filling.
Step 2: Combine Dry Ingredients
In a medium saucepan, whisk together the sugar, cocoa powder, cornstarch, and salt until no lumps remain.
Step 3: Add Wet Ingredients
In a separate bowl, whisk the egg yolks. Gradually whisk in the milk until well combined. Slowly pour the milk mixture into the dry ingredients, whisking constantly to prevent lumps.
Step 4: Cook the Filling
Place the saucepan over medium heat. Cook, whisking constantly, until the mixture thickens and begins to bubble, about 5 to 7 minutes. Continue to cook for 1 to 2 minutes more, whisking constantly, until the pudding is thick and smooth. Remove from heat.
Step 5: Add Butter and Vanilla
Stir in the butter and vanilla extract until the butter is completely melted and the filling is smooth.
Step 6: Fill the Crust
Pour the hot chocolate filling into the cooled pie crust. Spread evenly with a spatula. Press a piece of plastic wrap directly onto the surface of the filling to prevent a skin from forming.
Step 7: Chill
Refrigerate the pie for at least 4 hours, or preferably overnight, until the filling is completely set and firm.
Step 8: Serve
Remove the plastic wrap. Top with whipped cream and chocolate shavings if desired. Slice and serve chilled.
Tips for the Perfect Chocolate Pie
-
Use Whole Milk: Whole milk creates the richest, creamiest filling. Lower-fat milks may result in a thinner consistency.
-
Whisk Constantly: Constant whisking prevents lumps and ensures a smooth, silky filling. Do not walk away from the stove.
-
Cook Until Thickened: The filling should be thick enough to hold its shape when spooned. It will continue to set as it chills.
-
Press Plastic Wrap on Surface:Placing plastic wrap directly on the hot filling prevents a skin from forming as it cools.
-
Chill Thoroughly: The pie needs at least 4 hours to set properly. Overnight chilling is even better for a firm, sliceable pie.
-
Use a Good Quality Cocoa Powder:The flavor of the pie comes largely from the cocoa powder, so use a brand you enjoy. Dutch-processed cocoa will give a smoother, less acidic flavor.
Variations and Additions
-
Meringue Topping: Top the pie with a fluffy meringue instead of whipped cream for a classic diner-style chocolate pie.
-
Chocolate Chip: Sprinkle ½ cup of mini chocolate chips over the filling immediately after pouring it into the crust.
-
Coconut Chocolate Pie: Add ½ cup of sweetened shredded coconut to the filling before cooking.
-
Peanut Butter Chocolate Pie: Swirl ¼ cup of melted peanut butter into the filling before chilling.
-
Spiced Chocolate: Add ½ teaspoon of cinnamon or a pinch of cayenne pepper to the dry ingredients for warmth.
-
Gluten-Free: Use a gluten-free pie crust to make this recipe gluten-free.
What to Serve with Chocolate Pie
This rich, decadent pie is delicious on its own or paired with:
-
Whipped Cream: A generous dollop of lightly sweetened whipped cream.
-
Fresh Berries: Raspberries or strawberries add a bright, tart contrast.
-
Coffee or Tea: The perfect accompaniment for an afternoon treat.
-
Vanilla Ice Cream: A scoop of vanilla ice cream adds extra indulgence.
Storage and Make-Ahead
-
Refrigerator: Store the pie covered in the refrigerator for up to 4 days.
-
Make-Ahead: This pie is ideal for making a day or two in advance. Simply prepare, chill, and serve when ready.
-
Freezer: This pie does not freeze well, as the texture of the filling may become grainy upon thawing.
The History of Chocolate Pie
Chocolate pie has deep roots in American Southern cuisine. It is a classic “cream pie”—a custard or pudding-style pie that became popular in the late 19th and early 20th centuries. These pies were often made with simple ingredients that were readily available in most pantries: sugar, cocoa, cornstarch, eggs, and milk.
Chocolate pie became a staple at church suppers, family reunions, and holiday tables across the South. It was often topped with meringue, which used up the egg whites left over from the filling. Today, it remains a beloved dessert, cherished for its rich flavor and nostalgic appeal.
Why This Recipe Works
This recipe succeeds because of its classic, time-tested technique. Cooking the filling on the stovetop allows the cornstarch to fully thicken the mixture, creating a smooth, stable pudding that sets beautifully in the crust. The combination of egg yolks and butter adds richness and a velvety texture.
Using a pre-baked crust ensures the bottom stays crisp and flaky, while chilling the pie allows the filling to set into a firm, sliceable consistency. The result is a chocolate pie that is deeply flavorful, perfectly textured, and wonderfully nostalgic.
Nutritional Information
Please note that values are estimates and will vary based on specific ingredients and crust.
Per serving (based on 8 servings, without whipped cream):
| Nutrient | Amount |
|---|---|
| Calories | 350–400 |
| Protein | 5–7g |
| Carbohydrates | 55–60g |
| Fat | 12–15g |
| Saturated Fat | 6–8g |
| Fiber | 2–3g |
| Sugar | 40–45g |
Conclusion
Old Fashioned Chocolate Pie is a timeless dessert that brings warmth, comfort, and a touch of nostalgia to any table. With its silky, rich filling and flaky crust, it is the kind of pie that never goes out of style. Whether you are baking for a holiday, a family gathering, or simply because you deserve something sweet, this recipe delivers.
I hope this classic chocolate pie becomes a cherished favorite in your kitchen. If you give it a try, please leave a comment below. I would love to hear how it turned out for you.