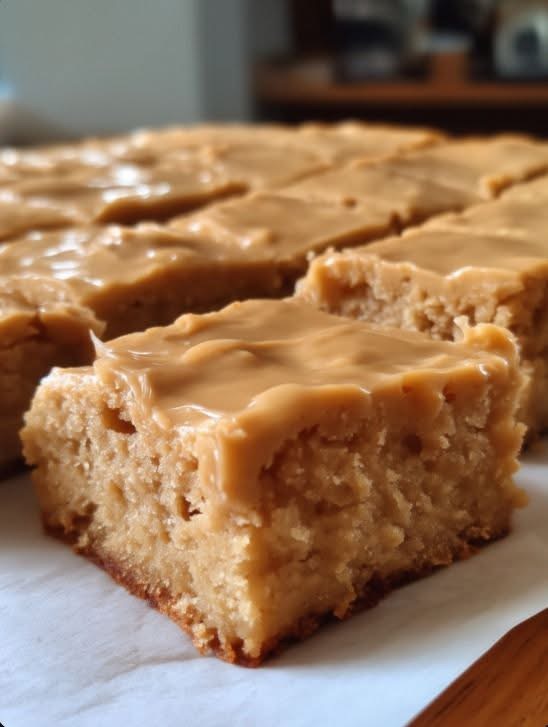
Peanut Butter Lunch Lady Bars are the kind of dessert that transports you straight back to the school cafeteria—the rectangle of soft, chewy, peanut buttery goodness that you’d eagerly wait in line for. These bars have that perfect texture: dense yet tender, with a rich peanut butter flavor throughout and a glossy, fudgy frosting on top that makes them absolutely irresistible.
There’s a reason these bars have achieved near-legendary status in the world of comfort food. They’re simple, made with pantry staples, and deliver pure nostalgia in every bite. Whether you’re recreating childhood memories or discovering them for the first time, these peanut butter bars are guaranteed to become a favorite.
The Magic of Lunch Lady Bars
What makes these bars so special is their unique texture. The boiled method of combining butter, peanut butter, and milk creates a base that’s incredibly moist and tender. The beaten eggs provide structure, while the baking soda gives just enough lift to create a soft, almost cake-like crumb. The generous amount of peanut butter ensures that every bite is packed with that classic peanut butter flavor we all love.
The powdered sugar frosting is the perfect finishing touch—sweet, creamy, and fudgy, it seals in moisture and adds a beautiful glossy finish that makes these bars look as good as they taste.
The Complete Recipe: Peanut Butter Lunch Lady Bars
Prep Time: 15 minutes | Cook Time: 20-25 minutes | Total Time: 40 minutes | Servings: 24 bars
Ingredients
For the Bars:
-
2 cups all-purpose flour
-
2 cups granulated sugar
-
1 cup unsalted butter
-
1 cup creamy peanut butter
-
½ cup whole milk
-
2 large eggs, beaten
-
1 teaspoon baking soda
-
1 teaspoon vanilla extract
-
1 teaspoon salt
For the Frosting:
-
4 cups powdered sugar
-
½ cup unsalted butter
-
¼ cup whole milk
-
½ cup creamy peanut butter
-
1 teaspoon vanilla extract
Step-by-Step Instructions
1. Preheat and Prepare
Preheat your oven to 375°F (190°C). Grease a 10×15-inch jelly roll pan or a 9×13-inch baking dish.
2. Boil the Base
In a medium saucepan over medium heat, combine the butter, peanut butter, and milk. Heat, stirring frequently, until the butter is melted and the mixture is smooth. Bring to a gentle boil, then remove from heat immediately.
3. Combine Wet Ingredients
In a large bowl, whisk together the beaten eggs and vanilla extract. Gradually pour the hot peanut butter mixture into the eggs while whisking constantly. This tempers the eggs and prevents them from scrambling.
4. Add Dry Ingredients
In a separate bowl, whisk together the flour, sugar, baking soda, and salt. Gradually add the dry ingredients to the wet mixture, stirring until just combined. Do not overmix.
5. Bake
Pour the batter into the prepared pan and spread evenly. Bake for 20 to 25 minutes, until a toothpick inserted into the center comes out clean. The edges should be lightly golden.
6. Cool Completely
Let the bars cool completely in the pan on a wire rack before frosting. This is important—warm bars will cause the frosting to melt.
7. Make the Frosting
In a medium saucepan, combine the butter, peanut butter, and milk. Heat over medium heat, stirring frequently, until the butter is melted and the mixture is smooth. Remove from heat and gradually whisk in the powdered sugar and vanilla extract until smooth and creamy. The frosting should be pourable but thick.
8. Frost the Bars
Pour the warm frosting over the cooled bars and spread evenly. Let the frosting set for at least 30 minutes before cutting into squares.
9. Serve
Cut into 24 bars and serve. Store any leftovers in an airtight container.
Pro Tips for the Best Peanut Butter Bars
-
Don’t Overbake: These bars are best when they’re soft and tender. Overbaking can make them dry. Start checking at 20 minutes.
-
Cool Completely: Resist the urge to frost warm bars. The frosting will melt and soak in instead of setting into a beautiful, glossy layer.
-
Pan Choice: A 10×15-inch jelly roll pan produces thinner, chewier bars. A 9×13-inch pan yields thicker, more cake-like bars. Both are delicious.
-
Natural Peanut Butter: Avoid natural peanut butter that separates, as it can affect the texture. Standard creamy peanut butter works best.
-
Add Mix-Ins: For variation, stir 1 cup of chocolate chips or chopped peanuts into the batter before baking.
Delicious Variations
-
Chocolate Peanut Butter Bars: Add 1 cup of chocolate chips to the batter and drizzle melted chocolate over the frosted bars.
-
Peanut Butter Chocolate Chip: Stir 1 cup of mini chocolate chips into the batter.
-
Salted Peanut Butter Bars: Sprinkle flaky sea salt over the frosting before it sets.
-
Reese’s Pieces Bars: Press Reese’s Pieces into the warm frosting for a colorful twist.
-
Peanut Butter Cup Bars: Press chopped peanut butter cups into the warm frosting.
Serving Suggestions
-
Serve with a cold glass of milk for the ultimate nostalgic experience
-
Pack in lunchboxes for a special treat
-
Arrange on a cookie platter for parties and gatherings
-
Serve alongside vanilla ice cream for an indulgent dessert
-
Enjoy with a cup of hot coffee or tea
Storage
-
Room Temperature: Store in an airtight container for up to 5 days.
-
Refrigerator: Store in an airtight container for up to 1 week.
-
Freezer: These bars freeze beautifully for up to 2 months. Wrap individually in plastic wrap and place in a freezer bag. Thaw at room temperature.
Conclusion: A Slice of Nostalgia
Peanut Butter Lunch Lady Bars are more than just a dessert—they’re a memory, a taste of childhood, and a reminder of simpler times. With their soft, chewy texture, rich peanut butter flavor, and dreamy frosting, they’re guaranteed to bring smiles to faces of all ages.
Easy to make, impossible to resist, and always requested, these bars deserve a permanent spot in your baking rotation. Make a batch and watch them disappear—just like they did in the school cafeteria