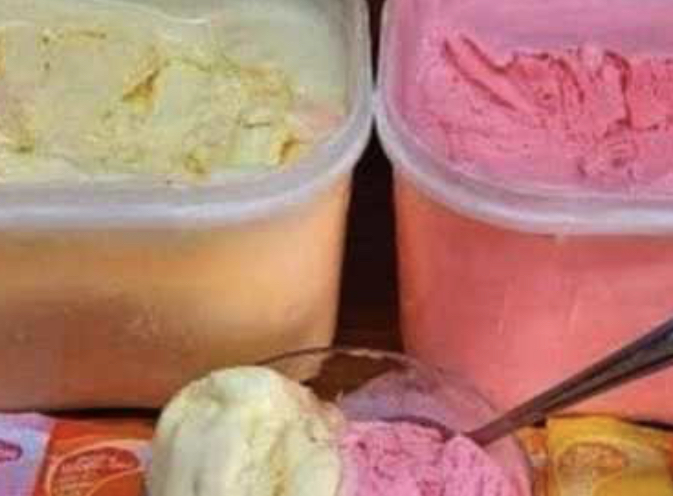
Indulging in homemade ice cream is not only a delightful experience but also a creative process that allows you to craft a personalized dessert with minimal effort. This recipe requires just four basic ingredients and yields a rich, creamy texture that rivals store-bought varieties. No ice cream maker needed, no complicated techniques—just pure, simple, delicious ice cream that you can customize endlessly.
There is something magical about making your own ice cream at home. The process is satisfyingly simple, yet the result feels like a special treat. Whether you’re cooling off on a hot summer day, impressing guests at a dinner party, or simply satisfying a late-night craving, this homemade ice cream delivers every time.
The Magic of No-Churn Ice Cream
This recipe works because of the brilliant combination of whipped cream and sweetened condensed milk. Whipping the heavy cream incorporates air, creating the light, creamy texture we expect from ice cream. The sweetened condensed milk adds sweetness and, more importantly, prevents large ice crystals from forming as the mixture freezes. Its high sugar content and viscosity ensure a smooth, scoopable texture straight from the freezer.
The result is an ice cream that is every bit as creamy and luxurious as traditional churned versions, but with a fraction of the effort and no special equipment required.
The Complete Recipe: Simple Homemade Ice Cream
Prep Time: 10 minutes | Freeze Time: 4-6 hours | Total Time: 4-6 hours | Servings:6-8
Ingredients
-
2 cups heavy cream (for a rich, creamy base)
-
1 can (14 oz) sweetened condensed milk (for sweetness and smoothness)
-
1-2 teaspoons vanilla extract (for classic flavor)
Optional Add-Ins (choose your favorites):
-
Chocolate chips or chunks
-
Crushed cookies (Oreos, chocolate chip cookies, etc.)
-
Fresh fruit (strawberries, raspberries, peaches)
-
Caramel swirls
-
Chocolate sauce swirls
-
Toasted nuts (pecans, walnuts, almonds)
-
Sprinkles
-
Cocoa powder (for chocolate ice cream)
Tools Required
-
Mixing bowls
-
Whisk or electric mixer
-
Spatula
-
Airtight freezer-safe container (loaf pan works perfectly)
Step-by-Step Instructions
1. Whip the Heavy Cream
In a large mixing bowl, beat the heavy cream using an electric mixer on medium-high speed (or a whisk and some elbow grease) until stiff peaks form. This should take about 3 to 5 minutes with a mixer. You’ll know it’s ready when the cream holds its shape and doesn’t slump when you lift the beater. This creates the airy, creamy base for your ice cream.
2. Add Sweetened Condensed Milk
Pour the sweetened condensed milk into the bowl with the whipped cream. Using a spatula, gently fold the two together. The key word is “fold”—use a gentle motion that cuts down through the mixture and brings it up from the bottom, rotating the bowl as you go. Be careful not to deflate the whipped cream too much; some streaks are okay.
3. Incorporate Vanilla Extract
Stir in the vanilla extract, folding gently until just combined. Adjust the quantity to your preference—1 teaspoon for subtle flavor, 2 teaspoons for more pronounced vanilla.
4. Add Optional Mix-Ins
If you’re adding any extras, now is the time. Gently fold in your chosen mix-ins, distributing them evenly throughout the base. Don’t overmix, or you’ll deflate the cream.
5. Freeze
Transfer the mixture to an airtight freezer-safe container. Smooth the top with a spatula. Cover tightly and freeze for at least 4 to 6 hours, or until firm. For best results, freeze overnight.
6. Serve
Let the ice cream sit at room temperature for 5 to 10 minutes before scooping to soften slightly. Scoop into bowls or cones and enjoy! Add toppings like whipped cream, sprinkles, or chocolate sauce for extra flair.
Pro Tips for Perfect Ice Cream
-
Use Full-Fat Ingredients: For the creamiest, richest results, use full-fat heavy cream and full-fat sweetened condensed milk. Low-fat versions will not produce the same texture.
-
Chill Your Bowl: For best results when whipping cream, chill your mixing bowl and beaters in the freezer for 10 to 15 minutes before starting.
-
Don’t Overwhip: Stop whipping when stiff peaks form. If you go too far, the cream will start to turn into butter.
-
Get Creative with Mix-Ins: This base is a blank canvas. Experiment with different flavor combinations.
-
Storage Container: A metal loaf pan works beautifully—it freezes quickly and evenly, and the shape is perfect for scooping.
Delicious Flavor Variations
-
Chocolate Ice Cream: Whisk ⅓ cup unsweetened cocoa powder into the sweetened condensed milk before folding into the whipped cream.
-
Strawberry Ice Cream: Swirl in ½ cup strawberry puree (fresh or frozen strawberries blended smooth) at the end.
-
Mint Chocolate Chip: Add 1 teaspoon mint extract and fold in ½ cup mini chocolate chips.
-
Cookies and Cream: Crush 10 to 12 Oreo cookies and fold them in at the end.
-
Coffee Ice Cream: Dissolve 2 tablespoons instant espresso powder in 1 tablespoon warm water and add with the vanilla.
-
Peanut Butter Cup: Swirl in ⅓ cup melted peanut butter and fold in chopped peanut butter cups.
-
Salted Caramel: Swirl in ⅓ cup caramel sauce and sprinkle with flaky sea salt.
Serving Suggestions
-
Serve in waffle cones or sugar conesfor a classic ice cream experience
-
Top with hot fudge, caramel sauce, and sprinkles for a sundae
-
Layer with fresh berries and whipped cream for an elegant dessert
-
Use as a base for milkshakes or floats
-
Sandwich between two cookies for homemade ice cream sandwiches
Storage
-
Freezer: Store in an airtight container for up to 2 weeks. Press a piece of plastic wrap directly onto the surface of the ice cream before sealing to prevent ice crystals from forming.
-
Softening: Homemade ice cream freezes harder than commercial varieties. Let it sit at room temperature for 5 to 10 minutes before scooping.
Conclusion: Homemade Happiness in Every Scoop
This Simple Homemade Ice Cream recipe is proof that you don’t need fancy equipment or culinary degrees to create something truly spectacular. With just four basic ingredients and a few minutes of prep, you can make ice cream that is creamier, more flavorful, and more satisfying than anything from the store.
The real magic is in the customization. Once you master the basic method, you can create endless variations tailored to your tastes. Chocolate, fruit, cookies, candy—the possibilities are limited only by your imagination. This is the kind of recipe that becomes a family favorite, a go-to for celebrations, and a delightful way to turn ordinary evenings into something special.