
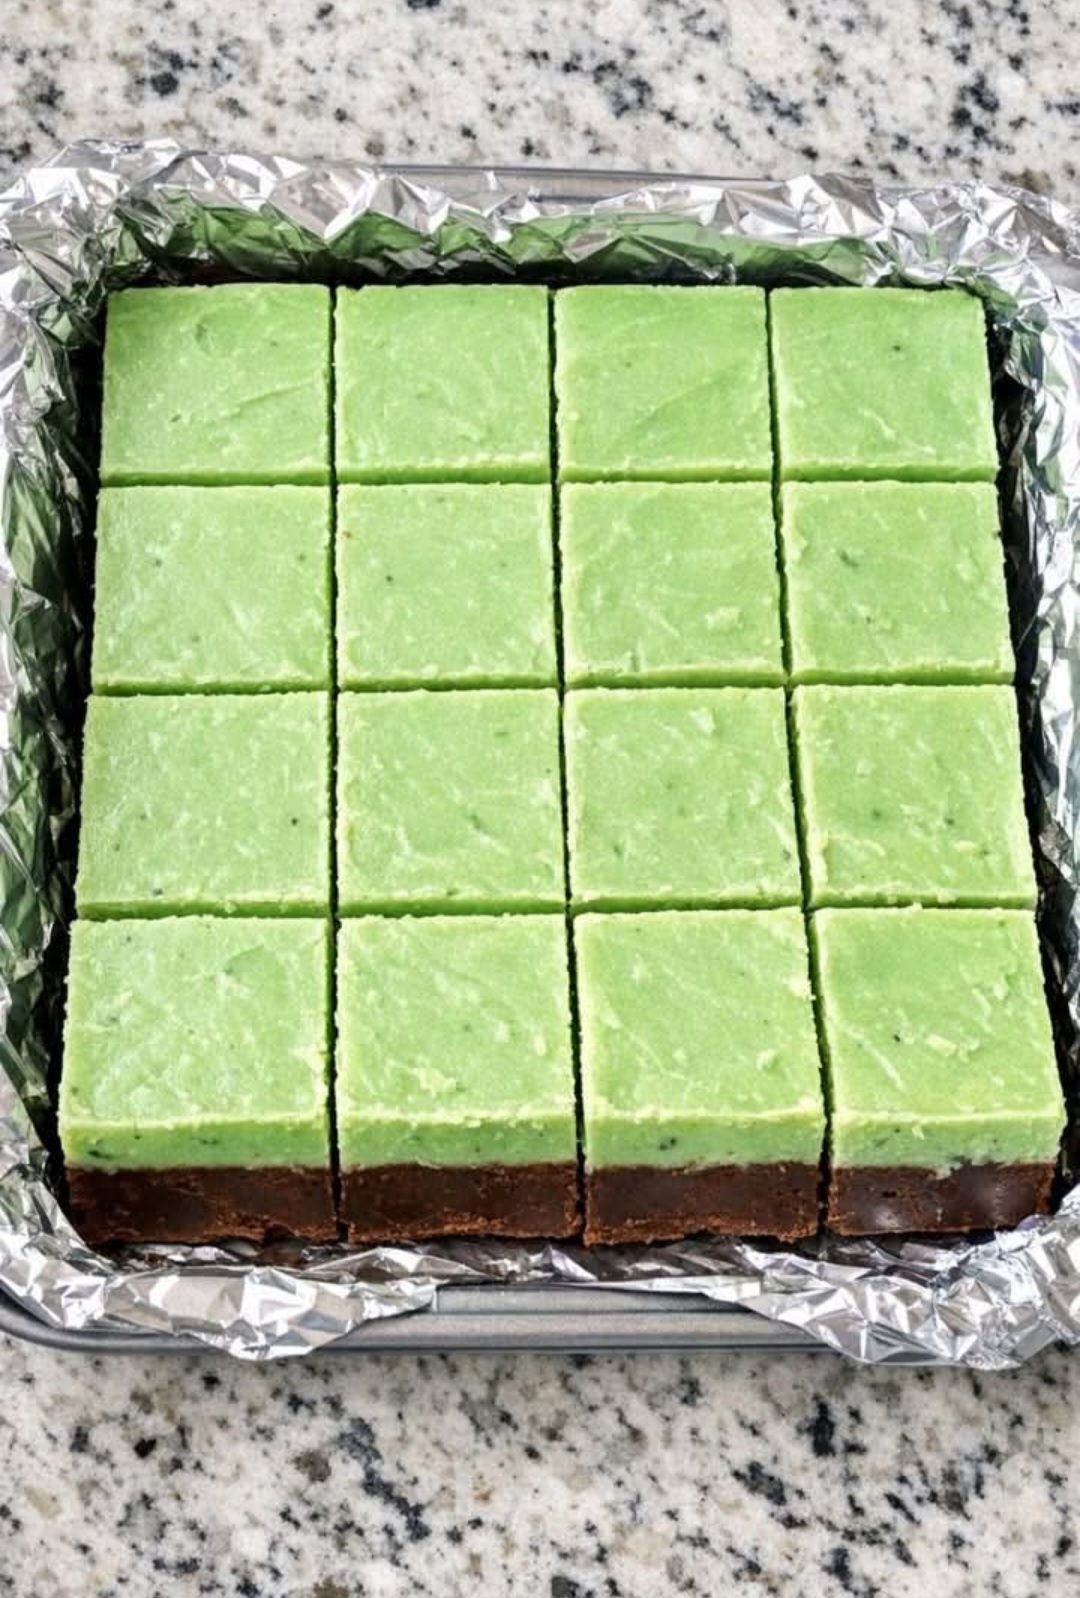
3-Ingredient Mint Chocolate Fudge – A Creamy Springtime Treat Everyone Loves
There is something irresistible about homemade fudge, especially when it combines rich chocolate with a refreshing hint of mint. This 3-Ingredient Mint Chocolate Fudge is the kind of easy, old-fashioned treat that turns an ordinary afternoon into something special. With just three simple ingredients, a saucepan, and a little patience while it chills, you can create a beautiful batch of creamy, chocolatey squares that look every bit as lovely as they taste.
My mother-in-law loves this fudge so much that she now insists I bring it to every family gathering. What started as a simple springtime experiment quickly became a family favorite, requested for Easter celebrations, baby showers, birthday parties, and Sunday afternoon get-togethers. The combination of smooth semisweet chocolate, sweetened condensed milk, and cool peppermint creates a delicious balance of sweetness and freshness that makes every bite memorable.
The best part? This easy mint chocolate fudge recipe requires no candy thermometer, no complicated techniques, and no baking. Everything comes together on the stovetop before chilling in the refrigerator until perfectly firm. The chocolate layers create an attractive marbled appearance, making these little squares look impressive on a dessert table without requiring hours in the kitchen.
Whether you are preparing homemade candy for a holiday celebration or simply craving a sweet treat to share with your family, this 3-ingredient chocolate mint fudge deserves a permanent place in your recipe collection.
Why You’ll Love This 3-Ingredient Mint Chocolate Fudge
– Only three ingredients: You need semisweet chocolate chips, sweetened condensed milk, and peppermint extract to make this simple homemade candy.
– No oven required: Everything is prepared on the stovetop and finished in the refrigerator.
– Rich, creamy texture: Sweetened condensed milk helps create smooth, luscious fudge without the need for complicated candy-making techniques.
– Refreshing mint flavor: Peppermint adds a cool, fresh note that complements the richness of the chocolate.
– Perfect for spring gatherings: The chocolate-and-mint combination makes a lovely addition to Easter dessert tables, spring parties, and family celebrations.
– Easy to make ahead: Prepare the fudge in advance, chill until firm, and cut it into squares when you are ready to serve.
– Beautiful homemade gift: Arrange the finished pieces in a decorative tin or treat box for friends, neighbors, and family members.
Ingredients for 3-Ingredient Mint Chocolate Fudge
This recipe uses three main ingredients to create a rich chocolate base and a refreshing mint layer.
1. Semisweet Chocolate Chips – 3 Cups
Semisweet chocolate chips provide the deep chocolate flavor that makes this fudge so satisfying. Their balanced sweetness pairs beautifully with peppermint, preventing the finished candy from tasting overwhelmingly sugary.
You will divide the chocolate chips between the two layers. Use 2 cups for the first chocolate layer and 1 cup for the mint layer. The different proportions help create a darker chocolate base with a contrasting mint-chocolate topping.
For the best results, choose good-quality semisweet chocolate chips that melt smoothly. You can substitute dark chocolate chips for part of the semisweet chocolate if you prefer a richer, less sweet flavor.
2. Sweetened Condensed Milk – 2 Cans (14 Ounces Each)
Sweetened condensed milk is the secret to the fudge’s soft, creamy consistency. It contains concentrated milk and sugar, giving the chocolate a smooth texture while providing plenty of sweetness.
You will use one 14-ounce can for each layer. When gently heated with the chocolate, it creates a thick, glossy mixture that sets into firm but creamy squares after refrigeration.
Important: Use sweetened condensed milk, not evaporated milk. They are different products, and evaporated milk will not provide the same sweetness or texture.
3. Peppermint Extract – 2 Teaspoons
Peppermint extract gives this fudge its signature refreshing flavor. Just two teaspoons provide a noticeable minty taste that complements the rich chocolate without overpowering it.
If you prefer a more delicate flavor, begin with 1 teaspoon. For a stronger peppermint finish, you can increase the amount slightly, but add it carefully because peppermint extract can become overpowering very quickly.
Optional decoration: A drop or two of green food coloring can make the mint layer look more vibrant. Food coloring is not necessary for the recipe to work and is not included in the three main ingredients.
How to Make 3-Ingredient Mint Chocolate Fudge
Follow these simple steps to create smooth, delicious fudge with an attractive chocolate-and-mint finish.
Step 1: Prepare the Pan
Line an 8-by-8-inch square baking pan with aluminum foil, allowing some foil to hang over the sides. These overhanging edges will act as handles, making it easy to lift the chilled fudge out of the pan later.
Smooth the foil into the corners as neatly as possible. If desired, lightly grease the foil to make removal even easier.
Set the prepared pan aside while you make the chocolate base.
Step 2: Melt the Chocolate Base
Place 2 cups of semisweet chocolate chips and 1 can of sweetened condensed milk in a medium saucepan.
Heat over low heat, stirring constantly with a heat-resistant spatula. Continue stirring until the chocolate chips have completely melted and the mixture becomes thick, smooth, and glossy.
Keep the heat low to prevent the chocolate from scorching. Chocolate can burn easily, so gentle heat and frequent stirring are essential for a silky texture.
Step 3: Spread the First Layer
Pour the melted chocolate mixture into the prepared baking pan.
Use a spatula to spread it evenly across the bottom, making sure the mixture reaches all four corners. Gently tap the pan on the counter to help smooth the surface and release any trapped air.
Set the pan aside while you prepare the mint layer. Allow the chocolate base to cool slightly so the next layer can be added more easily.
Step 4: Prepare the Mint Mixture
Clean the saucepan before using it again.
Add the remaining can of sweetened condensed milk and warm it over low heat until it becomes slightly thinner and easier to stir. Remove the saucepan from the heat before adding the peppermint extract.
Stir the extract into the warm condensed milk until evenly distributed.
If you want a more noticeable green color, you can add a drop or two of green food coloring at this stage.
Step 5: Add the Remaining Chocolate Chips
Add the remaining 1 cup of semisweet chocolate chips to the warm mint mixture.
Stir gently until the chocolate begins to melt and the mixture becomes mostly smooth. Depending on the temperature of the condensed milk, some chocolate may remain partially melted, creating a subtle marbled effect.
For a more uniform mint-chocolate layer, continue stirring until the chocolate has completely melted. For visible chocolate swirls, avoid overmixing once the desired pattern appears.
Helpful tip: The ingredients alone will not produce a naturally bright green mint layer. If you want a distinct green color, a small amount of green food coloring is the easiest way to achieve it.
Step 6: Add the Mint Layer
Carefully pour the mint mixture over the chocolate base.
Spread it evenly with a spatula, taking care not to disturb the bottom layer too much.
For a decorative finish, gently drag the tip of a butter knife through the top in small swirling motions. This creates an attractive marbled appearance that looks especially pretty when the fudge is cut into squares.
If you prefer clearly separated layers, simply smooth the mint mixture over the chocolate without swirling.
Step 7: Refrigerate Until Firm
Place the pan in the refrigerator and chill for at least 2 to 3 hours, or until the fudge is firm enough to cut.
For the cleanest slices, allow the pan to rest at room temperature for approximately 5 to 10 minutes before cutting. This softens the edges slightly and makes slicing easier.
Avoid leaving the fudge in a warm room for too long, as the chocolate may soften.
Step 8: Cut and Serve
Use the foil handles to lift the entire block of fudge out of the pan and place it on a cutting board.
Carefully peel away the foil and cut the fudge into small squares using a sharp knife.
For neat edges, wipe the knife with a warm, damp cloth between cuts. Arrange the squares on a serving platter or return them to a lined tray.
Keep the fudge refrigerated until serving for the best texture and flavor.
Pro Tips for Perfect Mint Chocolate Fudge
A few simple techniques can make the difference between ordinary fudge and a batch that looks and tastes wonderful.
1. Always use low heat. Chocolate can scorch or become grainy when heated too aggressively. Melt it slowly and stir continuously for the smoothest results.
2. Choose the right condensed milk. Sweetened condensed milk is essential for the proper sweetness and consistency. Do not substitute evaporated milk.
3. Measure peppermint extract carefully. Peppermint is a strong flavor, and a little goes a long way. Start with the recommended amount before adjusting it for future batches.
4. Let the bottom layer cool slightly. Pouring the mint mixture over a very hot chocolate base may cause the layers to blend together. A brief cooling period helps preserve their definition.
5. Decide between swirls and clean layers. Gently swirling creates a marbled finish, while spreading the mint mixture without swirling produces a more distinct two-layer appearance.
6. Use a sharp knife. A clean, sharp blade helps create even squares without crumbling the edges. Wiping the blade between cuts keeps the pieces looking neat.
7. Allow enough chilling time. The fudge needs to become completely firm before cutting. If it feels soft in the center, return it to the refrigerator for additional time.
8. Make it ahead. This recipe is ideal for busy holidays and family celebrations because you can prepare it before the day of your gathering.
Easy Variations to Try
Once you have mastered the basic recipe, there are several ways to customize your homemade mint chocolate fudge.
– Extra-Minty Fudge: Increase the peppermint extract slightly for a more pronounced mint flavor, taking care not to overwhelm the chocolate.
– Dark Chocolate Mint Fudge: Replace some or all of the semisweet chocolate chips with dark chocolate chips for a deeper, less sweet chocolate taste.
– Green Mint Fudge: Add a small amount of green food coloring to the mint mixture for a festive springtime appearance.
– Chocolate Chip Topping: Sprinkle a few extra chocolate chips over the top before chilling for added texture.
– Holiday Mint Fudge: Add a light sprinkle of crushed peppermint candy for a festive finish, especially during winter celebrations.
– Gift-Ready Fudge: Cut the chilled fudge into small, uniform squares and place them in decorative paper candy cups before arranging them in a gift box.
Keep in mind that changing the amount or type of chocolate can affect how firmly the fudge sets, so make substitutions gradually.
How to Store Mint Chocolate Fudge
Proper storage keeps your fudge fresh, flavorful, and ready whenever a chocolate craving strikes.
In the refrigerator: Place the fudge in an airtight container and refrigerate for up to one week. Separate layers with parchment paper if you need to stack the pieces.
In the freezer: Freeze the fudge in an airtight, freezer-safe container for up to two months. Separate the layers with parchment paper to prevent sticking.
When you want to serve frozen fudge, transfer it to the refrigerator and let it thaw gradually. For the best texture, keep it chilled until shortly before serving.
Avoid storing the fudge in direct sunlight or in a warm kitchen, as the chocolate can soften and lose its neat shape.
What to Serve with Mint Chocolate Fudge
These rich little squares are delicious on their own, but the right accompaniments can make them even more enjoyable.
– Fresh strawberries and raspberries: Their bright, slightly tart flavor balances the sweetness of the fudge.
– Hot coffee: A cup of freshly brewed coffee provides a pleasant contrast to the creamy chocolate.
– Hot cocoa: For chocolate lovers, serving fudge alongside a warm mug of cocoa creates an especially indulgent treat.
– Cold milk: A classic pairing that is particularly popular with children.
– Vanilla ice cream: Serve a small fudge square beside a scoop of vanilla ice cream for a simple plated dessert.
– Spring dessert platters: Arrange the fudge with pastel candies, fresh berries, and other bite-sized sweets for Easter celebrations, baby showers, or afternoon gatherings.
Because the fudge is rich, cut it into small squares. Guests can enjoy a little sweetness without feeling overwhelmed, and anyone who loves the mint-and-chocolate combination can always come back for another piece.
Frequently Asked Questions
Can I make 3-ingredient mint chocolate fudge without a candy thermometer?
Yes! One of the best things about this recipe is that it does not require a candy thermometer. Gently melt the chocolate with the sweetened condensed milk, spread the layers into the pan, and refrigerate until firm.
Why is my fudge too soft?
Soft fudge may need more chilling time, or the ingredients may not have been measured accurately. Make sure you use the specified amounts of chocolate chips and sweetened condensed milk. Keep the fudge refrigerated until it is firm enough to slice.
Can I make this fudge without green food coloring?
Absolutely. Green food coloring is optional. Without it, the mint layer will look chocolate-colored rather than bright green, but it will still have its refreshing peppermint flavor.
Can I make the fudge a day ahead?
Yes. This is an excellent make-ahead dessert. Prepare it the day before your gathering, allow it to set completely, and store it in an airtight container in the refrigerator until serving.
Is this fudge suitable for Easter and spring parties?
Definitely! Its minty flavor and decorative swirls make it a lovely addition to Easter dessert tables, spring potlucks, baby showers, and family celebrations. Add optional green coloring or pastel decorations for an extra seasonal touch.
How should I cut fudge without making a mess?
Allow the chilled fudge to sit at room temperature for several minutes, then use a sharp knife to cut it into squares. Wipe the knife clean between cuts to keep the edges smooth and attractive.
A Simple Homemade Treat Worth Sharing
This 3-Ingredient Mint Chocolate Fudge proves that a delicious homemade dessert does not need a long ingredient list or hours of preparation. With semisweet chocolate chips, sweetened condensed milk, and peppermint extract, you can create creamy, rich fudge with a refreshing mint flavor and a beautiful finish.
It is easy enough for an ordinary weekday, elegant enough for a spring dessert table, and convenient enough to prepare ahead for your next family gathering. Serve it with coffee, arrange it beside fresh berries, or package a few squares as a thoughtful homemade gift.
And when your mother-in-law starts asking you to bring it to every family celebration, you will understand why this simple recipe becomes a tradition. Save this easy mint chocolate fudge recipe, keep the three ingredients on hand, and enjoy a homemade treat that makes every gathering a little sweeter.