
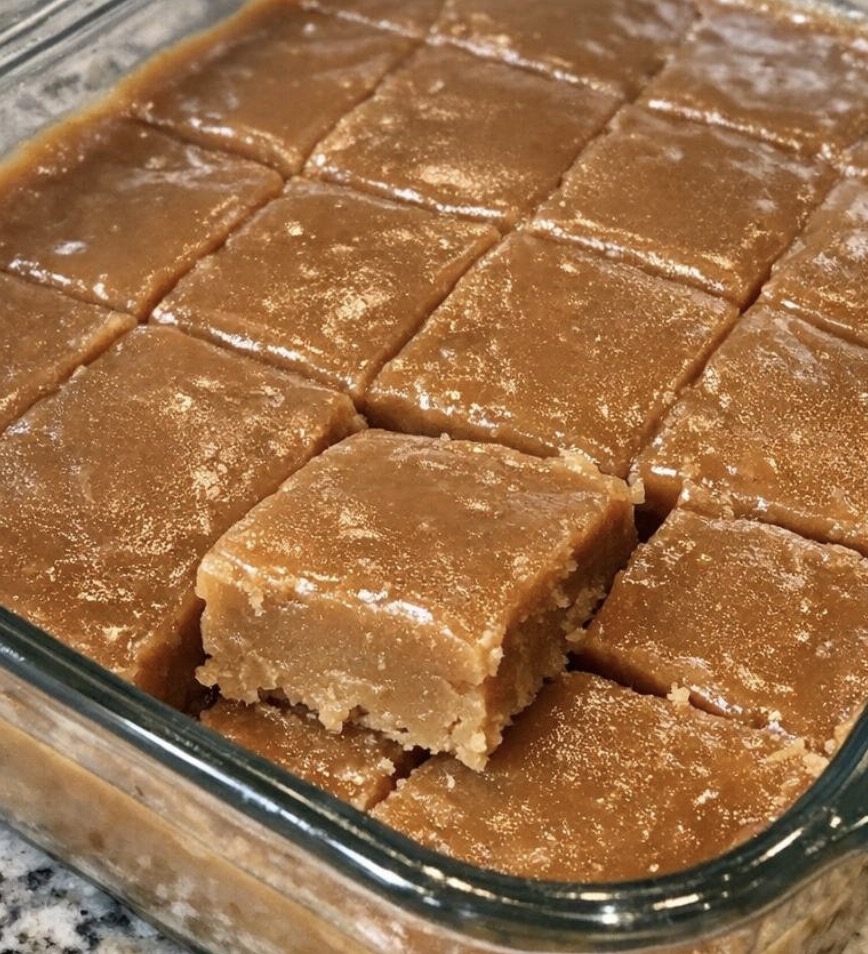
Why This Recipe Is an Absolute Keeper
Before we dive into the method, here’s why this caramel fudge will become a favorite in your kitchen:
-
Only four ingredients. Brown sugar, milk, butter, and vanilla. That’s it.
-
Quick and easy. Ready in under 30 minutes with minimal prep.
-
Creamy and rich. The perfect caramel fudge texture.
-
Budget-friendly. All the ingredients are affordable and easy to find.
-
Minimal cleanup. One saucepan, one pan. That’s it.
-
Crowd-pleasing. Everyone loves this creamy, caramel fudge.
-
Perfect for gift-giving, holidays, and sweet cravings. It’s that versatile.
-
Great for making ahead. Stays fresh for weeks.
-
No complicated steps. Just cook, beat, and set.
The 4-Star Ingredients
This recipe proves that you don’t need a long ingredient list to create something spectacular. Here’s what you’ll need:
Packed brown sugar – 2 cups. Brown sugar is the base of this fudge. It provides deep, caramel-like sweetness and creates the rich, buttery flavor that makes this fudge so irresistible.
Whole milk – ½ cup. Milk adds creaminess and helps create the smooth, velvety texture of the fudge. Whole milk gives the richest results.
Butter – 4 tablespoons. Butter adds richness and a silky, smooth texture. It also helps prevent the fudge from becoming grainy.
Vanilla extract – 1 teaspoon. Vanilla adds warmth and enhances the caramel flavor of the brown sugar.
That’s it. Four ingredients. No corn syrup. No condensed milk. No complicated steps. Just honest, delicious ingredients that come together beautifully.
Step-by-Step Instructions (The Short Version)
-
Butter an 8-inch square pan or small glass casserole dish and set it aside.
-
In a heavy saucepan over medium heat, combine the brown sugar, milk, and butter. Stir steadily until the butter melts and the sugar dissolves into a smooth caramel-colored mixture.
-
Bring the mixture to a gentle boil and cook, stirring often, until it reaches the soft-ball stage, about 234 to 240°F on a candy thermometer. (If you don’t have a thermometer, drop a little into cold water; it should form a soft ball that flattens when lifted.)
-
Remove the pan from the heat and stir in the vanilla. Let the mixture cool undisturbed for 5 to 10 minutes, until it thickens slightly.
-
Beat the fudge with a wooden spoon until it loses some of its gloss and starts to look thicker and creamier, then quickly spread it into the prepared pan.
-
Let the fudge cool completely, then cut into squares and serve. For neat pieces, allow it to set fully before slicing.
How to Serve It Like a Pro
This fudge is delicious on its own, but a few simple additions make it even better:
-
With a sprinkle of sea salt – Adds a sweet-salty contrast.
-
With chopped nuts – Pecans or walnuts add crunch.
-
With chocolate chips – Stir in chocolate chips for a caramel-chocolate twist.
-
With a drizzle of chocolate – Adds extra indulgence.
-
As a gift – Wrap in cellophane with a ribbon for a beautiful homemade gift.
-
On a dessert tray – Perfect for holiday cookie exchanges.
-
With a cup of coffee or tea – The perfect afternoon treat.
-
With a scoop of ice cream – Crumble over vanilla ice cream.
Variations & Swaps (Because Life Happens)
One of the best things about this recipe is how flexible it is. Here are some easy ways to make it your own:
Make It with Different Sugar
Use dark brown sugar for a deeper caramel flavor.
Make It with Different Milk
Use half-and-half or heavy cream for an even richer fudge.
Make It with Different Extract
Use almond extract, maple extract, or rum extract for a different flavor.
Make It with Nuts
Add ½ cup of chopped pecans or walnuts.
Make It with Chocolate
Stir in chocolate chips or swirl in melted chocolate.
Make It with Sea Salt
Sprinkle with flaky sea salt before setting.
Make It with Coconut
Add shredded coconut for a tropical twist.
Make It with Peanut Butter
Swirl in peanut butter for a caramel-peanut butter fudge.
Make It with a Different Pan
Use a 9-inch round pan or a loaf pan.
Make It with a Candy Thermometer – For the most consistent results.
Pro Tips for Absolute Success
After making this fudge multiple times (because it’s so easy and delicious), here are my best tips:
-
Use a heavy saucepan. It distributes heat evenly and prevents burning.
-
Stir constantly while heating. This prevents the sugar from scorching.
-
Use a candy thermometer. It takes the guesswork out of the soft-ball stage.
-
Don’t overbeat. Beat just until the fudge loses its gloss and thickens.
-
Work quickly. The fudge sets fast once it’s beaten.
-
Cool completely before cutting. This ensures clean, neat squares.
-
Store in an airtight container. Fudge stays fresh for up to 2 weeks.
Frequently Asked Questions
Can I use a different type of sugar?
Yes. Dark brown sugar works well for a deeper caramel flavor.
Can I use a different type of milk?
Yes. Half-and-half or heavy cream create an even richer fudge.
Can I add nuts to this?
Yes. Add ½ cup of chopped pecans or walnuts.
How long does this fudge last?
Store in an airtight container at room temperature for up to 2 weeks.
Can I freeze this fudge?
Yes. Freeze in an airtight container for up to 3 months. Thaw at room temperature.
Why is my fudge grainy?
The sugar may not have dissolved fully. Stir until completely dissolved.
Why is my fudge too soft?
It may not have reached the soft-ball stage. Cook to 234–240°F.
Can I double this recipe?
Yes. Use a 9×13-inch pan and double the ingredients.
What if I don’t have a candy thermometer?
Use the cold water test to check for the soft-ball stage.
Can I add chocolate to this?
Yes. Stir in chocolate chips or swirl in melted chocolate.
The Beauty of Simple, Homemade Candies
There’s something deeply satisfying about a creamy, rich, homemade fudge that comes together with almost no effort. It’s the kind of treat that makes people happy — the kind that proves you don’t need complicated ingredients to create something delicious.
This caramel fudge is a celebration of all those things — simplicity, flavor, and the joy of making something sweet with your own hands.
It’s not fancy. It’s not complicated. But it is reliable, crowd-pleasing, and delicious. And isn’t that what great homemade candies are all about?
So keep brown sugar, milk, butter, and vanilla in your kitchen. And when you need a simple, impressive treat that delivers big flavor with minimal fuss, you’ll know exactly what to make.
Final Verdict
-
Rating: 5 out of 5
-
Difficulty: Easy
-
Prep Time: 5 minutes
-
Cook Time: 10–15 minutes
-
Total Time: Approximately 30–45 minutes (including cooling)
-
Yield: 16 small squares
-
Cleanup: Minimal (one saucepan + one pan)
-
Leftover potential: Excellent — stays fresh for weeks
-
Best for: Gift-giving, holidays, and sweet cravings