
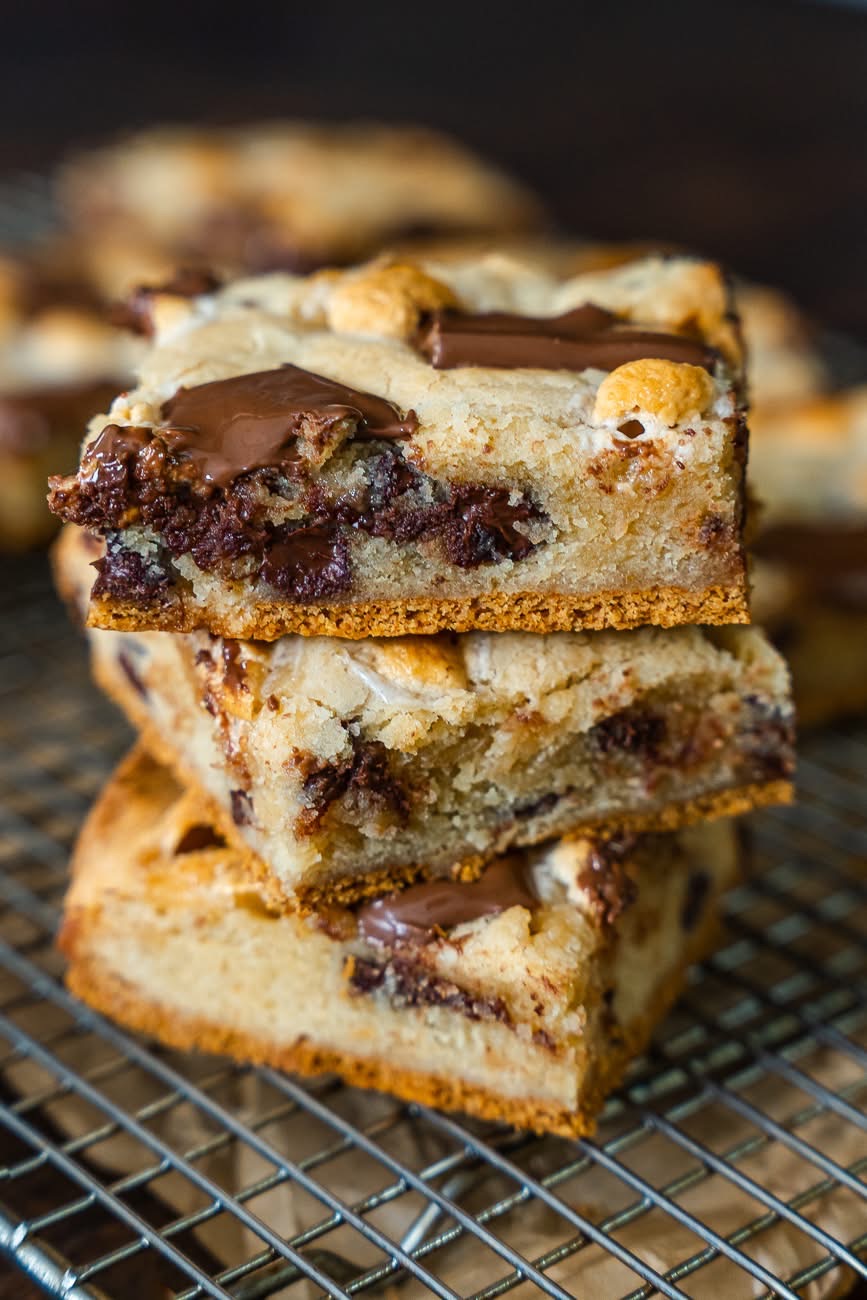
S’mores Cookie Bars
Let me introduce you to the dessert that has completely taken over my kitchen and my heart. These S’mores Cookie Bars are everything you love about classic campfire s’mores—the gooey marshmallow, the melty chocolate, the nostalgic graham cracker crunch—but transformed into a ridiculously easy, absolutely irresistible bar cookie that you can make any time of year. No campfire required, no sticky fingers (well, maybe a little), and no waiting for summer to roll around.
I first created these on a rainy afternoon when my kids were begging for s’mores and building a fire was clearly not happening. The result was pure magic. A buttery, graham cracker-infused cookie base, a layer of chocolate that melts into puddles of pure goodness, and a toasted marshmallow topping that gets all golden and puffy in the oven. They taste like childhood, like summer nights, like pure joy. Every time I bring these to a potluck or bake sale, they disappear in minutes, and I always leave with empty containers and a dozen recipe requests. These bars are dangerously simple to make, and I guarantee they’ll become a staple in your dessert rotation.
Ingredients
For the Cookie Base:
-
1 ½ cups graham cracker crumbs (about 10 full sheets)
-
1 cup all-purpose flour
-
1 teaspoon baking powder
-
½ teaspoon salt
-
1 cup unsalted butter, softened
-
1 cup brown sugar, packed
-
½ cup granulated sugar
-
2 large eggs
-
1 teaspoon vanilla extract
For the Layers:
-
2 cups semi-sweet chocolate chips (or chopped chocolate bars)
-
2 cups mini marshmallows (or regular marshmallows, quartered)
-
½ cup graham cracker crumbs, for sprinkling (optional)
-
2 regular-sized chocolate bars, broken into pieces (for extra chocolate presence, optional)
Directions
-
Preheat and prepare: Preheat your oven to 350°F (175°C). Line a 9×13-inch baking dish with parchment paper, leaving some overhang on the sides for easy removal. Lightly grease the parchment.
-
Make the cookie base: In a medium bowl, whisk together the graham cracker crumbs, flour, baking powder, and salt. Set aside. In a large bowl, beat the softened butter, brown sugar, and granulated sugar together until light and fluffy, about 2-3 minutes. Add the eggs one at a time, beating well after each addition, then beat in the vanilla extract. Gradually add the dry ingredients to the wet ingredients, mixing just until combined. The dough will be thick and slightly sticky.
-
Press into the pan: Press the cookie dough evenly into the prepared baking dish, making sure it reaches all the corners and is level. I recommend using your hands or the bottom of a measuring cup to get a smooth, even layer.
-
Add the chocolate: Sprinkle the chocolate chips (and broken chocolate bar pieces if using) evenly over the cookie dough layer. Gently press them into the dough so they stay in place.
-
Add the marshmallows: Scatter the mini marshmallows evenly over the chocolate layer. They will spread and melt during baking, creating that perfect gooey topping.
-
Bake: Bake for 20-25 minutes, or until the edges are golden brown and the marshmallows are puffed and lightly toasted. Don’t overbake—you want the marshmallows soft and gooey, not crispy.
-
Cool and set: Let the bars cool completely in the pan on a wire rack. This is important—the chocolate needs time to set so you get clean, beautiful squares. For faster setting, you can refrigerate the bars for 20-30 minutes after they’ve cooled to room temperature.
-
Slice and serve: Using the parchment overhang, lift the bars out of the pan. Slice into 16-24 squares, wiping your knife between cuts for clean edges. Sprinkle with extra graham cracker crumbs for a beautiful finish if desired.
Variations
-
Peanut Butter S’mores: Swirl ½ cup of melted peanut butter into the cookie dough before baking, or add ½ cup of peanut butter chips along with the chocolate chips.
-
Salted Caramel S’mores: Drizzle ½ cup of caramel sauce over the chocolate layer before adding the marshmallows, and sprinkle with flaky sea salt after baking.
-
Dark Chocolate Obsession: Use dark chocolate chips or chopped dark chocolate instead of semi-sweet, and add a sprinkle of espresso powder to the dough for a sophisticated twist.
-
Cookie Butter S’mores: Swap the graham cracker crumbs for cookie butter cookie crumbs, and add ½ cup of cookie butter to the dough for an extra decadent version.
-
White Chocolate Raspberry:Replace the chocolate chips with white chocolate chips and dot the top with fresh raspberries before baking for a fruity twist.
-
Gluten-Free S’mores: Use certified gluten-free graham crackers and a gluten-free all-purpose flour blend. The results are just as delicious.
Expert Tips
-
Use Fresh Graham Crumbs: For the best flavor, crush your own graham crackers rather than using pre-packaged crumbs. The texture is better and the flavor is more pronounced.
-
Don’t Overmix the Dough: Mix the dry ingredients into the wet ingredients just until combined. Overmixing can make the cookie base tough instead of tender and chewy.
-
Press Firmly: Make sure you press the dough firmly and evenly into the pan. This prevents the bars from being crumbly and ensures a solid, even base.
-
Broil for Extra Toast: If your marshmallows aren’t as golden as you’d like after baking, you can turn on the broiler for 1-2 minutes at the end. Watch them carefully—they can burn in seconds.
-
Let Them Set: I know it’s tempting to dive in while they’re still warm, but letting the bars cool completely is crucial. The melted chocolate needs to set so you get perfect, sliceable bars rather than a gooey mess.
Storage and Reheating
Store leftover S’mores Cookie Bars in an airtight container at room temperature for up to 4 days. The marshmallows will stay soft and gooey. To reheat, microwave individual bars for 10-15 seconds for that fresh-from-the-oven warmth, or warm them in a 325°F oven for 5-7 minutes. These bars also freeze beautifully—wrap individual bars tightly in plastic wrap, then place in a freezer bag for up to 3 months. Thaw at room temperature and enjoy.
Frequently Asked Questions
-
Can I use homemade graham cracker crumbs? Absolutely. Homemade crumbs give the bars an even better flavor. Just pulse graham crackers in a food processor until they form fine crumbs.
-
Why are my bars crumbly? This usually happens if the dough wasn’t pressed firmly enough into the pan, or if the bars were sliced before they were completely cool. Make sure to press down firmly and let them cool fully before cutting.
-
Can I use regular marshmallows instead of mini? Yes. Just quarter large marshmallows so they distribute evenly over the top. You can also use marshmallow fluff, but the texture will be different—it will be more of a sauce than a puffy topping.
-
Can I bake these in a different sized pan? Yes. An 8×8-inch pan will give you thicker, more bar-like portions and will require a longer baking time (about 30-35 minutes). A 9×9-inch pan will work similarly. Adjust baking times accordingly.
-
Can I make these vegan? Yes. Use vegan butter, a flax egg (1 tablespoon ground flaxseed mixed with 3 tablespoons water per egg), and dairy-free chocolate chips. Vegan marshmallows are also available at most grocery stores.
-
How do I get clean, neat cuts? Let the bars cool completely. For the cleanest slices, use a sharp knife and wipe it clean between each cut. You can also refrigerate the bars for 20-30 minutes before slicing.
What to Serve With This Dish
-
A tall glass of cold milk—the classic pairing for any s’mores dessert.
-
A scoop of vanilla, chocolate, or caramel ice cream for an over-the-top sundae.
-
A drizzle of warm chocolate or caramel sauce on each serving.
-
Fresh berries on the side to cut through the sweetness with a little tartness.
-
A strong cup of coffee or espresso to balance the rich, sweet flavors.
-
These bars also stand beautifully on their own—they’re the perfect anytime treat.
Final Thoughts
These S’mores Cookie Bars are pure happiness in bar form. They’re gooey, chocolaty, nostalgic, and absolutely impossible to resist. What I love most about them is how they bring that campfire magic into your kitchen with minimal effort and maximum payoff. Whether you’re making them for a birthday party, a bake sale, or just because it’s Tuesday and you need something sweet, these bars will deliver every single time. They’ve become one of my most beloved recipes, and I know they’ll become one of yours too.