
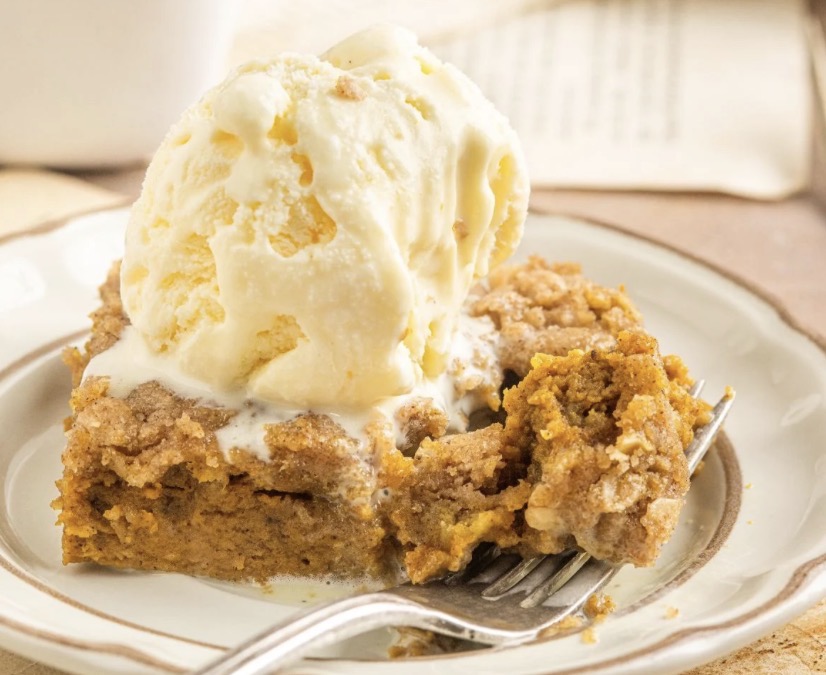
Homemade Pumpkin Crisp
There are pumpkin desserts that are good, and then there are pumpkin desserts that feel like autumn in every single bite. This Homemade Pumpkin Crisp is absolutely the latter. It combines the smooth, spiced richness of pumpkin pie filling with a buttery, crunchy, oat-and-pecan topping that’s utterly irresistible. It’s the kind of dessert that fills your kitchen with the most wonderful aroma and makes any fall gathering feel extra special.
What I love most about this crisp is how it captures all the cozy flavors we crave when the weather turns cool—warm cinnamon, nutty pecans, and that unmistakable pumpkin goodness. The filling is silky, almost custard-like, while the crisp topping adds a wonderful texture that contrasts perfectly with the smooth pumpkin. It’s simpler than a traditional pumpkin pie, feeds a crowd, and always disappears fast. Whether you’re serving it at Thanksgiving or a casual autumn dinner, it’s guaranteed to be a hit.
Ingredients
For the Pumpkin Filling:
-
1 can (15 oz) pumpkin puree (not pumpkin pie filling)
-
1 cup evaporated milk
-
1 cup granulated sugar
-
2 large eggs
-
1 teaspoon vanilla extract
-
2 teaspoons pumpkin pie spice (or 1 teaspoon cinnamon + ½ teaspoon nutmeg + ¼ teaspoon ginger + ¼ teaspoon cloves)
For the Crisp Topping:
-
1 cup all-purpose flour
-
1 cup old-fashioned rolled oats
-
1 cup brown sugar, packed
-
½ cup unsalted butter, melted
-
½ cup chopped pecans or walnuts (optional but highly recommended)
-
½ teaspoon ground cinnamon
Directions
-
Preheat and prepare: Preheat your oven to 350°F (175°C). Lightly grease a 9×13-inch baking dish or a 9-inch deep-dish pie plate.
-
Make the pumpkin filling: In a large bowl, whisk together the pumpkin puree, evaporated milk, sugar, eggs, vanilla, and pumpkin pie spice until smooth and well combined. Pour the mixture into the prepared baking dish.
-
Make the crisp topping: In a separate bowl, combine the flour, oats, brown sugar, cinnamon, and pecans (if using). Pour the melted butter over the dry ingredients and stir until the mixture is crumbly and evenly moistened.
-
Assemble and bake: Sprinkle the crisp topping evenly over the pumpkin filling, covering it completely. Bake for 45-55 minutes, or until the filling is set around the edges and the topping is golden brown. A knife inserted near the center should come out mostly clean.
-
Cool and serve: Let the crisp cool on a wire rack for at least 15-20 minutes before serving. The filling will set as it cools. Serve warm or at room temperature.
Variations
-
Maple Pumpkin Crisp: Replace the granulated sugar in the filling with ½ cup of maple syrup and add ½ teaspoon of maple extract for a deeper fall flavor.
-
Bourbon Pumpkin Crisp: Stir 2 tablespoons of bourbon or dark rum into the pumpkin filling for a grown-up twist.
-
Pecan Streusel: Add an extra ½ cup of chopped pecans and ¼ cup of brown sugar to the topping for an even crunchier finish.
-
Gluten-Free: Use a 1:1 gluten-free flour blend and certified gluten-free oats for a celiac-friendly version.
-
Chocolate Chip Pumpkin Crisp:Fold ½ cup of semi-sweet chocolate chips into the pumpkin filling before topping with the crisp.
-
Individual Servings: Divide the filling and topping among 6-8 ramekins and bake for 25-30 minutes.
Expert Tips
-
Use pumpkin puree, not pie filling: Pie filling contains added sugar and spices, which will throw off the balance of this recipe. Stick with 100% pumpkin puree.
-
Don’t overmix the filling: Whisk just until smooth. Overmixing can incorporate too much air and cause the filling to puff up and crack during baking.
-
Toast the pecans: If you have time, toast the pecans in a dry skillet for 3-5 minutes before adding them to the topping. This brings out their nutty flavor.
-
Let it rest: Allow the crisp to cool for at least 15 minutes before serving. This helps the filling set and makes it easier to scoop.
-
Serve warm: Pumpkin crisp is best enjoyed warm, ideally with a scoop of vanilla ice cream or a dollop of whipped cream melting into the top.
Storage and Reheating
Store leftovers covered in the refrigerator for up to 4 days. To reheat, warm individual portions in the microwave for 30-45 seconds or place the whole dish in a 325°F oven for 10-15 minutes. This crisp also freezes beautifully—cool completely, wrap tightly, and freeze for up to 2 months. Thaw in the refrigerator before reheating.
Frequently Asked Questions
-
Can I use a different fruit filling?Yes, this crisp topping is wonderful on apple, pear, or even berry fillings. Adjust the spices accordingly.
-
Can I use a gluten-free flour blend? Yes, a 1:1 gluten-free flour works well in the topping. Just make sure to use certified gluten-free oats.
-
Why is my filling runny? This can happen if the crisp isn’t baked long enough. Make sure the filling is set around the edges and a knife inserted near the center comes out mostly clean.
-
Can I make this ahead of time?Yes, you can assemble the crisp (without baking) a day ahead, cover, and refrigerate. When ready, bake as directed, adding 5-10 minutes to the bake time.
-
What’s the difference between pumpkin crisp and pumpkin pie?Pumpkin crisp has a crumbly oat topping instead of a pastry crust. It’s easier to make and has a lovely texture contrast.
What to Serve With This Dish
-
A scoop of vanilla bean ice cream melting over a warm slice.
-
A dollop of freshly whipped cream and a sprinkle of cinnamon.
-
A drizzle of caramel sauce for extra indulgence.
-
A hot cup of coffee, spiced chai, or mulled apple cider.
-
A sprinkle of toasted pecans on top for extra crunch.
Final Thoughts
This Homemade Pumpkin Crisp is the ultimate fall dessert. It’s warm, comforting, and absolutely packed with those cozy pumpkin spice flavors we all love. Whether you’re making it for a Thanksgiving gathering, a family dinner, or just because you need a little seasonal comfort, this crisp delivers every single time. I hope it becomes a beloved tradition in your kitchen as it has in mine.